Oh my goodness, if you haven’t tried a No-Bake Lotus Biscoff Cheesecake yet, you’re in for a treat! The first time I made this, I was skeptical—could something this easy really taste *that* good? One bite and I was hooked. The rich, caramelized cookie flavor of Biscoff paired with that creamy, dreamy cheesecake filling? Absolute perfection. No oven, no fuss—just pure indulgence in every bite. I’ve made this for birthdays, potlucks, and even just because it’s Tuesday. Trust me, this dessert never lasts long on the table!
Why You’ll Love This No-Bake Lotus Biscoff Cheesecake
Let me tell you why this dessert is my go-to for every occasion (and sometimes just because!):
- No oven required – Perfect for hot summer days or when you just can’t be bothered with baking
- Creamy dreamy texture – That velvety smooth filling will melt in your mouth
- Ready in 20 minutes (plus chilling) – I’ve whipped this up last-minute more times than I can count
- Always a crowd-pleaser – The caramelized cookie flavor wins over everyone, from kids to food snobs
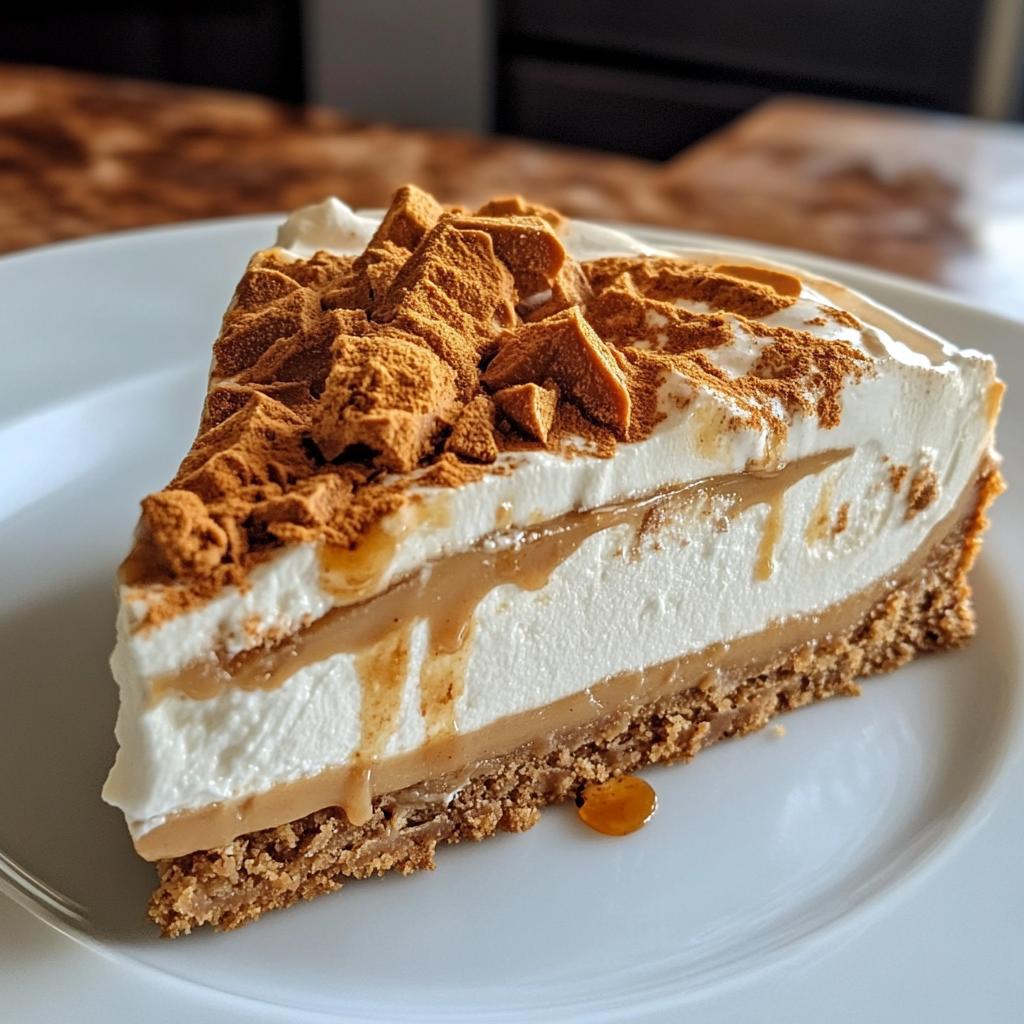
- Looks fancy but so easy – Those gorgeous Biscoff swirls make it look like you spent hours
Seriously, this recipe is foolproof and always gets rave reviews. My neighbor still thinks I’m some pastry chef because of it!
Ingredients for No-Bake Lotus Biscoff Cheesecake
Here’s everything you’ll need for that dreamy, no-fuss dessert (I promise it’s worth every ingredient!):
- 250g Lotus Biscoff cookies – crushed into fine crumbs (save a few for garnish if you’re feeling fancy)
- 100g melted butter – unsalted works best so you control the sweetness
- 500g cream cheese – full-fat and must be at room temperature (trust me, I learned this the hard way!)
- 100g powdered sugar – sifted if you’re feeling meticulous
- 300ml heavy cream – cold straight from the fridge
- 200g Lotus Biscoff spread – the star of the show!
- 1 tsp vanilla extract – the good stuff makes all the difference
Ingredient Notes & Substitutions
In a pinch? Here’s how to adapt:
- No Biscoff cookies? Graham crackers or digestive biscuits work, but the flavor won’t be quite as magical
- Dairy-free? Coconut cream can sub for heavy cream (chill the can first!)
- Warning: Low-fat cream cheese will give you a sad, runny filling – don’t do it!
- Extra crunch? Add chopped toasted hazelnuts to the crust
Equipment You’ll Need
Don’t worry—you don’t need fancy gadgets for this No-Bake Lotus Biscoff Cheesecake! Here’s what I always grab:
- 9-inch springform pan – The sides pop off for easy serving (no wrestling with the cake!)
- Electric mixer – A hand mixer works great for that fluffy filling
- Spatula – For scraping every last bit of that dreamy Biscoff spread
- Food processor – Or just a rolling pin and some elbow grease for crushing cookies
Optional but fun: Piping bag for fancy swirls, but honestly? A spoon works just fine!
How to Make No-Bake Lotus Biscoff Cheesecake
This is where the magic happens! I’ve made this recipe dozens of times, and these steps never fail me. Just follow along, and you’ll have the creamiest, dreamiest cheesecake ready in no time.
Step 1: Prepare the Crust
First things first—let’s make that irresistible Biscoff cookie base. Grab those cookies and crush them into fine crumbs (I like some small bits for texture). Mix them with melted butter until it looks like wet sand. Now, press this mixture firmly into the bottom of your 9-inch springform pan. I mean really press it—use the bottom of a glass if needed. Pop it in the fridge for 15 minutes to set while you make the filling. This chill time makes all the difference for that perfect crumbly crust!
Step 2: Make the Cheesecake Filling
Here’s where the creaminess comes in! Beat your room-temperature cream cheese until it’s completely smooth—no lumps allowed! Add powdered sugar and vanilla, mixing just until combined. In another bowl, whip that cold heavy cream to stiff peaks (when you lift the beaters, the peaks should stand up straight). Now, gently fold the whipped cream into the cream cheese mixture. Be patient here—overmixing will deflate all that air we worked so hard to incorporate!
Step 3: Layer and Decorate
Time for the fun part! Spread half the filling over your chilled crust. Now, warm about half the Biscoff spread for 10 seconds in the microwave (just until it’s drizzle-able). Swirl it over the filling with a spoon—don’t overdo it, or you’ll lose those beautiful marbled streaks. Add the remaining filling, smooth the top, then repeat with more Biscoff swirls. I sometimes dust extra cookie crumbs on top for crunch.
Step 4: Chill and Set
Patience is key here! Refrigerate your masterpiece for at least 4 hours, but overnight is even better. I know it’s tempting, but don’t peek! This chilling time lets the flavors develop and the texture set perfectly. When you’re ready to serve, run a knife around the edge before releasing the springform pan sides. That first slice revealing those gorgeous layers? Pure happiness!
Tips for the Perfect No-Bake Lotus Biscoff Cheesecake
After making this cheesecake more times than I can count, here are my golden rules for perfection:
- Room temp is key – Cold cream cheese equals lumpy filling. I leave mine out for 2 hours before starting.
- Fold, don’t stir – Gentle folding keeps the filling light and airy. Overmixing makes it dense.
- Full-fat everything – Skimp on fat and you’ll get a weepy mess. Trust me, it’s worth the calories!
- Slice with a hot knife – Dip your knife in hot water and wipe between cuts for picture-perfect slices.
- Let it breathe – Take the cheesecake out of the fridge 15 minutes before serving for maximum flavor.
These little tricks make all the difference between good and “Oh my god, give me the recipe!” amazing.
Serving Suggestions
Oh, the fun part! This No-Bake Lotus Biscoff Cheesecake shines all on its own, but here’s how I love to serve it:
- With strong coffee – The caramelized cookie flavor pairs perfectly with a dark roast
- Fresh berries – Raspberries or strawberries cut through the richness beautifully
- Extra Biscoff crumbs – Because you can never have too much cookie goodness!
- Drizzle of caramel – For those days when you really want to indulge
Honestly? A simple slice with a fork is all you really need – it’s that good!
Storage & Reheating
Here’s the good news—this No-Bake Lotus Biscoff Cheesecake keeps like a dream! Cover it tightly with plastic wrap (I press it right against the surface to prevent drying) and it’ll stay fresh in the fridge for up to 3 days. Want to freeze it? Just wrap individual slices in parchment paper, then foil, and they’ll keep for 2 months. Thaw overnight in the fridge—no reheating needed! The texture stays perfect, though I dare you to wait that long before devouring it.
Nutritional Information
Just so you know what you’re indulging in (because let’s be real, this is totally worth every bite!):
- Calories: 450 per slice
- Fat: 32g (18g saturated)
- Carbs: 35g
- Protein: 5g
Values are estimates and will vary based on your specific ingredients. But hey – life’s too short to count calories when Biscoff’s involved!
FAQs About No-Bake Lotus Biscoff Cheesecake
Got questions? I’ve got answers! Here are the most common things people ask me about this dreamy dessert:
“Can I use peanut butter instead of Biscoff spread?”
Sure, but it’ll taste completely different! The caramelized cookie flavor is what makes this cheesecake special. If you must swap, try speculoos cookie butter – it’s similar to Biscoff.
“Why is my filling runny?”
Usually means: 1) Your cream cheese wasn’t room temp, 2) You used low-fat ingredients, or 3) Didn’t whip the cream to stiff peaks. Also – did you chill it long enough? Four hours minimum!
“Can I make this ahead?”
Absolutely! In fact, it’s better the next day. Just keep it covered in the fridge for up to 3 days. The flavors deepen beautifully overnight.
“No springform pan – help!”
No worries! Use a regular pie dish lined with parchment paper (leave overhang). To serve, lift the whole cheesecake out using the parchment as handles.
“How do I get clean slices?”
My trick? Run your knife under hot water, wipe dry, then slice. Repeat between cuts. Also – don’t skip the chilling time! A properly set cheesecake slices like a dream.
Alright, my fellow dessert lovers – it’s your turn now! I’ve shared all my secrets for this incredible No-Bake Lotus Biscoff Cheesecake, and I can’t wait for you to try it. Whether it’s for a special occasion or just because you deserve something sweet today, this recipe never disappoints. When you make it (and you totally should!), snap a photo of those gorgeous Biscoff swirls and tell me all about it in the comments below. Did your family go crazy for it? Any fun twists you added? I want to hear everything – because sharing kitchen victories is half the fun!
Print
No-Bake Lotus Biscoff Cheesecake: 20-Minute Blissful Dessert
- Total Time: 4 hours 20 minutes
- Yield: 8 servings 1x
- Diet: Vegetarian
Description
A creamy, no-bake cheesecake with the rich flavor of Lotus Biscoff cookies. Quick and easy to make, perfect for any occasion.
Ingredients
- 250g Lotus Biscoff cookies
- 100g melted butter
- 500g cream cheese
- 100g powdered sugar
- 300ml heavy cream
- 200g Lotus Biscoff spread
- 1 tsp vanilla extract
Instructions
- Crush the Lotus Biscoff cookies into fine crumbs.
- Mix the crumbs with melted butter and press into a springform pan to form the base.
- Chill the base in the fridge for 15 minutes.
- Beat the cream cheese and powdered sugar until smooth.
- Whip the heavy cream until stiff peaks form, then fold into the cream cheese mixture.
- Add vanilla extract and mix well.
- Spread half the mixture over the chilled base.
- Melt the Lotus Biscoff spread slightly and drizzle half over the cream cheese layer.
- Add the remaining cream cheese mixture and smooth the top.
- Drizzle the remaining Biscoff spread on top and refrigerate for at least 4 hours or overnight.
Notes
- Use full-fat cream cheese for best results.
- Let the cheesecake set fully before slicing.
- Garnish with extra Biscoff crumbs if desired.
- Prep Time: 20 minutes
- Cook Time: 0 minutes
- Category: Dessert
- Method: No-Bake
- Cuisine: International
Nutrition
- Serving Size: 1 slice
- Calories: 450
- Sugar: 30g
- Sodium: 250mg
- Fat: 32g
- Saturated Fat: 18g
- Unsaturated Fat: 10g
- Trans Fat: 0g
- Carbohydrates: 35g
- Fiber: 1g
- Protein: 5g
- Cholesterol: 80mg
Keywords: no-bake cheesecake, Lotus Biscoff, easy dessert