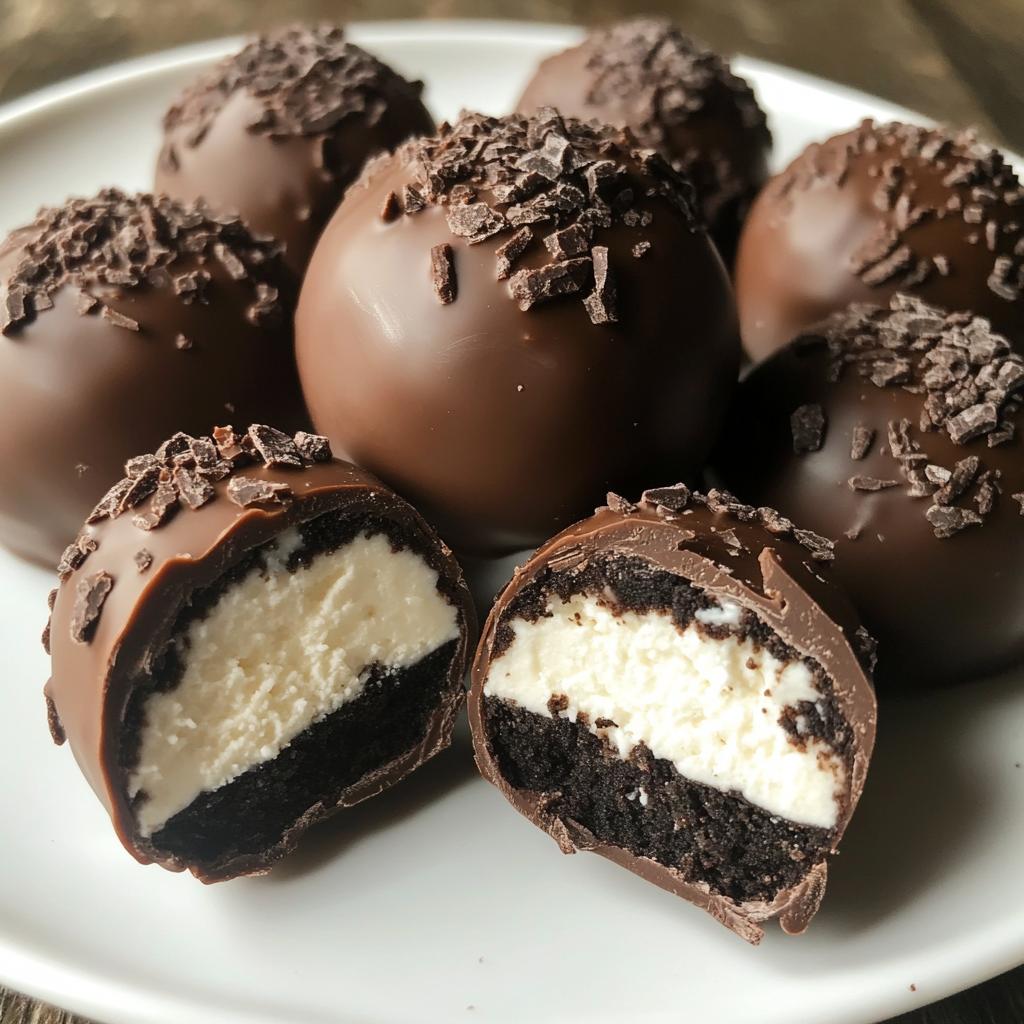
Oh my goodness, you’re in for a treat! These Oreo cheesecake truffles are the little bites of magic that disappeared faster than I could make them at my cousin’s baby shower last summer. I swear, my aunt hid a whole plate in her purse – not that I blame her! When you combine creamy cheesecake filling with crunchy Oreos and dunk it all in silky chocolate, you get what I call “emergency dessert” – the kind you always want to have on hand when surprise guests show up.
What makes these no-bake Oreo cheesecake truffles so special is how ridiculously easy they are compared to how impressive they look. My kids can practically make them themselves (though we do fight over who gets to lick the bowl). The recipe came from my college roommate who used to whip them up during finals week – because apparently stress baking is a thing, even when you don’t actually bake!
Now they’re my go-to for everything from book club meetings to teacher appreciation gifts. Just last month, my neighbor texted me at 10pm begging for the recipe after she tasted one at our block party. That’s the power of these little chocolate-covered wonders – they create instant friendships and happy memories with every bite.
Why You’ll Love These Oreo Cheesecake Truffles
Here’s why these little bites will become your new obsession:
- No oven required! Perfect for hot summer days or when you’re just too tired to bake.
- Super easy to make – even my 8-year-old can help (and usually does!).
- Decadent and rich, but in perfectly portioned bites so you don’t feel guilty.
- Always a hit at parties – they disappear faster than you can make them!
- Customizable with different coatings or sprinkles for any occasion.
Trust me, once you try them, you’ll be hooked!
Ingredients for Oreo Cheesecake Truffles
Okay, let’s talk ingredients – and I mean the good stuff! Here’s everything you’ll need to make these irresistible truffles:
- 36 Oreo cookies – That’s exactly one standard package, and yes, we’re using the whole thing (cream filling included!). I’ve tried generic brands, but trust me, name-brand Oreos make all the difference.
- 8 oz cream cheese, softened – Not cold, not melted – softened is the sweet spot. Leave it out on the counter for about 30 minutes before you start. My grandma always said “it should feel like spreading butter on toast” when it’s ready.
- 2 cups semi-sweet chocolate chips – These are for coating our truffles. I prefer semi-sweet because it balances the sweetness perfectly, but see my variations section if you want to mix it up!
- 1 tsp vegetable oil – This little secret makes your chocolate coating silky smooth. Coconut oil works too if that’s what you’ve got.
That’s it – just four simple ingredients! But let me tell you, the magic happens when they come together. Now grab your favorite mixing bowl and let’s get started!
How to Make Oreo Cheesecake Truffles
Alright, let’s get our hands dirty (literally – this is a messy job, but so worth it)! I’ll walk you through each step to create these little bites of heaven. Don’t worry if your first few look a little wonky – mine did too when I started, but they’ll still taste amazing!
Step 1: Prepare the Oreo Mixture
First, let’s turn those Oreos into magic dust! Dump all 36 cookies (yes, the whole package – cream filling and all) into a food processor and pulse until you’ve got fine crumbs. No food processor? No problem! Seal them in a ziplock bag and go to town with a rolling pin – it’s great stress relief! Then, in a big mixing bowl, combine your Oreo crumbs with the softened cream cheese. Mix it really well until it looks like dark, crumbly Play-Doh. Pro tip: Use your hands at the end to make sure everything’s fully incorporated – it’s messy but effective!
Step 2: Shape and Freeze the Truffles
Now for the fun part – rolling! Scoop about a tablespoon of the mixture (I use a small cookie scoop for consistency) and roll it between your palms to form 1-inch balls. Place them on a parchment-lined baking sheet – they won’t spread, so you can crowd them a bit. Pop the whole tray in the freezer for 30 minutes. This step is crucial – it firms them up so they won’t fall apart when we dip them later. Set a timer though – I once forgot about them and had to thaw rock-hard truffles on the counter for 20 minutes!
Step 3: Coat with Chocolate
Time for the chocolate bath! Melt your chocolate chips with the vegetable oil in 30-second bursts in the microwave, stirring between each. When it’s smooth and glossy, we’re ready to dip. Here’s my foolproof method: spear a frozen truffle with a fork, dunk it completely, then gently tap the fork on the bowl’s edge to shake off excess chocolate. Use a toothpick to carefully slide it back onto the parchment. If you’re adding sprinkles, do it immediately before the chocolate sets. Let them harden at room temperature (about 15 minutes) or pop them back in the fridge if you’re impatient like me!
Tips for Perfect Oreo Cheesecake Truffles
After making these truffles more times than I can count (and eating my fair share of “test batches”), I’ve picked up some tricks that’ll take yours from good to “oh-my-gosh-give-me-the-recipe” amazing:
1. The Fork Trick: That regular dinner fork in your drawer? It’s the secret weapon for perfect chocolate coating. Spear each truffle gently, dip it completely, then tap-tap-tap the fork against the bowl’s edge to shake off excess chocolate. The prongs let the chocolate drip through evenly – way better than fingers (which I learned the messy way).
2. Freeze Them Right: Don’t skip the freezing step! Those 30 minutes make all the difference between neat little truffles and chocolate-covered blobs. But here’s my hack – if you’re in a rush, pop them in the freezer for just 15 minutes, then the fridge for another 15. Works almost as well!
3. Sprinkle While Wet: Want pretty decorations? Have your sprinkles, crushed nuts, or sea salt ready before you start dipping. The second each truffle hits the parchment, sprinkle away – that chocolate sets fast! My kids love helping with this part (though half the sprinkles end up on the counter).
4. Keep Your Hands Cold: If you’re rolling the mixture on a hot day, run your hands under cold water first. Warm hands make the mixture sticky – trust me, I’ve had truffle dough stuck to my fingers more times than I’d like to admit!
5. Double Dip for Extra Decadence: For an ultra-chocolatey shell, let the first coat set completely (about 15 minutes), then give them a second quick dip. It’s overkill in the best possible way – like wearing two coats of lipstick for a night out.
Bonus tip from my disaster file: If your chocolate starts getting too thick as it cools, just zap it for another 10 seconds. Burnt chocolate smells terrible (another lesson learned the hard way), so go slow with those microwave bursts!
Variations for Oreo Cheesecake Truffles
The beauty of these truffles is how easily you can switch them up! I love playing with different flavors – it’s like having a whole new dessert with just a tiny twist. Here are my favorite ways to mix things up when I’m feeling creative (or when I need to use up what’s in my pantry):
1. Chocolate Swap: Not feeling semi-sweet? Try white chocolate for a pretty contrast against the dark Oreo centers. Melt it the same way, but watch closely – white chocolate burns faster. My niece calls these “panda truffles” because of the black-and-white look!
2. Festive Flavors: Add ½ teaspoon of peppermint extract to the Oreo mixture during the holidays – instant candy cane truffles! For fall, a pinch of pumpkin pie spice makes them taste like Thanksgiving. My book club goes crazy for the pumpkin version with gold sprinkles.
3. Crunchy Coatings: After dipping, roll your truffles in crushed nuts, toffee bits, or even more Oreo crumbs for extra texture. My husband’s favorite is the “cookie overload” version – double-dipped in chocolate then rolled in Oreo dust. It’s a mess to eat, but oh so good.
4. Fancy Fillings: Want to get really decadent? Press a chocolate chip or small caramel square into the center of each truffle before rolling. Just be careful when dipping – that surprise center makes them a little softer.
5. Colorful Drizzles: Melt some candy melts in different colors and drizzle over your set truffles. I keep a plastic sandwich bag with the corner snipped off just for this – makes me feel like a professional pastry chef for about 30 seconds!
Honestly, the possibilities are endless. Last month I made “birthday cake” versions by mixing in rainbow sprinkles with the Oreo crumbs and using pastel candy melts. The kids at my son’s party thought I bought them at a fancy bakery! What flavor combo will you try first?
Storing and Serving Oreo Cheesecake Truffles
Okay, here’s the thing about these truffles – they’re so good, you probably won’t have to worry about storing them for long! But just in case you manage to resist eating them all in one sitting (no judgment if you don’t), here’s how to keep them fresh and serve them like a pro.
First, let’s talk storage. These little guys must live in the fridge. The cream cheese means they’ll get soft and messy if left out too long. I keep mine in an airtight container with layers separated by parchment paper – it keeps them from sticking together. They’ll stay perfect for up to a week this way, though mine never last that long!
For longer storage, you can freeze them. Just pop them in a freezer-safe container (again, with parchment between layers) and they’ll keep for about 2 months. When you’re ready to enjoy, let them thaw in the fridge overnight. Pro tip: Don’t skip the fridge step – going straight from freezer to room temp can make the chocolate sweat. Not a good look!
Now, serving – here’s my secret for the best texture. Take them out of the fridge about 15-20 minutes before serving. That little bit of time lets the cheesecake filling soften just enough to be creamy, while the chocolate shell stays perfectly crisp. Arrange them on a pretty plate or in mini cupcake liners for a fancy touch. My go-to is a tiered dessert stand – it makes them look like they came from a high-end chocolate shop!
One last thing – if you’re gifting these (and you should, because they make people ridiculously happy), pack them in a cute box with parchment between layers. I always include a little note saying “Keep refrigerated” – learned that the hard way after a friend left them in her car on a hot day. Let’s just say chocolate and cream cheese soup isn’t nearly as appealing!
Nutritional Information
Let’s talk numbers – because even though these Oreo cheesecake truffles taste indulgent (and they are!), it’s good to know what you’re enjoying. Here’s the breakdown per truffle:
- Calories: 120
- Sugar: 9g
- Sodium: 85mg
- Fat: 7g
- Saturated Fat: 3.5g
- Carbohydrates: 12g
- Fiber: 1g
- Protein: 1g
- Cholesterol: 5mg
Now, here’s the deal – these values are estimates based on the ingredients I use. If you swap in different types of chocolate, cream cheese, or Oreos, the numbers will change. Also, let’s be real – no one makes truffles exactly the same size every time (unless you’re a perfectionist with a ruler, which I’m not). So take these numbers as a general guide, not a hard-and-fast rule.
Honestly, when I’m enjoying these truffles, I’m not thinking about the numbers – I’m too busy savoring every bite! But I know some of you like to keep track, so there you have it. Now go enjoy your treat without guilt – life’s too short to skip the good stuff!
Frequently Asked Questions
Over the years, I’ve gotten so many questions about these Oreo cheesecake truffles – some from friends who’ve tried the recipe, and plenty from my own family when I first started making them! Here are the answers to the most common things people wonder about:
Q: Can I use reduced-fat cream cheese?
Oh boy, I tried this once during my “healthy eating” phase and regretted it immediately! Reduced-fat cream cheese makes the mixture too soft and sticky – your truffles won’t hold their shape as well. Stick with regular full-fat cream cheese for the best texture. But hey, they’re called cheesecake truffles for a reason – a little indulgence is the whole point!
Q: How long do these truffles last?
In the fridge? About a week – though they’ve never lasted that long in my house! You can freeze them for up to 2 months if you store them properly (in an airtight container with parchment between layers). Just thaw in the fridge overnight before serving. Pro tip: Write the date on the container so you don’t forget when you made them – not that they’ll last long enough for you to forget!
Q: Can I skip freezing them before dipping?
Technically yes, but I wouldn’t recommend it unless you want chocolate-covered mush! That quick freeze firms them up just enough to handle the dipping process. If you’re really in a rush, pop them in the freezer for at least 15 minutes – but 30 is ideal. Trust me, I learned this the hard way with my first batch that turned into chocolate soup!
Q: What’s the best way to melt the chocolate?
I swear by the microwave method (30-second bursts, stirring in between) because it’s fast and easy. But if you’re worried about overheating, use a double boiler. The key is that vegetable oil – just 1 teaspoon makes the chocolate silky smooth for perfect dipping. And here’s a secret: if your chocolate does get too thick, add a tiny bit more oil (like ¼ teaspoon at a time) until it’s the right consistency again.
Q: Can I make these gluten-free?
Absolutely! Just use gluten-free Oreo-style cookies (several brands make them now). The rest of the ingredients are naturally gluten-free. I made these for my niece’s birthday party last year and no one could tell the difference – they disappeared just as fast as the regular version!
Share Your Experience
I absolutely love hearing about your Oreo cheesecake truffle adventures! Did you try the peppermint version for the holidays? Maybe you went all out with rainbow sprinkles for a birthday party? Whatever you did, I want to know! Drop a comment below and tell me how they turned out – the good, the messy, and everything in between. We’ve all had those kitchen moments where things didn’t go quite as planned (like the time I forgot to freeze my truffles before dipping – chocolate disaster!), so don’t be shy!
If you snapped a photo of your beautiful (or slightly lopsided) creations, share it with me on Instagram – tag me so I can see your masterpiece! There’s nothing more fun than scrolling through photos of all the different ways people make these truffles. It’s like a little community of Oreo cheesecake truffle lovers, and I’m here for it!
And hey, if you’ve got your own twist on this recipe, spill the details! I’m always looking for new ideas to try. Maybe you discovered the perfect coating or found a way to make them even easier. Your tips might just help someone else create their new favorite treat. So go ahead – share, tag, and let’s keep the Oreo cheesecake truffle love going strong!
Print
Irresistible 36-Oreo Cheesecake Truffles Recipe
- Total Time: 50 mins
- Yield: 24 truffles 1x
- Diet: Vegetarian
Description
Delicious bite-sized Oreo cheesecake truffles coated in chocolate.
Ingredients
- 36 Oreo cookies
- 8 oz cream cheese, softened
- 2 cups semi-sweet chocolate chips
- 1 tsp vegetable oil
Instructions
- Crush Oreos into fine crumbs.
- Mix crumbs with softened cream cheese until well combined.
- Roll mixture into 1-inch balls and place on a baking sheet.
- Freeze for 30 minutes.
- Melt chocolate chips with vegetable oil.
- Dip each ball into melted chocolate and place back on baking sheet.
- Chill until chocolate sets.
Notes
- Use a fork to dip truffles for even coating.
- Store in refrigerator.
- Add sprinkles before chocolate sets for decoration.
- Prep Time: 20 mins
- Cook Time: 0 mins
- Category: Dessert
- Method: No-Bake
- Cuisine: American
Nutrition
- Serving Size: 1 truffle
- Calories: 120
- Sugar: 9g
- Sodium: 85mg
- Fat: 7g
- Saturated Fat: 3.5g
- Unsaturated Fat: 3g
- Trans Fat: 0g
- Carbohydrates: 12g
- Fiber: 1g
- Protein: 1g
- Cholesterol: 5mg
Keywords: Oreo cheesecake truffles, no-bake dessert, chocolate truffles