Ah, peppermint bark! It’s hard to resist this festive treat that pops up everywhere during the holidays. I mean, who can say no to layers of rich chocolate and refreshing peppermint? It’s like a winter wonderland for your taste buds! The best part? This delightful bark is not only a crowd-pleaser, but it’s also super easy to make at home.
Every Christmas season, I whip up a batch (or three!) of peppermint bark to share with family and friends. The combination of dark and white chocolate, along with that burst of peppermint flavor, just screams holiday cheer. Plus, it’s a perfect gift idea wrapped up in a cute little box or tin. Trust me, once you make this, you’ll find yourself making it year after year!
Ingredients
To create your own batch of delightful peppermint bark, you’ll need just a handful of simple ingredients. Here’s what you’ll want to gather:
- 8 ounces dark chocolate: Go for high-quality chocolate with at least 60% cocoa for a rich flavor. You can use chocolate chips or a bar, just chop it up into smaller pieces for easier melting.
- 8 ounces white chocolate: Again, choose a good quality white chocolate. It should be smooth and creamy to balance the dark chocolate’s richness. Just like with the dark chocolate, chop it into smaller pieces to help it melt evenly.
- 1 teaspoon peppermint extract: This is the secret ingredient that brings that refreshing minty flavor to your bark. Make sure it’s pure peppermint extract for the best results!
- 1/2 cup crushed peppermint candies: You can use either store-bought crushed peppermint candies or crush some candy canes yourself. They’ll add a delightful crunch and festive sprinkle on top!
That’s it! With these simple ingredients, you’re ready to make a delicious batch of peppermint bark that will wow your friends and family this holiday season!
How to Prepare Peppermint Bark
Making peppermint bark is a breeze! You’ll be amazed at how simple it is to whip up this festive treat. Just follow these easy steps, and you’ll have a delicious batch ready in no time!
- Melt the dark chocolate: Start by breaking the dark chocolate into smaller pieces and placing them in a microwave-safe bowl. Heat it in the microwave in 30-second intervals, stirring in between until smooth and fully melted. Be careful not to overheat it, as burnt chocolate can ruin your bark!
- Spread the melted dark chocolate: Once melted, pour the dark chocolate onto a parchment-lined baking sheet. Use a spatula to spread it into an even layer, about 1/4 inch thick. Don’t worry about it being perfect; the rustic look adds to its charm!
- Chill until set: Pop the baking sheet into the refrigerator and let the dark chocolate set for about 30 minutes. This is the hardest part – waiting! But trust me, it’s worth it.
- Melt the white chocolate: While the dark chocolate is setting, melt the white chocolate the same way you did the dark chocolate. Remember to stir it well after each interval for that silky smooth texture.
- Add peppermint extract: Once the white chocolate is melted, stir in the peppermint extract. This is where the magic happens! The aroma will fill your kitchen, and you’ll be ready for the next step.
- Pour the white chocolate: Carefully pour the white chocolate over the set dark chocolate layer. Use a spatula to spread it out evenly, covering the dark chocolate completely. Don’t be shy about creating swirls; they add a lovely visual touch!
- Sprinkle the crushed peppermint: Now, sprinkle the crushed peppermint candies over the top of the white chocolate layer. Press them down gently with your hands to make sure they stick. Oh, the crunch and color they add is so festive!
- Final chill: Return the baking sheet to the refrigerator and let the peppermint bark set completely for about an hour. You can barely contain your excitement – it’s almost ready!
- Break into pieces: Once set, take the peppermint bark out of the fridge. Use your hands to break it into irregular pieces – the more rustic, the better! And just like that, your peppermint bark is ready to be enjoyed.
Now, wasn’t that easy? You’ll love how quickly this comes together, and the smiles on your friends’ faces when you share it will make it all worth it!
Why You’ll Love This Recipe
Let me tell you, peppermint bark is everything you want in a holiday treat! First off, it’s super quick and easy to whip up—honestly, you can have it ready in just a couple of hours. With minimal prep and just a handful of ingredients, you’ll be amazed at how something so delightful can come together so effortlessly.
Plus, it’s a total crowd-pleaser! Every time I bring out my batch of peppermint bark, I get those wide-eyed, happy faces. It’s like a little piece of holiday magic that everyone can enjoy. Whether you’re at a festive gathering or cozying up at home, this treat brings people together. You can’t help but smile when you see the vibrant layers of chocolate and that festive sprinkle of crushed peppermint!
And here’s the best part: it’s versatile! You can easily adjust the recipe to accommodate different tastes. Want to add some nuts or switch up the chocolate? Go for it! Whatever you decide, it’s hard to go wrong with this festive delight.
So, if you’re looking for a quick, easy, and oh-so-delicious holiday treat that’s sure to impress, peppermint bark is where it’s at. Trust me, once you make it, you’ll be hooked and probably won’t stop at just one batch!
Tips for Success
Now that you’re all set to make your peppermint bark, let me share some of my top tips to ensure it turns out absolutely perfect every time! Trust me, these little nuggets of wisdom can make a big difference in your holiday treat.
Use Quality Chocolate
First things first, don’t skimp on the chocolate! Using high-quality dark and white chocolate will elevate your peppermint bark to a whole new level. Look for brands that use real cocoa butter, as they melt beautifully and create a smooth texture. You’ll taste the difference, and your bark will be all the more decadent!
Be Patient When Melting
When you’re melting the chocolate, take your time! It’s tempting to crank up the microwave, but trust me, patience is key. Heat in short intervals, stirring in between, to prevent any burning. If you notice your chocolate starting to seize up, a tiny bit of vegetable oil can help smooth it out.
Don’t Rush the Chilling Process
I know the waiting can be tough, but letting each layer chill properly is crucial for a clean break when you’re ready to serve. If you skip the chilling, you might end up with a melty mess instead of those beautiful layers we’re going for. So, resist the urge and let it set completely!
Press Down the Peppermint Candies
When you sprinkle those crushed peppermint candies on top, don’t just let them sit there! Gently press them down into the melted white chocolate. This little step ensures they stick well and won’t fall off when you break the bark into pieces. Plus, it adds that lovely crunch when you bite into it!
Experiment with Flavors
Feel free to get creative! While the classic chocolate and peppermint combo is amazing, don’t hesitate to add your own spin. A sprinkle of sea salt on top can bring out the flavors even more. Or, try mixing in some nuts or dried fruit for added texture and flavor. The sky’s the limit!
With these tips in your back pocket, you’re all set to create a batch of peppermint bark that’s sure to impress. Happy baking, and enjoy every delicious bite of your festive creation!
Variations of Peppermint Bark
One of the best things about peppermint bark is how easily it can be customized to fit your taste buds! I love to play around with this recipe, and here are some of my favorite variations that you might want to try:
Different Types of Chocolate
Why stick to just dark and white chocolate when you can mix it up? Try using milk chocolate for a sweeter, creamier version. Or, if you’re feeling adventurous, go for semi-sweet chocolate for a delightful balance of flavors. You could even use dark chocolate with sea salt for a sweet-salty twist that’s simply irresistible!
Nutty Additions
If you love a good crunch, consider adding some chopped nuts to your peppermint bark. Almonds, pecans, or walnuts all make great options! Just sprinkle them over the melted white chocolate before it sets. They’ll add a delightful texture and flavor that pairs beautifully with the minty goodness.
Flavor Infusions
Want to take your peppermint bark to the next level? Add a splash of flavored extracts like vanilla or almond for a unique twist. A few drops of orange extract can also bring a citrusy brightness that complements the chocolate and peppermint perfectly!
Colorful Swirls
For a fun visual effect, try creating colorful swirls in your peppermint bark. Melt some colored candy melts (like pink or green) and drizzle them over the white chocolate layer before it sets. Use a skewer or toothpick to swirl them together for a festive look that’s sure to impress!
Seasonal Spices
Why not add a pinch of cinnamon or nutmeg to the white chocolate mixture? These warm spices can give your peppermint bark a cozy, holiday vibe that’s perfect for winter gatherings. Just a little sprinkle goes a long way in enhancing the flavor!
With these variations, the possibilities for your peppermint bark are endless! Feel free to experiment and find your favorite combinations. Trust me, once you start tweaking this classic treat, you might just create a holiday tradition of your own!
Storage & Reheating Instructions
Now that you’ve whipped up a delicious batch of peppermint bark, you’ll want to make sure it stays fresh and tasty! Here’s how to store your leftovers properly:
First off, let your peppermint bark cool completely at room temperature after it’s set. Once it has cooled, carefully break it into pieces (the more rustic, the better!) and store them in an airtight container. I like to layer the pieces between sheets of parchment paper to prevent them from sticking together. This way, you can easily grab a piece whenever the craving strikes!
Make sure to keep the container in a cool, dry place, away from direct sunlight. If you want to keep it extra fresh, you can store it in the refrigerator. Just remember that refrigeration may cause the bark to lose a bit of its snap, but it’ll still taste amazing!
As for reheating, there’s really no need to do that with peppermint bark, as it’s best enjoyed cold or at room temperature. If you find it’s become a little too hard in the fridge, simply let it sit out for a few minutes to soften up a bit before you dive in. Trust me, you won’t want to miss a single crumb of this festive treat!
With these simple storage tips, your peppermint bark will be ready to delight friends and family long after you make it. Enjoy every delicious bite!
Nutritional Information
As with any delightful treat, it’s good to know what you’re indulging in! Here’s a typical breakdown of the nutritional values for one piece of peppermint bark:
- Calories: 150
- Fat: 9g
- Saturated Fat: 5g
- Trans Fat: 0g
- Cholesterol: 0mg
- Sodium: 5mg
- Carbohydrates: 15g
- Fiber: 1g
- Sugar: 12g
- Protein: 1g
Keep in mind that these values are estimates and can vary based on the specific brands of chocolate and ingredients you use. So, while you enjoy your peppermint bark, you can do so knowing it’s a delicious holiday treat that fits nicely into your festivities!
FAQs
Q1. Can I use different types of chocolate in my peppermint bark?
Absolutely! While dark and white chocolate is a classic combination, feel free to experiment with milk chocolate, semi-sweet chocolate, or even dark chocolate with sea salt. Each type will give your peppermint bark a unique flavor profile!
Q2. How long will my peppermint bark stay fresh?
If stored properly in an airtight container, your peppermint bark can last up to two weeks at room temperature. For longer freshness, you can keep it in the refrigerator, but be aware it might lose some of its snap!
Q3. Can I make peppermint bark ahead of time?
Definitely! Making peppermint bark ahead of time is a great idea. Just make sure to store it in an airtight container, and it’ll be perfect for any holiday gathering or as a gift!
Q4. What can I do if my chocolate seizes while melting?
Oh no! If your chocolate seizes up, don’t panic. You can add a tiny bit of vegetable oil and stir it well to help smooth it out. Just remember to melt your chocolate slowly and in short intervals to avoid this happening in the first place!
Q5. Can I use flavored extracts besides peppermint?
You bet! While peppermint is the star of the show, you can mix it up with other flavors like vanilla, almond, or even orange extract. Just remember to adjust the amount to suit your taste!

Peppermint Bark: 8 Irresistible Variations to Try
- Total Time: 1 hour 30 minutes
- Yield: 16 servings 1x
- Diet: Vegetarian
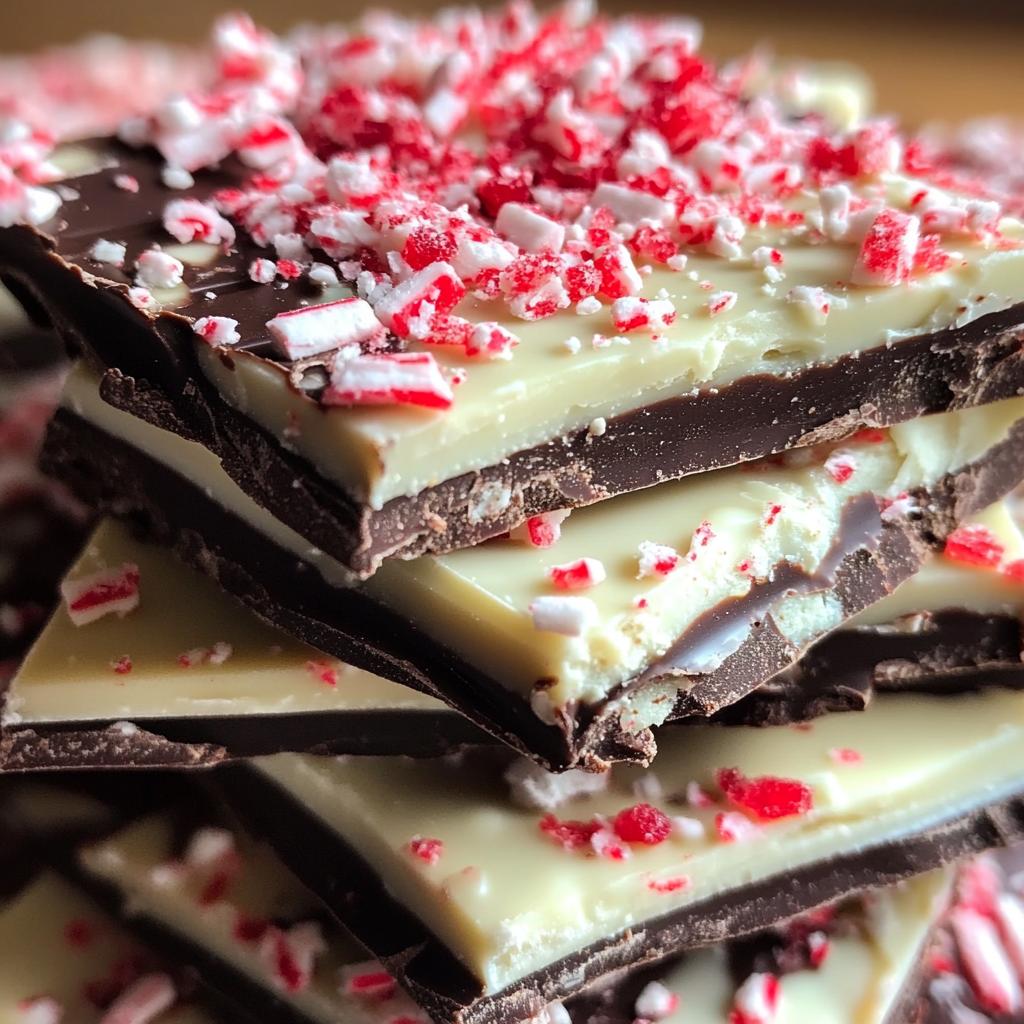
Description
A festive treat made with layers of chocolate and peppermint.
Ingredients
- 8 ounces dark chocolate
- 8 ounces white chocolate
- 1 teaspoon peppermint extract
- 1/2 cup crushed peppermint candies
Instructions
- Melt dark chocolate in a microwave-safe bowl.
- Spread melted dark chocolate onto a parchment-lined baking sheet.
- Refrigerate until set, about 30 minutes.
- Melt white chocolate and stir in peppermint extract.
- Pour white chocolate over set dark chocolate.
- Sprinkle crushed peppermint candies on top.
- Refrigerate until completely set, about 1 hour.
- Break into pieces and serve.
Notes
- Store in an airtight container.
- Use high-quality chocolate for best results.
- Crushed candy canes can be used instead of peppermint candies.
- Prep Time: 20 minutes
- Cook Time: 10 minutes
- Category: Dessert
- Method: No-Bake
- Cuisine: American
Nutrition
- Serving Size: 1 piece
- Calories: 150
- Sugar: 12g
- Sodium: 5mg
- Fat: 9g
- Saturated Fat: 5g
- Unsaturated Fat: 3g
- Trans Fat: 0g
- Carbohydrates: 15g
- Fiber: 1g
- Protein: 1g
- Cholesterol: 0mg
Keywords: peppermint bark, chocolate, holiday treat