Hey there, cookie lovers! If you’re looking for a fun and creative way to celebrate your love for basketball, you’ve landed in the right spot! These personalized basketball cookie sets are not just delicious; they’re a slam dunk at parties and make fantastic gifts for any basketball fan in your life. Imagine a platter filled with vibrant, orange and black iced cookies that look just like basketballs—how cool is that? They’re perfect for game days, birthday parties, or just because you want to indulge in some sweet treats! Trust me, these cookies will bring a smile to everyone’s face and score you major points in the kitchen. So, let’s get started on making these delightful basketball cookies that are sure to be a hit!
Ingredients List
Gathering the right ingredients is essential for whipping up these delicious personalized basketball cookie sets. Here’s what you’ll need:
- 2 3/4 cups all-purpose flour – this forms the base of your cookies.
- 1 teaspoon baking soda – to help those cookies rise and get that perfect texture.
- 1/2 teaspoon salt – a little salt enhances the sweetness and balances flavors.
- 1 cup unsalted butter, softened – this adds richness and helps create that melt-in-your-mouth texture.
- 1 cup granulated sugar – for sweetness and a bit of crunch.
- 1 cup brown sugar, packed – it brings moisture and a deeper flavor.
- 2 large eggs – these help bind everything together.
- 2 teaspoons vanilla extract – for that lovely warm flavor.
- 2 cups chocolate chips – because who doesn’t love a good chocolatey bite?
- 1 cup orange icing – to create that bright basketball color.
- 1 cup black icing – for those signature basketball lines.
Make sure all your ingredients are prepped and ready to go before you start baking! This will make the whole process a breeze.
How to Prepare Personalized Basketball Cookie Set
Now that we have all our ingredients lined up and ready to go, let’s dive into the fun part – making these amazing personalized basketball cookies! It’s a straightforward process, and I promise you’ll love every step of the way.
Prepping the Dough
First things first, let’s get that dough ready! Start by preheating your oven to 350°F (175°C). This is super important so the cookies bake evenly and come out perfectly.
In a large mixing bowl, combine 2 3/4 cups of all-purpose flour, 1 teaspoon of baking soda, and 1/2 teaspoon of salt. Give it a good whisk to blend everything together—this helps to evenly distribute the leavening agents.
In another bowl, beat together 1 cup of softened unsalted butter, 1 cup of granulated sugar, and 1 cup of packed brown sugar until it’s creamy and light. You’ll want to whip it for about 2-3 minutes. Your mixture should look fluffy and pale—this is where the magic starts!
Next, add in 2 large eggs and 2 teaspoons of vanilla extract. Blend well until everything is nicely mixed. Now comes the fun part: gradually add your flour mixture to the wet ingredients. Mix until just combined—don’t overdo it! You want to keep that dough nice and soft.
Finally, fold in 2 cups of chocolate chips for that delicious melty goodness. Your dough is ready to go, and it should feel soft and slightly sticky!
Baking the Cookies
Time to bake those beauties! Line your baking sheets with parchment paper for easy cleanup and to prevent sticking. Using a cookie scoop or a spoon, drop generous spoonfuls of dough onto the prepared baking sheets, leaving some space in between each cookie—about 2 inches should do it. You want them to have room to spread!
Pop those sheets into the oven and bake for about 10-12 minutes or until the edges are golden brown. Keep an eye on them! The centers should look slightly underbaked; they’ll continue to firm up as they cool. Trust me, you don’t want them to get too hard!
Once baked, let the cookies cool on the sheets for a few minutes before transferring them to a wire rack to cool completely. Your kitchen will smell heavenly, and you’ll want to resist the urge to snack before decorating!
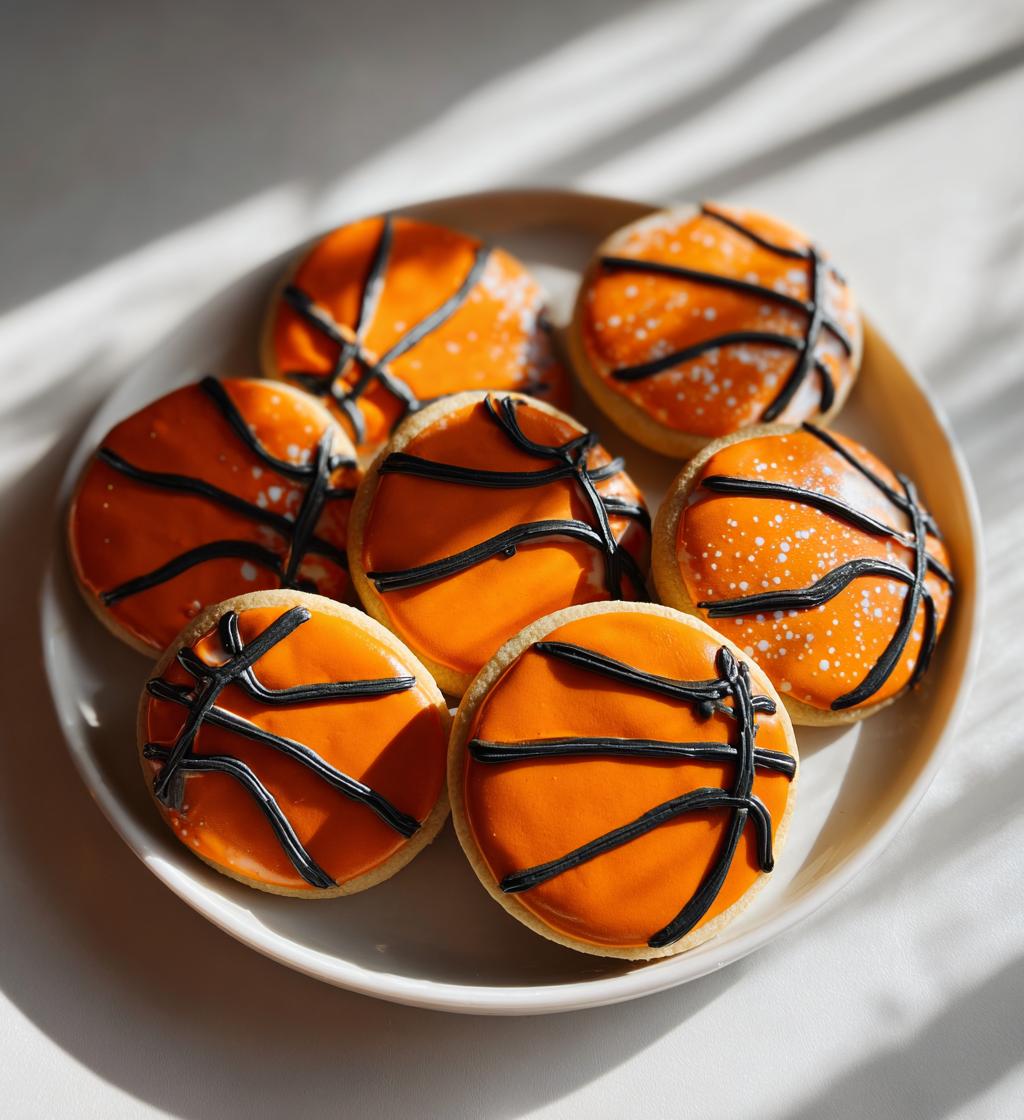
Decorating Your Cookies
Now for the best part—decorating! Grab your 1 cup of orange icing and 1 cup of black icing. If you’re feeling adventurous, you can even mix in a little food coloring to really make those colors pop!
Using a piping bag or a simple plastic sandwich bag with the corner snipped off, carefully outline the cookies with black icing to create the basketball lines. Take your time with this part; it’s where the cookies really start to shine.
Once the outlines are done, fill in the cookies with the orange icing. You can use a toothpick to help spread the icing if needed. Let them set for a bit so the icing can firm up—this will make them easier to stack and store.
And there you have it! A delightful batch of personalized basketball cookies, ready to impress your friends and family. Can you smell the sweetness already? I can’t wait for you to share them!
Why You’ll Love This Recipe
These personalized basketball cookie sets are a total game changer, and here’s why you’re going to love making them:
- Fun for Everyone: Whether you’re a basketball fanatic or just love cookies, these treats are a hit for all ages. They bring a playful spirit to any gathering!
- Simple to Make: With easy-to-follow steps, you can whip these up quickly. Even if you’re a beginner, you’ll feel like a pro in the kitchen!
- Customizable: Personalize your cookies with different icing colors or designs. Get creative and make them uniquely yours!
- Perfect for Parties: These cookies are a fantastic addition to game days, birthday parties, or any celebration. They look impressive and taste divine!
- Great for Gifting: Pack them up in a cute box or tin, and you’ve got a thoughtful gift for the basketball lover in your life. Who wouldn’t appreciate homemade cookies?
Trust me, once you start making these cookies, you’ll find every excuse to whip up another batch! They’re not just cookies; they’re a way to celebrate the fun moments in life!
Tips for Success
Making the perfect personalized basketball cookie set is easier than you might think! With a few handy tips and tricks, you’ll ensure that your cookies turn out just right every time. Here are my top recommendations:
- Room Temperature Ingredients: Make sure your butter and eggs are at room temperature before you start. This helps everything blend smoothly, giving you that lovely, creamy texture. Cold ingredients can lead to a lumpy dough!
- Don’t Overmix: When you combine your wet and dry ingredients, mix until just combined. Overmixing can develop gluten, which makes for tough cookies. You want them soft and chewy, not like a hockey puck!
- Watch the Baking Time: Every oven is different, so keep an eye on your cookies as they bake. The edges should be golden brown, while the centers might still look a tad underbaked. They’ll firm up as they cool, trust me!
- Use Parchment Paper: Lining your baking sheets with parchment paper not only helps with easy cleanup but also prevents the cookies from sticking. It’s a simple step that makes a big difference!
- Decorating Tips: If you’re new to decorating, practice on a few extra cookies before you get to the main ones. This way, you can work out your technique without stressing about the final batch!
- Storage Is Key: Keep your decorated cookies in an airtight container at room temperature to maintain their freshness. If you have leftovers (which I doubt, but just in case!), they’ll stay delicious for several days!
With these tips in hand, you’ll be well on your way to creating the best personalized basketball cookie set. Remember, baking is all about having fun, so don’t stress too much. Enjoy the process, and happy baking!
Nutritional Information Section
Before you indulge in these delightful personalized basketball cookies, it’s good to know what you’re getting into! Here’s an estimated nutritional breakdown per cookie:
- Calories: 150
- Fat: 8g
- Saturated Fat: 5g
- Unsaturated Fat: 2g
- Trans Fat: 0g
- Cholesterol: 20mg
- Sodium: 100mg
- Carbohydrates: 18g
- Fiber: 1g
- Sugar: 10g
- Protein: 2g
Keep in mind that these values are estimates and may vary based on specific ingredient brands and portion sizes. But hey, a little indulgence never hurt anyone, right? Just enjoy these cookies in moderation and savor every delicious bite!
FAQ Section
Got questions about your personalized basketball cookie set? No worries! Here are some common queries I’ve come across, along with the answers to help you out:
Can I use different flavors of icing for my basketball cookies?
Absolutely! While orange and black are traditional for basketballs, feel free to get creative. You can use any color or flavor of icing that suits your style. How about adding some fun sprinkles or edible glitter for extra flair? The sky’s the limit!
What’s the best way to store my cookies after decorating?
To keep your cookies fresh and delicious, store them in an airtight container at room temperature. Make sure they’re completely cooled before putting them in the container to avoid any icing smudges. If you stack them, place a piece of parchment paper between layers to prevent sticking.
Can I freeze the cookie dough for later use?
You bet! Freezing the cookie dough is a great way to have fresh cookies on hand anytime. Just scoop the dough into balls and freeze them on a baking sheet until solid. Then transfer them to a freezer-safe bag or container. When you’re ready to bake, just pop them in the oven straight from the freezer, adding a couple of extra minutes to the baking time!
How can I customize my cookies for a basketball-themed party?
Customizing your cookies is super fun! You can use different icing colors to match the team’s colors, add edible images of players, or even use cookie cutters in fun shapes like basketball hoops or shoes. Personalizing them with names or numbers of players can give a special touch for gifts or party favors!
What if I don’t have a piping bag for decorating?
No problem at all! If you don’t have a piping bag, a simple sandwich bag works just as well. Just fill it with your icing and snip off a tiny corner. Practice on a paper towel first to get the hang of it, and then you’re ready to decorate your cookies like a pro!
Storage & Reheating Instructions
Now that you’ve created a batch of those delightful personalized basketball cookies, let’s talk about how to keep them fresh and tasty! Proper storage is key to enjoying these treats for as long as possible.
To store your cookies, simply place them in an airtight container at room temperature. This will help maintain their softness and flavor. If you’ve decorated them with icing, make sure the icing is completely set before stacking them to avoid any smudging. If you’re worried about them sticking together, you can place a piece of parchment paper between layers—trust me, this little trick works wonders!
If you find yourself with leftovers (which is rare, but hey, it happens!), your cookies will stay delicious for about up to one week when stored correctly. Just make sure to keep them in a cool, dry place away from direct sunlight.
Now, if you’re in the mood for a warm cookie treat later on, you can easily reheat them! Preheat your oven to 350°F (175°C) and place the cookies on a baking sheet. Heat them for about 5-7 minutes, or until they’re warmed through. You can also pop them in the microwave for about 10-15 seconds if you’re in a hurry. Just be careful not to overdo it, or they might turn out a bit chewy!
And there you have it! With these simple storage and reheating instructions, you can enjoy your personalized basketball cookies whenever the craving strikes. Happy snacking!
Serving Suggestions
Now that you’ve baked up a batch of those amazing personalized basketball cookies, it’s time to think about how to serve them at your next event or party! Trust me, presentation can elevate your treats from delicious to downright spectacular. Here are some fun ideas to get you started:
- Cookie Platter: Arrange your cookies on a large platter or tray, mixing in some basketball-themed decorations like mini hoops or basketballs. This visually appealing setup will surely catch everyone’s eye!
- Pair with Milk: You can’t go wrong with the classic combo of cookies and milk! Set out a jug of cold milk for dipping, and watch everyone’s faces light up as they enjoy a nostalgic treat.
- Game Day Snack Table: If you’re hosting a game day party, include your basketball cookies alongside other fun snacks like popcorn, nachos, or cheese platters. This creates a festive atmosphere and keeps your guests fueled for the game!
- Gift Bags: Package individual cookies in cute little bags tied with basketball-themed ribbons. These make fantastic party favors or gifts for your guests to take home and enjoy later!
- Ice Cream Sandwiches: For an extra special treat, consider making ice cream sandwiches! Just take two cookies and add a scoop of your favorite ice cream in between. This delightful twist will have everyone coming back for seconds!
Whatever you choose, serving these personalized basketball cookies alongside other tasty treats will surely make your event a slam dunk! Enjoy sharing them with friends and family, and watch as they disappear in no time. Happy serving!
Print
Personalized Basketball Cookie Set: 7 Sweet Game Changers
- Total Time: 27 minutes
- Yield: 24 cookies 1x
- Diet: Vegetarian
Description
A fun and unique cookie set designed for basketball fans. Perfect for parties and gifts.
Ingredients
- 2 3/4 cups all-purpose flour
- 1 teaspoon baking soda
- 1/2 teaspoon salt
- 1 cup unsalted butter, softened
- 1 cup granulated sugar
- 1 cup brown sugar, packed
- 2 large eggs
- 2 teaspoons vanilla extract
- 2 cups chocolate chips
- 1 cup orange icing
- 1 cup black icing
Instructions
- Preheat your oven to 350°F (175°C).
- In a bowl, mix flour, baking soda, and salt.
- In another bowl, beat the butter, granulated sugar, and brown sugar until creamy.
- Add eggs and vanilla to the butter mixture and blend well.
- Gradually add the flour mixture to the wet ingredients.
- Stir in chocolate chips.
- Drop spoonfuls of dough onto baking sheets.
- Bake for 10-12 minutes or until golden.
- Let cookies cool completely.
- Decorate cookies with orange and black icing to resemble basketballs.
Notes
- Store cookies in an airtight container.
- Use food coloring for icing to customize.
- This recipe makes about 24 cookies.
- Prep Time: 15 minutes
- Cook Time: 12 minutes
- Category: Dessert
- Method: Baking
- Cuisine: American
Nutrition
- Serving Size: 1 cookie
- Calories: 150
- Sugar: 10g
- Sodium: 100mg
- Fat: 8g
- Saturated Fat: 5g
- Unsaturated Fat: 2g
- Trans Fat: 0g
- Carbohydrates: 18g
- Fiber: 1g
- Protein: 2g
- Cholesterol: 20mg
Keywords: personalized basketball cookie set