Oh, winter! It brings such a magical chill to the air, and let’s be honest, what could be more fun than playing in fresh, fluffy snow? One of my absolute favorite winter traditions is making snow ice cream. Seriously, it’s like capturing a bit of winter wonderland in a bowl! There’s something so delightful about scooping up clean snow and turning it into a sweet, creamy treat. I remember the first time I made it with my kids; we laughed so hard as we bundled up in our warm clothes and raced outside, scooping up the perfect snow. The look on their faces when they took that first bite? Priceless! Trust me, this snow ice cream recipe is not just a dessert; it’s an adventure and a memory you’ll cherish. So, let’s dive in and make some delicious snow ice cream together!
Ingredients List
Gathering the right ingredients is super simple and truly exciting! Here’s what you’ll need to whip up this delightful snow ice cream:
- 4 cups of fresh, clean snow: Make sure it’s the fluffy stuff! Fresh snow is the star of this recipe, so look for pristine white snow that’s light and airy. Avoid any discolored or dirty patches—cleanliness is key!
- 1 cup of whole milk: This adds the creamy texture that makes the snow ice cream so delightful. I love using whole milk for that rich taste, but you can use any milk you prefer!
- 1/2 cup of granulated sugar: This sweetens the mix perfectly! Adjust the amount to your liking if you want it sweeter or less sweet—just know that sugar really brings all those flavors together.
- 1 teaspoon of pure vanilla extract: This is my secret weapon! The vanilla adds a lovely warmth and depth of flavor that makes the snow ice cream truly special. Always opt for pure vanilla extract for the best taste!
With these simple ingredients, you’re all set to create a winter treat that’s sure to delight everyone! Let’s get ready to make something magical!
How to Prepare the Snow Ice Cream Recipe
Getting ready to make snow ice cream is a breeze, and I promise you’ll have a blast along the way! Follow these steps to create a fun and delicious treat that’ll have everyone smiling.
Step 1: Gather Fresh Snow
First things first, let’s talk about that snow! You want to collect about 4 cups of fresh, clean snow, so be sure to pick a spot away from dirt, leaves, or any other outdoor debris. I like to scoop it from the top of a snow drift where it’s light and fluffy. If you’re with kids, make it a game! They’ll love racing to fill the bowl with that perfect powder. Just remember, the cleaner the snow, the better your ice cream will taste!
Step 2: Prepare the Milk Mixture
While your little helpers are gathering snow, you can whip up the milk mixture! In a separate bowl, combine 1 cup of whole milk, 1/2 cup of granulated sugar, and 1 teaspoon of pure vanilla extract. Stir this mixture until the sugar dissolves completely—this step is crucial for a smooth, sweet flavor. I usually use a whisk for this because it makes it easier, but a spoon works just fine too! You want that creamy vanilla goodness to be fully blended before moving on.
Step 3: Combine and Serve
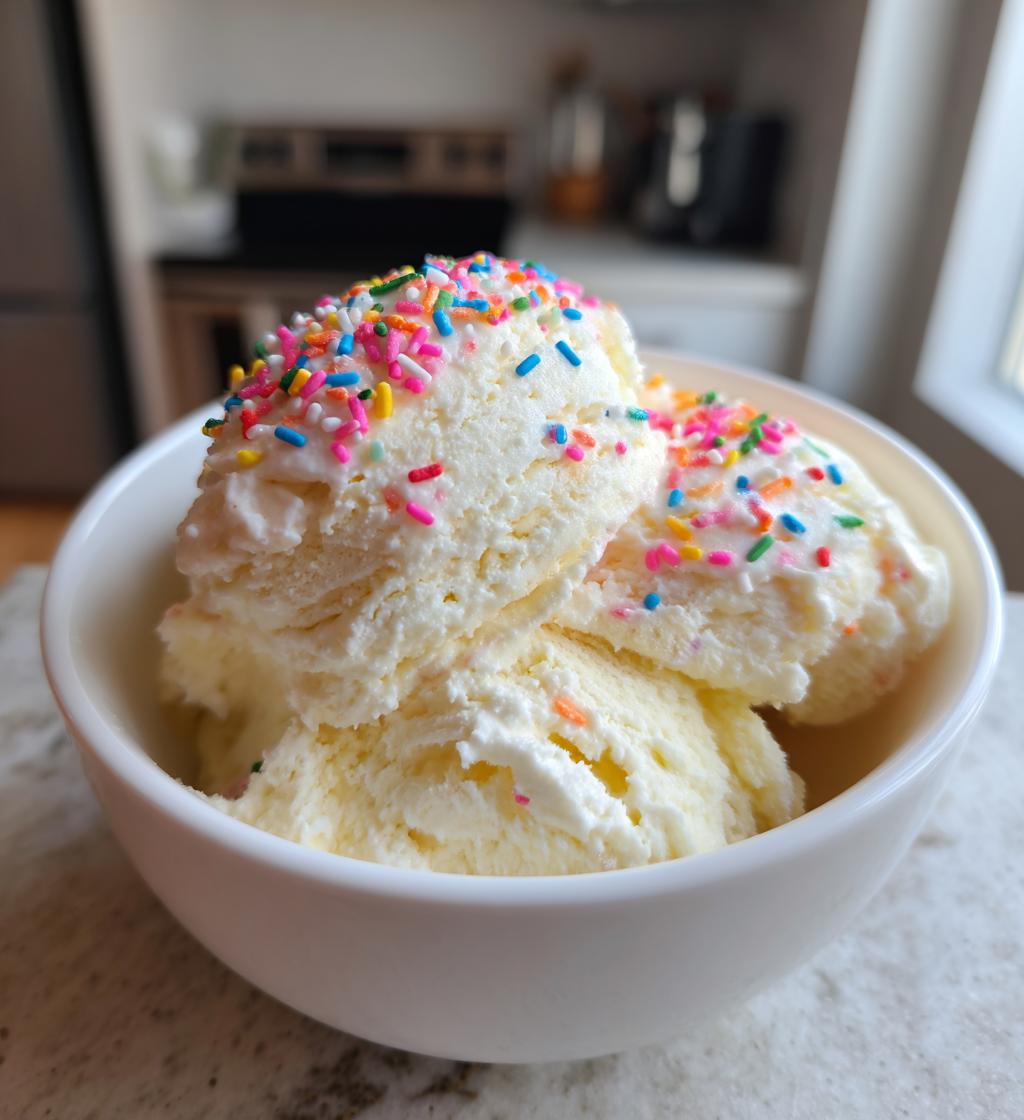
Now comes the fun part! Take that lovely bowl of fresh snow and pour the milk mixture over it. Don’t just dump it all in at once; drizzle it gently to let the snow absorb the creaminess. Using a spatula or a spoon, stir everything together just until combined. You’ll want to be gentle here; you don’t want to pack the snow down too much! Once it’s all mixed, serve the snow ice cream right away for the best texture. You can scoop it into bowls and add fun toppings like chocolate syrup, sprinkles, or even fresh fruit. Enjoy the magic of winter in a bowl!
Why You’ll Love This Recipe
This snow ice cream recipe is a total winner for so many reasons! Here’s why you’re going to adore it:
- Quick Preparation: It takes just 5 minutes from start to finish! You’ll have a delicious treat ready in no time.
- Fun Activity for Kids: Involving the little ones in collecting snow and mixing ingredients makes for a memorable winter activity!
- Delicious Taste: With the creamy milk, sweet sugar, and a hint of vanilla, it’s a delightful treat that captures the essence of winter.
- Customizable: You can easily adjust sweetness or add favorite toppings, making it a treat everyone can enjoy!
Trust me, this is one winter recipe that will bring smiles all around!
Tips for Success
Getting the most out of your snow ice cream experience is all about those little touches! Here are my top tips to ensure every batch is a hit:
- Adjust Sweetness: If you like your treats sweeter, feel free to add a bit more sugar to the milk mixture. I usually start with 1/2 cup, but tasting as you go is key—just a pinch can make all the difference!
- Top it Off: Don’t be shy with toppings! Chocolate syrup, sprinkles, or even fresh fruit like berries or sliced bananas add a fun twist. You could even try crushed cookies for a little crunch!
- Mix Gently: When combining the milk mixture with the snow, stir gently to keep that fluffy texture intact. You want to create a creamy blend without turning it into a solid mass.
- Serve Immediately: This treat is best enjoyed fresh! As it sits, the snow will start to melt, so scoop it up and savor those wintery flavors right away.
With these tips, you’re all set to make the perfect snow ice cream that’ll bring joy and laughter to your winter days!
Variations of Snow Ice Cream Recipe
Now that you’ve mastered the classic snow ice cream, let’s have some fun with variations! Personalizing your snow ice cream is a fantastic way to get creative, and the options are endless. Here are a few delicious twists you can try:
- Chocolate Delight: Mix in some cocoa powder to the milk mixture for a rich chocolate flavor. You can top it off with chocolate chips or a drizzle of chocolate syrup for extra indulgence!
- Fruity Fun: Add pureed fruit like strawberries or mangoes to the milk mixture for a fresh twist. You can also sprinkle in some fresh fruit on top for added color and flavor.
- Minty Fresh: Swap in peppermint extract instead of vanilla for a refreshing minty treat. Top with crushed candy canes to make it festive!
- Nutty Flavor: Stir in a bit of almond extract and sprinkle chopped nuts like almonds or walnuts for a delightful crunch and flavor.
These variations not only enhance the taste but also make snow ice cream a unique treat every time. Get creative and let your taste buds guide you!
Nutritional Information Section
When it comes to enjoying snow ice cream, it’s nice to know what you’re indulging in! Here’s an estimated breakdown of the nutritional values per serving:
- Calories: 150
- Sugar: 20g
- Sodium: 50mg
- Fat: 4g
- Saturated Fat: 2g
- Carbohydrates: 25g
- Protein: 3g
Keep in mind that these values are estimates and can vary based on your specific ingredients and portion sizes. But isn’t it nice to know you’re enjoying a treat that’s simple, fun, and oh-so-delicious? Now, let’s dive into making some sweet memories!
FAQ Section
Got questions about making this delightful snow ice cream? No worries—I’ve got you covered! Here are some common queries I get:
- Can I use any kind of snow for this recipe? It’s best to stick with fresh, clean snow. Avoid snow that’s yellow or has debris; it won’t taste good and could be unsafe!
- How long does snow ice cream last? Snow ice cream is best enjoyed right away. If you let it sit, the snow will melt, turning it into a slushy treat. Enjoy it fresh for the best texture!
- Can I make snow ice cream without milk? Absolutely! You can substitute milk with a dairy-free alternative like almond milk or coconut milk for a tasty twist.
- Is this snow ice cream recipe suitable for kids? Yes! This is a fun and safe recipe for kids to help out with, especially when gathering snow and mixing ingredients together.
- What toppings can I add to my snow ice cream? The possibilities are endless! You can top it with chocolate syrup, sprinkles, fresh fruit, or even crushed cookies for a fun crunch!
Feel free to reach out if you have more questions or need tips. Happy snow ice cream making!
Print
snow ice cream recipe: 5 Steps to Winter Delight
- Total Time: 5 minutes
- Yield: 4 servings 1x
- Diet: Vegetarian
Description
A simple and fun recipe to make snow ice cream using fresh snow.
Ingredients
- 4 cups fresh snow
- 1 cup milk
- 1/2 cup sugar
- 1 teaspoon vanilla extract
Instructions
- Gather fresh, clean snow in a large bowl.
- In a separate bowl, mix milk, sugar, and vanilla extract until the sugar dissolves.
- Pour the milk mixture over the snow.
- Stir gently until combined.
- Serve immediately and enjoy.
Notes
- Use only clean snow.
- You can adjust sweetness by adding more or less sugar.
- Add toppings like chocolate syrup or sprinkles if desired.
- Prep Time: 5 minutes
- Cook Time: 0 minutes
- Category: Dessert
- Method: No-Cook
- Cuisine: American
Nutrition
- Serving Size: 1 cup
- Calories: 150
- Sugar: 20g
- Sodium: 50mg
- Fat: 4g
- Saturated Fat: 2g
- Unsaturated Fat: 0g
- Trans Fat: 0g
- Carbohydrates: 25g
- Fiber: 0g
- Protein: 3g
- Cholesterol: 10mg
Keywords: snow ice cream recipe, snow dessert, winter treat