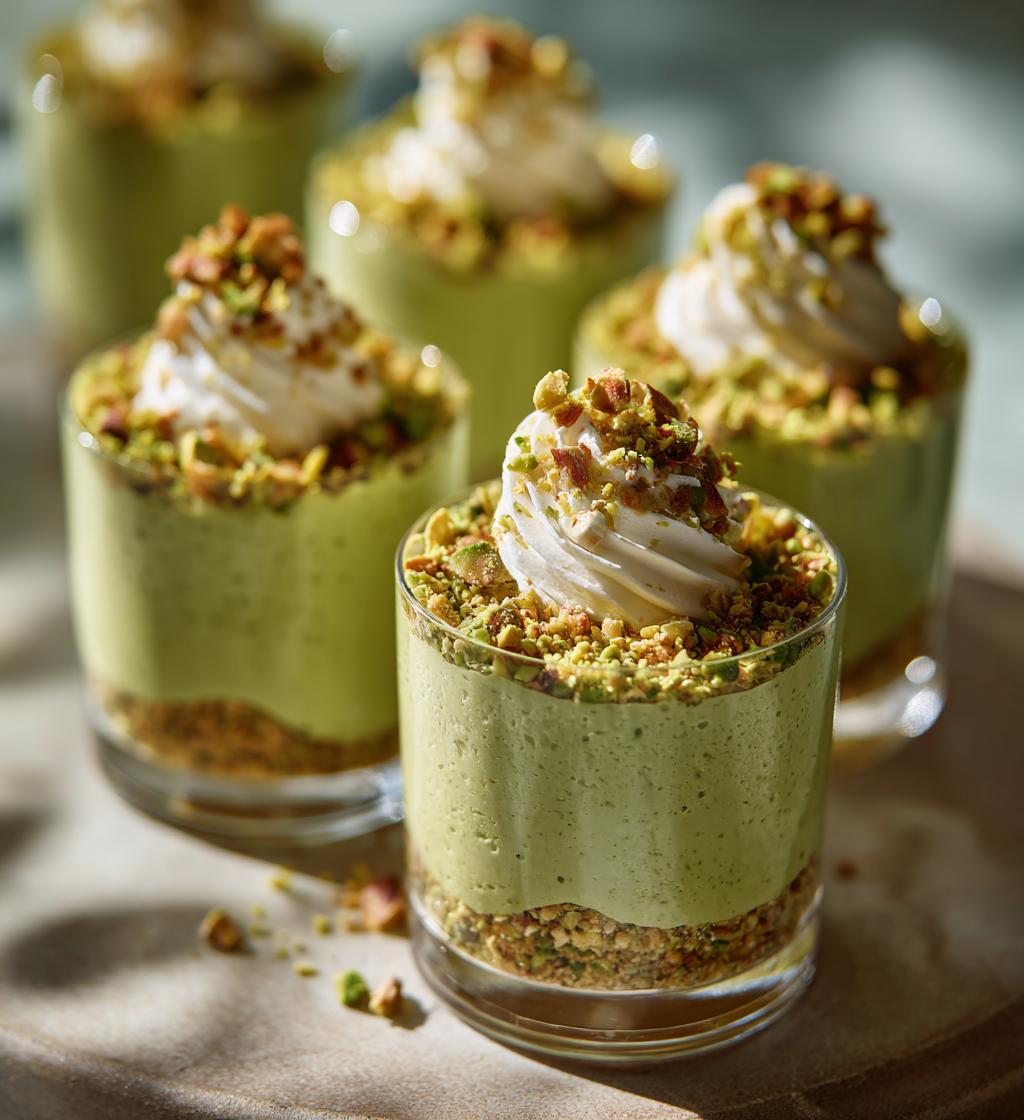
Oh my goodness, let me tell you about these Pistachio Dessert Cups! They’re my go-to for a fresh, healthy treat that never fails to impress. I first stumbled upon this recipe during a summer gathering, and it quickly became a staple in my kitchen. There’s just something magical about the creamy, nutty flavor of pistachios paired with a light, fluffy filling. Plus, they look so adorable sitting on the table, ready to be devoured!
These little cups are not only a feast for the eyes but also a delight for the taste buds. They’re perfect for any occasion – whether it’s a casual family dinner or a fancy get-together. I love how easy they are to whip up; you can prepare them ahead of time, making entertaining a breeze. Trust me, once you take that first bite, you’ll understand why I’m so excited to share my Pistachio Dessert Cups with you! They truly embody the essence of fresh, healthy snacking while still feeling indulgent. So, let’s dive into how to make these scrumptious treats!
Ingredients List
Let’s gather everything we need to create these delightful Pistachio Dessert Cups! Here’s what you’ll need:
- 1 cup pistachios – shelled and roughly chopped. These little green gems are the star of the show!
- 1 cup cream cheese – softened to room temperature so it mixes smoothly. This gives our filling that deliciously creamy texture.
- 1/2 cup Greek yogurt – plain or vanilla, it adds a lovely tang and creaminess. Trust me, you’ll want this in your filling!
- 1/4 cup honey or maple syrup – for sweetness. Feel free to adjust this to your taste; you can even skip it if you prefer a less sweet dessert.
- 1 teaspoon vanilla extract – because every dessert needs that warm, aromatic touch!
- 1/2 cup whipped cream – for folding into the filling. It lightens everything up and adds fluffiness.
- Fresh fruit or additional pistachios for topping – strawberries, blueberries, or more crushed pistachios make for beautiful garnishes!
Make sure to prepare your ingredients ahead of time! This will make the preparation process smoother and quicker. Now that we have everything ready, let’s move on to crafting these tasty dessert cups!
How to Prepare Pistachio Dessert Cups
Alright, let’s get down to the delicious details of preparing these Pistachio Dessert Cups! I promise you, the process is as enjoyable as the final result. Follow these steps, and you’ll have a delightful treat ready to impress your family and friends!
Step 1: Prepare the Base
First things first, we need to set the stage for our dessert cups! I like to use small dessert cups or even shot glasses for that cute presentation. If you prefer a more traditional approach, you can also use mini tart shells. If you’re going with the shells, preheat your oven to 350°F (175°C) and bake them for about 10 minutes until they’re golden and crisp. Let them cool completely before filling. If you’re using cups, you can skip this step altogether!
Now, here’s a little tip: if you’re feeling adventurous, you can crush some additional pistachios to sprinkle at the bottom of your cups. This adds a lovely crunch and enhances that nutty flavor we love!
Step 2: Make the Filling
Now it’s time to whip up that creamy filling! In a mixing bowl, combine your softened cream cheese and Greek yogurt. Using a hand mixer or a whisk, blend them together until smooth and creamy. It’s important to ensure there are no lumps because we want that velvety texture.
Next, add in your honey or maple syrup, vanilla extract, and about half of your chopped pistachios. Mix until everything is well incorporated. The filling should be sweet but not overpowering, so taste it! Adjust the sweetness if needed. Finally, gently fold in the whipped cream, which will lighten up the mixture. You want to keep it fluffy, so be careful not to overmix!
Step 3: Assemble the Cups
Assembly time! Grab your dessert cups or mini tart shells and start layering. I like to first add a spoonful of the filling at the bottom, then sprinkle a little of the remaining chopped pistachios on top for a nice crunch. Follow this with another layer of the filling. Repeat until your cups are filled, finishing with a lovely dollop of filling on top. This is where you can get creative with your presentation!
For the final touch, garnish with fresh fruit or a sprinkle of crushed pistachios. You can even add a mint leaf for a pop of color. Trust me, your guests will be impressed!
Step 4: Chill and Serve
The last step is super important! Cover the dessert cups with plastic wrap and pop them in the refrigerator for at least 2 hours. This chilling time allows the flavors to meld beautifully and gives the filling a chance to set up a bit more. If you can let them chill overnight, even better!
When you’re ready to serve, just remove them from the fridge, and voilà! You’ve got a stunning and scrumptious treat that everyone will adore. Enjoy the praise that’s sure to come your way!
Why You’ll Love This Recipe
Oh, where do I begin? You’re going to absolutely adore these Pistachio Dessert Cups for so many reasons!
- Quick and Easy: With minimal prep time and simple steps, you can whip these up in no time. Perfect for last-minute gatherings!
- Healthy Indulgence: Packed with protein from the Greek yogurt and healthy fats from the pistachios, these cups are a guilt-free treat!
- Customizable: You can easily switch up the toppings or adjust the sweetness to suit your taste buds. Go wild with your creativity!
- Impressive Presentation: They look so elegant, making them a great addition to any dessert table. Your friends will think you’re a pro!
- Deliciously Flavorful: The creamy filling paired with the nutty pistachios creates a flavor explosion that’s simply irresistible!
Trust me, once you make these, they’ll become a go-to recipe in your kitchen!
Nutritional Information Section
Let’s take a moment to appreciate the nutritional benefits of these delightful Pistachio Dessert Cups! Here’s a rough breakdown of what you can expect per serving, which is one of those lovely dessert cups:
- Calories: Approximately 220
- Fat: 14g (with healthy fats from pistachios and cream cheese)
- Protein: 6g (thanks to the Greek yogurt and cream cheese)
- Carbohydrates: 20g (mostly from natural sources like honey and yogurt)
- Sugar: 5g (depending on how much honey or maple syrup you decide to add)
Keep in mind that these values are estimates and can vary based on specific ingredients and portion sizes. But rest assured, you’re treating yourself to a healthier dessert option without compromising flavor!
Tips for Success
Alright, let’s make sure your Pistachio Dessert Cups turn out absolutely perfect! I’ve got a few pro tips up my sleeve that can elevate your dessert game.
- Choose Quality Ingredients: Don’t skimp on the pistachios! Opt for fresh, high-quality nuts for that vibrant flavor. If you can find roasted pistachios, even better—they add an extra depth of taste!
- Experiment with Sweeteners: If you’re looking for a healthier option, try using agave syrup or stevia instead of honey or maple syrup. Just remember to adjust the amount based on sweetness preference, as these can be sweeter!
- Play with Flavors: Want to mix things up? Consider adding a pinch of cardamom or a splash of orange zest to your filling. It’ll give your Pistachio Dessert Cups a unique twist that’s sure to surprise!
- Make Ahead: These dessert cups are even better when made a day in advance! The chilling time not only enhances the flavor but also helps the filling set beautifully, making them a fabulous option for entertaining.
- Presentation is Key: Don’t be afraid to get creative with your toppings! Use edible flowers, a drizzle of chocolate sauce, or a sprinkle of crushed nuts for that Instagram-worthy finish.
With these tips in mind, you’ll be well on your way to making the most delightful Pistachio Dessert Cups that everyone will rave about!
Variations
Now that you’ve mastered the classic Pistachio Dessert Cups, let’s have some fun with variations! There’s so much room for creativity, and I can’t wait to share a few ideas that’ll inspire your own twists on this delightful dessert.
- Fruit Fusion: Swap out the toppings for seasonal fruits! Try sliced bananas, diced mango, or even a handful of pomegranate seeds. The juicy burst of fruit will add a refreshing contrast to the creamy filling.
- Chocolate Lover’s Delight: For a richer flavor, drizzle some melted dark chocolate over the top or fold in mini chocolate chips into the filling. It’s an irresistible combination that chocolate enthusiasts will adore!
- Nutty Adventure: Mix in other nuts along with the pistachios for added crunch. Almonds, walnuts, or hazelnuts can create a delightful nut medley that elevates the texture and flavor!
- Spiced Up: Add a pinch of cinnamon or nutmeg to the filling for a warm, cozy flavor. This is especially lovely if you’re making these dessert cups during the fall or winter months.
- Dairy-Free Option: If you’re looking for a dairy-free version, substitute the cream cheese with cashew cream or dairy-free yogurt. You’ll still get that luscious texture while making it suitable for various dietary needs.
Feel free to mix and match these ideas, or even come up with your own creative toppings and fillings! The sky’s the limit, and I can’t wait to see what delicious variations you come up with!
Serving Suggestions
Ready to take your Pistachio Dessert Cups to the next level? Pairing them with complementary dishes can elevate your dessert experience! Here are a few delightful suggestions:
- Fresh Fruit Salad: A light and refreshing fruit salad is the perfect companion. Think juicy watermelon, ripe berries, and zesty citrus fruits to balance out the creamy goodness of the cups.
- Herbal Iced Tea: Sip on a chilled herbal iced tea, like mint or chamomile, to cleanse your palate and enhance the flavors of the dessert. It’s a refreshing choice that adds a lovely touch!
- Dark Chocolate Bark: Serve a few pieces of dark chocolate bark on the side. The rich, slightly bitter chocolate pairs beautifully with the nutty sweetness of the pistachios!
- Lightly Sweetened Whipped Cream: For an extra touch of indulgence, a dollop of lightly sweetened whipped cream on the side can add a delightful creaminess to each bite.
These pairings not only complement the Pistachio Dessert Cups but also create a delightful spread that your guests will absolutely love! Enjoy experimenting with these ideas!
FAQ Section
Got questions about these fabulous Pistachio Dessert Cups? No worries! I’ve got you covered with some common queries that pop up when making this delightful treat.
Q1: Can I make these Pistachio Dessert Cups ahead of time?
Absolutely! In fact, I recommend making them a day in advance. The chilling time not only enhances the flavors but also helps the filling set perfectly, making them an excellent option for parties or gatherings.
Q2: Are there any nut-free alternatives for this recipe?
If you need a nut-free version, try using sunflower seeds or pumpkin seeds instead of pistachios. You can also make a delicious filling using dairy-free yogurt and cashew cream for a similar texture without the nuts.
Q3: How long do these dessert cups stay fresh?
Once assembled, these Pistachio Dessert Cups will keep well in the fridge for about 3-4 days. Just make sure to cover them properly to maintain their freshness!
Q4: Can I use flavored yogurt instead of plain?
Yes, you can! Using flavored Greek yogurt like vanilla or honey will add a delightful twist to your filling. Just keep in mind that it might make the cups a bit sweeter, so adjust your honey or maple syrup accordingly.
Q5: What’s the best way to store leftovers?
Store any leftovers in an airtight container in the refrigerator. This will help preserve their creamy texture and keep them fresh for your next indulgent snack!

Pistachio Dessert Cups: 7 Irresistible Treats to Savor
- Total Time: 10 minutes
- Yield: 1 wrap 1x
- Diet: Low Calorie
Description
A fresh and healthy wrap filled with chicken and veggies, perfect for a light meal.
Ingredients
- 1 cup cooked chicken, shredded
- 1 whole wheat wrap
- 1/2 cup lettuce, chopped
- 1/4 cup cucumber, sliced
- 1/4 cup bell pepper, sliced
- 2 tablespoons hummus
- Salt and pepper to taste
Instructions
- Spread hummus on the wrap.
- Add shredded chicken on top of the hummus.
- Layer with lettuce, cucumber, and bell pepper.
- Season with salt and pepper.
- Roll the wrap tightly.
- Cut in half and serve.
Notes
- Use grilled chicken for more flavor.
- Substitute vegetables as per your preference.
- Can be served with a side of salsa.
- Prep Time: 10 minutes
- Cook Time: 0 minutes
- Category: Lunch
- Method: Wrap
- Cuisine: American
Nutrition
- Serving Size: 1 wrap
- Calories: 350
- Sugar: 2g
- Sodium: 300mg
- Fat: 10g
- Saturated Fat: 1g
- Unsaturated Fat: 8g
- Trans Fat: 0g
- Carbohydrates: 40g
- Fiber: 5g
- Protein: 25g
- Cholesterol: 70mg
Keywords: Spring Chicken Wrap