There’s something utterly delightful about *protein desserts*—they’re not just a treat; they’re a way to indulge while still being kind to your body. As the spring sunshine starts to warm up our days, I find myself craving fresh, vibrant flavors. That’s where this no-bake protein dessert comes in! It’s a celebration of seasonal fruits, bursting with color and flavor, and packed with just the right amount of protein to keep you feeling satisfied without the heaviness of traditional desserts.
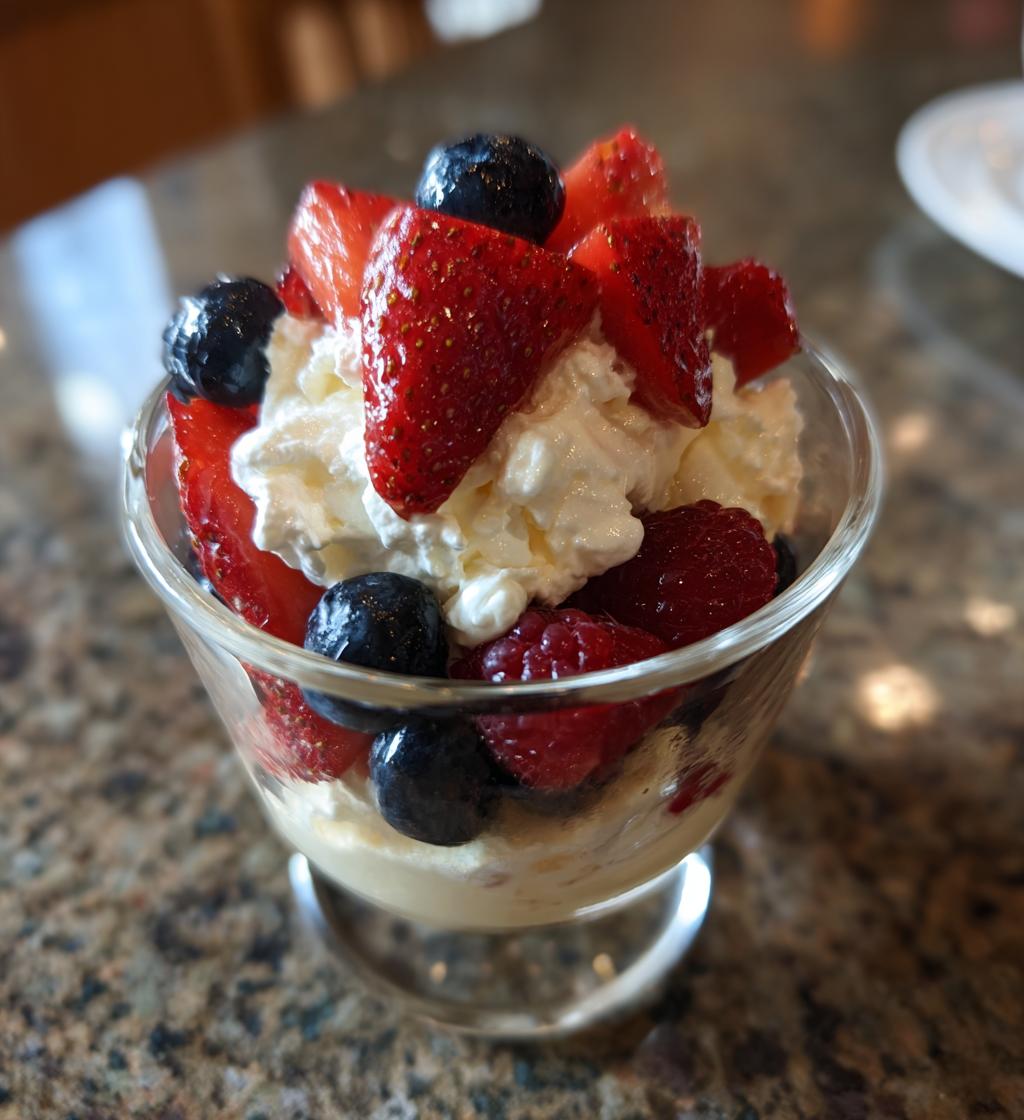
Picture this: a bowl filled with luscious strawberries, blueberries, and raspberries, all lovingly layered, topped with a light whipped cream mixture that makes every bite feel like a little piece of heaven. I love making this dessert because it’s quick, refreshing, and perfect for those sunny afternoons when you want something sweet but guilt-free. Plus, it’s so easy to whip up—you’ll be amazed at how simple it is to create something so delicious. Trust me, the flavors of fresh fruit in spring are just unbeatable!
Ingredients List
For this delightful no-bake protein dessert, you’ll need a handful of simple yet fresh ingredients that truly shine in the spotlight of spring. Here’s what you’ll need:
- 2 cups strawberries, sliced – Fresh, juicy strawberries are a must! Make sure to remove the stems and slice them to really bring out their sweetness.
- 1 cup blueberries – These little gems add a pop of color and a burst of tangy sweetness.
- 1 cup raspberries – Their vibrant flavor and beautiful color make them a perfect addition.
- 1 cup whipped cream – You can use store-bought or homemade; just make sure it’s nice and fluffy!
- 2 tablespoons honey – This natural sweetener enhances the flavors of the fruits. If you prefer, feel free to swap it out for maple syrup for a vegan option.
- 1 teaspoon vanilla extract – A dash of vanilla adds a lovely depth to the whipped cream mixture.
And if you want to elevate your dessert even more, consider garnishing it with some fresh mint leaves for that extra touch of spring! Trust me, the freshness of these ingredients will make your dessert not just delicious but also visually stunning.
How to Prepare Protein Desserts
Now that you have all your ingredients ready, let’s dive into the fun part—putting it all together! This process is super simple and absolutely rewarding. Follow these steps, and you’ll have a beautiful, protein-packed dessert in no time!
Step 1: Prepare the Fruits
First things first, we need to give our fruits a good wash to make sure they’re nice and clean. I usually fill a bowl with cool water and gently swish the strawberries, blueberries, and raspberries around. For the strawberries, after washing, I slice off the green tops and then cut them into thick slices—this way, they stay juicy and don’t get mushy in the dessert. For the blueberries and raspberries, just give them a good rinse and let them dry on a clean towel. Easy peasy!
Step 2: Make the Whipped Cream Mixture
Next up, let’s whip up that creamy goodness! In a mixing bowl, add your cup of whipped cream, followed by the honey and vanilla extract. Now, it’s time to mix! If you’re using a hand mixer, beat it on medium speed until everything is well combined and the mixture is fluffy. You want it to hold soft peaks—this means when you lift the mixer, the cream should form little peaks that gently fall over. If you’re doing it by hand, grab a whisk and put in some elbow grease! Just remember, thorough mixing is key to achieving that light and airy texture.
Step 3: Assemble the Dessert
Now the fun part begins—layering! Grab your serving dishes and start with a layer of your prepared fruits. I usually go for a mix of all three fruits to make it colorful. Then, spoon a generous dollop of the whipped cream mixture right on top. You can repeat the layers if you have enough ingredients, creating a beautiful little parfait! For an extra touch, I love to sprinkle a few whole berries on top of the whipped cream for that pop of color, and don’t forget those fresh mint leaves if you’re feeling fancy!
Step 4: Serve or Chill
Finally, it’s time to decide if you want to dive right in or let it chill for a bit! If you’re serving immediately, just grab a spoon and dig in! But if you want to enhance those flavors, cover the dishes with plastic wrap and pop them in the fridge for about 30 minutes. This allows the flavors to meld beautifully, making each bite even more delightful. Either way, you’re in for a treat!
Why You’ll Love This Recipe
This no-bake protein dessert is not just a treat for your taste buds; it comes with a bunch of fantastic benefits that make it a must-try! Here’s why you’ll fall in love with this delightful dish:
- Quick Preparation: You can whip this up in just 15 minutes! Perfect for those busy spring afternoons when you want something sweet without the hassle.
- Freshness of Seasonal Fruits: Using ripe, seasonal fruits elevates the flavors and brings a burst of natural sweetness that’s hard to beat. Each bite is a taste of spring!
- Healthy and Guilt-Free: Packed with protein and made with wholesome ingredients, this dessert satisfies your sweet tooth while keeping your healthy lifestyle on track.
- No-Bake Convenience: No need to turn on the oven! This dessert is perfect for warm days when you want something light and refreshing.
- Customizable: Feel free to switch up the fruits or add toppings like nuts or seeds for extra crunch. You can really make it your own!
Ingredient Notes/Substitutions
When it comes to creating the perfect no-bake protein dessert, knowing your ingredients is key! Let’s dive into each one and explore some tasty substitutions that can cater to various preferences and dietary needs.
Fresh Fruits
Using fresh, organic fruits will always give you the best flavor and texture. If strawberries, blueberries, or raspberries aren’t available, don’t worry! You can easily swap them out for other seasonal fruits like peaches, mangoes, or even kiwi. Just remember to keep the ratios similar to maintain the balance of sweetness and acidity in the dessert.
Whipped Cream
If you’re looking for a dairy-free option, there are fantastic alternatives out there! Coconut whipped cream is a great choice—it’s light, fluffy, and adds a subtle coconut flavor that pairs wonderfully with fruits. You can also use whipped almond or soy cream based on your preference. Just make sure it’s unsweetened if you want to control the sweetness of your dessert!
Sweeteners
While honey adds a delightful sweetness to the whipped cream mixture, you can easily substitute it with maple syrup for a vegan-friendly option. Agave nectar is another great alternative that works well. Just keep in mind that these substitutes might alter the flavor slightly, but they still bring a lovely sweetness to the dish.
Vanilla Extract
Vanilla extract is a classic for adding depth to the whipped cream. However, if you don’t have any on hand, pure almond extract can provide a different yet delicious flavor twist. Just be careful with the quantity—almond extract is much stronger, so a few drops should suffice!
Dietary Considerations
This dessert is naturally gluten-free and can easily be made vegan with the right substitutions. If you’re avoiding sugar, consider using a sugar-free whipped cream or a sugar substitute like erythritol. Just keep in mind that some sugar substitutes can have different sweetness levels, so adjust according to your taste.
Ultimately, this recipe is versatile, and I encourage you to get creative! The joy of cooking is experimenting and making it your own, so don’t be afraid to try different ingredients that suit your taste and dietary needs. Happy cooking!
Tips for Success
Getting this no-bake protein dessert just right is all about a few key tips that can take your creation from good to absolutely fabulous! Trust me, with these little nuggets of wisdom, you’ll be a pro in no time.
Choose the Right Fruits
When it comes to fruits, freshness is everything! Opt for organic, ripe fruits as they bring out the best flavors. If you can, hit up your local farmers’ market during the spring. Strawberries should be bright red and fragrant, while blueberries and raspberries should be plump and juicy. If you’re feeling adventurous, try mixing in some chopped kiwi or peaches for a fun twist!
Perfecting the Whipped Cream Texture
For that dreamy, fluffy texture, make sure your whipped cream is really chilled. I often pop my mixing bowl and beaters in the fridge for about 15 minutes before whipping! When you start mixing, be patient and don’t rush it. Gradually increase the speed, and watch for those soft peaks. You want it to be light and airy, but be careful not to overwhip it—otherwise, you’ll end up with butter instead of cream. Yikes!
Layering Like a Pro
Layering is all about balance! Start with a layer of fruits, then a dollop of whipped cream, and repeat. Make sure to spread the whipped cream gently to maintain the beautiful colors of the fruits. If you want to impress your guests, consider using clear glass cups or bowls so they can see those vibrant layers peeking through. It’s like a little work of art!
Chill for the Best Flavor
If you can, let your assembled dessert chill in the fridge for at least 30 minutes before serving. This helps the flavors meld together beautifully. Plus, it makes the whipped cream even more deliciously creamy! Just remember to cover it with plastic wrap to keep it fresh.
Get Creative with Toppings
Don’t be shy about adding toppings! A sprinkle of crushed nuts, a drizzle of extra honey, or even a few chocolate shavings can elevate your dessert. Fresh mint leaves aren’t just for looks; they add a pop of flavor that complements the fruits perfectly. Get creative and make it your own!
With these tips, you’ll be well on your way to creating a stunning and delicious no-bake protein dessert that will impress everyone. Happy cooking, my friend!
Nutritional Information Section
As you whip up this delightful no-bake protein dessert, it’s always good to keep an eye on the nutrition. Here’s a general overview of the nutritional values based on the ingredients listed. Just remember, these values can vary depending on the specific brands and types of ingredients you use, so consider this a ballpark figure:
- Serving Size: 1 serving
- Calories: 150
- Sugar: 12g
- Sodium: 20mg
- Fat: 5g
- Saturated Fat: 3g
- Unsaturated Fat: 2g
- Trans Fat: 0g
- Carbohydrates: 22g
- Fiber: 3g
- Protein: 2g
- Cholesterol: 15mg
Keep in mind that these numbers can change based on ingredient substitutions or portion sizes. It’s always a good idea to check the labels and adjust as needed to fit your dietary needs. Enjoy this tasty treat knowing it’s not just delicious but nourishing too!
FAQ Section
As you embark on your journey of making this delightful no-bake protein dessert, you might have a few questions buzzing around in your mind. Don’t worry; I’ve got you covered! Here are some common queries that pop up, along with my answers to help you navigate your way through this fruity adventure:
Can I use frozen fruits instead of fresh?
Absolutely! While fresh fruits are always ideal for their vibrant flavor and texture, frozen fruits can work in a pinch. Just make sure to thaw them and drain any excess liquid before using them in your dessert. This will help keep your layers looking pretty and prevent the dessert from becoming too watery.
How do I store leftovers?
If you have any leftovers (which, let’s be honest, might not be likely because it’s so good!), you can store them in an airtight container in the fridge for up to 2 days. Just remember that the texture of the whipped cream might change a little after a day, so it’s best enjoyed fresh. If you’re planning to serve it later, consider holding off on layering the whipped cream until just before serving!
Can I make this dessert ahead of time?
Yes! You can prepare the fruits and the whipped cream mixture a few hours in advance. Just keep them separate until you’re ready to assemble the dessert to maintain that beautiful fluffy texture. I recommend assembling it no more than a few hours before serving for the best results.
What if I have dietary restrictions?
That’s the beauty of this recipe! It’s super adaptable. If you’re vegan, just swap the honey for maple syrup and choose a dairy-free whipped cream. For those avoiding gluten, this dessert is naturally gluten-free as long as you check your ingredient labels. Feel free to customize it to fit your needs!
Can I add other flavors to the whipped cream?
Definitely! If you want to switch things up, try adding a hint of cocoa powder for a chocolatey twist or some lemon zest for a refreshing zing. You can also experiment with different extracts like almond or coconut for a fun flavor change. The possibilities are endless!
Hopefully, these FAQs help answer some of your burning questions about creating the perfect no-bake protein dessert. Don’t hesitate to get creative and make this recipe your own—cooking should always be a fun and enjoyable experience!
Print
Protein Desserts: 5 Guilt-Free Treats for Spring Bliss
- Total Time: 15 minutes
- Yield: 4 servings 1x
- Diet: Vegan
Description
A refreshing spring dessert featuring seasonal fruits.
Ingredients
- 2 cups strawberries, sliced
- 1 cup blueberries
- 1 cup raspberries
- 1 cup whipped cream
- 2 tablespoons honey
- 1 teaspoon vanilla extract
Instructions
- Wash and prepare the fruits.
- In a bowl, mix the whipped cream, honey, and vanilla extract.
- Layer the fruits in serving dishes.
- Top with the whipped cream mixture.
- Serve immediately or chill for 30 minutes.
Notes
- Use fresh organic fruits for the best flavor.
- You can substitute honey with maple syrup.
- Garnish with mint leaves if desired.
- Prep Time: 15 minutes
- Cook Time: 0 minutes
- Category: Dessert
- Method: No-bake
- Cuisine: American
Nutrition
- Serving Size: 1 serving
- Calories: 150
- Sugar: 12g
- Sodium: 20mg
- Fat: 5g
- Saturated Fat: 3g
- Unsaturated Fat: 2g
- Trans Fat: 0g
- Carbohydrates: 22g
- Fiber: 3g
- Protein: 2g
- Cholesterol: 15mg
Keywords: Spring Dessert, Seasonal Fruits, No-Bake Dessert