Let me tell you about the first time I made this red velvet Oreo cheesecake – it was pure kitchen magic! I’d been craving something that combined my two favorite desserts, and after some delicious experimentation, this beauty was born. The moment that deep red batter swirled with creamy vanilla and Oreo chunks came out of the oven, I knew I’d created something special.
This red velvet Oreo cheesecake recipe hits all the right notes – rich cocoa flavor from the red velvet, that signature tang from the cream cheese, and those irresistible crunchy Oreo bits throughout. What I love most is how impressive it looks while being surprisingly simple to make. No fancy techniques required – just good ingredients and a little patience while it bakes to perfection.
Every time I serve this at gatherings, people go crazy for that first bite where the velvety smooth cheesecake meets the chocolatey Oreo crust. It’s become my go-to dessert for birthdays, holidays, or really any Tuesday that needs brightening up. Trust me, once you try this combination of flavors and textures, you’ll understand why it’s earned a permanent spot in my recipe box!
Why You’ll Love This Red Velvet Oreo Cheesecake Recipe
Let me tell you why this recipe never fails to impress – whether you’re baking for a crowd or just treating yourself:
- That magical moment when rich red velvet meets chocolatey Oreo – it’s like your favorite desserts had a delicious baby
- The texture is absolute perfection – creamy, dreamy cheesecake with little Oreo surprises in every bite
- It looks like you spent hours in the kitchen, but honestly? The hardest part is waiting for it to chill
- Those beautiful red swirls make it the star of any dessert table (I always get asked for the recipe!)
- You can dress it up with extra Oreos on top or keep it simple – it’s stunning either way
Seriously, if you love showstopper desserts that don’t require a pastry degree, this is your new best friend.
Ingredients for Red Velvet Oreo Cheesecake Recipe
Okay, let’s gather our goodies! Here’s everything you’ll need to make this showstopper cheesecake – and trust me, every single ingredient plays an important role:
- 2 cups Oreo cookie crumbs – finely crushed (I just toss whole cookies in my food processor – filling and all!)
- 1/4 cup melted unsalted butter – this binds our Oreo crust together beautifully
- 24 oz cream cheese – softened to room temperature (this is KEY for smooth blending)
- 1 cup granulated sugar – just the right amount of sweetness to balance the tang
- 1 tsp pure vanilla extract – skip the imitation stuff here, it makes a difference
- 3 large eggs – room temperature (cold eggs can make your batter lumpy)
- 1/2 cup sour cream – our secret weapon for ultra-creamy texture
- 1/4 cup unsweetened cocoa powder – gives that authentic red velvet flavor
- 1 tbsp red food coloring – go for the gel kind for vibrant color without thinning the batter
- 1/2 cup chopped Oreo cookies – because more Oreos are always better
A quick tip from my many cheesecake adventures: measure everything before you start mixing. There’s nothing worse than realizing mid-recipe that your cream cheese isn’t quite soft enough yet!
How to Make Red Velvet Oreo Cheesecake
Ready to create this masterpiece? Let’s get baking! I’ll walk you through each step so your cheesecake turns out as stunning as mine always does.
Prepare the Crust
First things first – that Oreo crust! It’s the foundation of this beauty, so we want it perfect. Grab your springform pan and mix those Oreo crumbs with melted butter until they’re nice and crumbly. Now, press it firmly into the bottom of the pan – I use the bottom of a measuring cup to really pack it down. Trust me, you want it compact so it holds together when you slice it later. Pop it in the fridge while you work on the filling – it helps it set up nicely.
Make the Cheesecake Filling
Here’s where the magic happens! Start by beating that softened cream cheese until it’s smooth and creamy. Add the sugar and vanilla, and mix until it’s just combined – don’t overdo it! Crack in those room temperature eggs one at a time, mixing gently after each. Then, fold in the sour cream for that extra creaminess. Now, here’s the fun part: divide the batter in half. To one half, add the cocoa powder and red food coloring – this is your red velvet batter. Keep the other half plain – it’s your classic cheesecake base. The contrast is what makes this dessert so gorgeous!
Swirl and Bake
Time to get artistic! Take spoonfuls of the red and plain batter and alternate them over the crust. Don’t worry about being perfect – the more random, the better the swirls! Once you’ve used all the batter, take a butter knife and gently swirl through the colors. Just a few passes – we want those beautiful marbled patterns, not a muddy mess. Sprinkle those chopped Oreos on top for extra crunch. Now, into the oven it goes! Bake at 325°F for about 45-50 minutes. You’ll know it’s done when the edges are set but the center still has a slight jiggle.
Chill Before Serving
Here’s the hardest part – waiting! Let the cheesecake cool completely at room temperature, then transfer it to the fridge. I know it’s tempting to dig in right away, but trust me, at least 4 hours of chilling makes all the difference. It helps the flavors meld and gives you that perfect sliceable texture. If you can manage it, overnight is even better! When you’re ready to serve, run a knife around the edge of the pan for clean slices. Get ready for the compliments – this one’s a showstopper!
Tips for the Best Red Velvet Oreo Cheesecake Recipe
After making this cheesecake more times than I can count (hey, quality control is important!), I’ve picked up some foolproof tricks to guarantee perfect results every time:
- Room temp is your BFF – I can’t stress this enough! Cold cream cheese = lumpy batter. Take everything out at least an hour before baking. I usually set my ingredients out when I wake up if I’m baking in the afternoon.
- Mix with love, not power – Overbeating introduces too much air, which leads to cracks. Once you add the eggs, mix just until combined. I use the “low and slow” approach with my mixer.
- Cool it, hot stuff – Sudden temperature changes are a cheesecake’s worst enemy. After baking, I prop the oven door open with a wooden spoon and let it cool gradually for about an hour before moving it to the fridge.
- Patience pays off – I know it’s hard, but that 4-hour chill time is non-negotiable! The texture transforms from good to “oh my goodness” when it’s properly set. For special occasions, I make it the day before.
- The water bath secret – If you’re really worried about cracks, place your springform pan in a roasting pan with hot water halfway up the sides. The steam creates the gentlest baking environment – my grandma’s trick!
Remember, even if your cheesecake cracks (mine did the first few times!), it’ll still taste incredible. A little whipped cream or extra Oreo crumbs can cover any imperfections. The most important thing? Enjoy the process and that first heavenly bite!
Variations for Your Red Velvet Oreo Cheesecake
One of the things I love most about this recipe is how easy it is to make it your own. Here are some of my favorite ways to mix things up when I’m feeling creative:
- Chocolate lovers’ dream: Skip the red food coloring and add extra cocoa powder to the batter for a rich chocolate cheesecake. It’s like a chocolate Oreo cheesecake with a red velvet twist – total decadence!
- Whipped cream wonder: Top your cheesecake with a cloud of homemade whipped cream and extra crushed Oreos. I like to add a touch of vanilla and powdered sugar to my whipped cream – it’s the perfect finishing touch.
- Golden Oreo magic: Swap regular Oreos for golden Oreos in the crust and topping. The vanilla flavor pairs beautifully with the red velvet, and it gives the cheesecake a completely different look. I’ve even done half-and-half for a fun contrast!
These variations are perfect for when you want to surprise your guests – or just try something new for yourself. The base recipe is so versatile, you really can’t go wrong. Have fun experimenting and let me know what creative twists you come up with!
Serving and Storing Your Red Velvet Oreo Cheesecake
Now for the best part – enjoying your masterpiece! Here’s everything you need to know about serving and keeping this cheesecake tasting fresh:
- Slice like a pro: Run your knife under hot water and wipe it dry between each cut. This gives you those picture-perfect slices without dragging crumbs everywhere. I usually get about 12 generous slices from my 9-inch pan.
- Fridge life: Cover any leftovers tightly with plastic wrap or store in an airtight container. It’ll stay delicious in the fridge for up to 5 days – if it lasts that long! The flavors actually deepen after a day or two.
- Freezer magic: This cheesecake freezes beautifully! Wrap individual slices in plastic wrap, then foil, and freeze for up to 2 months. Thaw overnight in the fridge when those cheesecake cravings hit.
Pro tip: If you’re serving this for a party, let it sit at room temperature for about 15 minutes before slicing. That slight softening makes the texture absolutely dreamy. And don’t be shy with garnishes – extra Oreo crumbs, chocolate drizzle, or fresh berries all take it to the next level!
Red Velvet Oreo Cheesecake Recipe FAQs
Can I use boxed red velvet cake mix?
Oh honey, I know it’s tempting to grab that box mix, but trust me – it won’t give you the same creamy, dreamy texture we’re after. The cocoa powder and food coloring combo in our recipe creates that perfect red velvet flavor without drying out the cheesecake. Boxed mixes have leavening agents that can make your cheesecake puff up weirdly and then collapse. Stick with our from-scratch method – your taste buds will thank you!
How do I prevent cracks?
Don’t panic if you see cracks – they happen to the best of us! My foolproof method is the water bath trick. Just wrap your springform pan in foil and place it in a roasting pan with about an inch of hot water. The steam keeps everything moist and prevents those stress-inducing cracks. And remember – cool it slowly! I leave mine in the turned-off oven with the door cracked for an hour before moving it to the fridge.
Can I make this gluten-free?
Absolutely! Gluten-free Oreos work beautifully in this recipe – just make sure to use the GF version for both the crust and mix-ins. Everything else in the cheesecake filling is naturally gluten-free. I’ve made this for friends with celiac disease, and they couldn’t tell the difference! Just double-check that your cocoa powder and other ingredients are certified gluten-free if that’s a concern.
Nutritional Information for Red Velvet Oreo Cheesecake
Okay, let’s be real – we’re not eating cheesecake for its health benefits! But I know some of you like to keep track, so here’s the scoop on what’s in each delicious slice. Remember, these numbers are estimates – your actual results might vary depending on exact ingredients and portion sizes.
- Calories: About 450 per slice (and worth every single one!)
- Fat: 30g (mostly from that glorious cream cheese and butter)
- Carbs: 40g (thank the Oreos and sugar for that)
- Protein: 8g (who knew dessert could pack some protein?)
- Sugar: 30g (it’s a special treat, after all!)
A little tip from my nutritionist friend – if you’re watching your intake, try cutting smaller slices. This cheesecake is so rich, a little goes a long way in satisfying your sweet tooth. Or you could do what I do – enjoy a normal slice and take an extra walk the next day!
Share Your Red Velvet Oreo Cheesecake Experience
Alright, now it’s your turn! I’d love to hear how your red velvet Oreo cheesecake adventure goes. Did you nail those perfect swirls on your first try? Maybe you came up with an amazing new variation I haven’t thought of yet? Drop a comment below and tell me all about it!
And hey – if you snapped a photo of your masterpiece (I know you did – it’s too pretty not to!), tag me on Instagram. There’s nothing I love more than seeing your kitchen creations. Questions? Don’t be shy – ask away! I’ve made this recipe more times than I can count, so I’m happy to help troubleshoot.
Finally, if this cheesecake brought as much joy to your table as it does to mine, consider giving the recipe a star rating. It helps other dessert lovers find this gem too. Now go enjoy that first glorious bite – you’ve earned it!
Print
Irresistible 2-Layer Red Velvet Oreo Cheesecake Recipe
- Total Time: 5 hours 10 minutes
- Yield: 12 servings 1x
- Diet: Vegetarian
Description
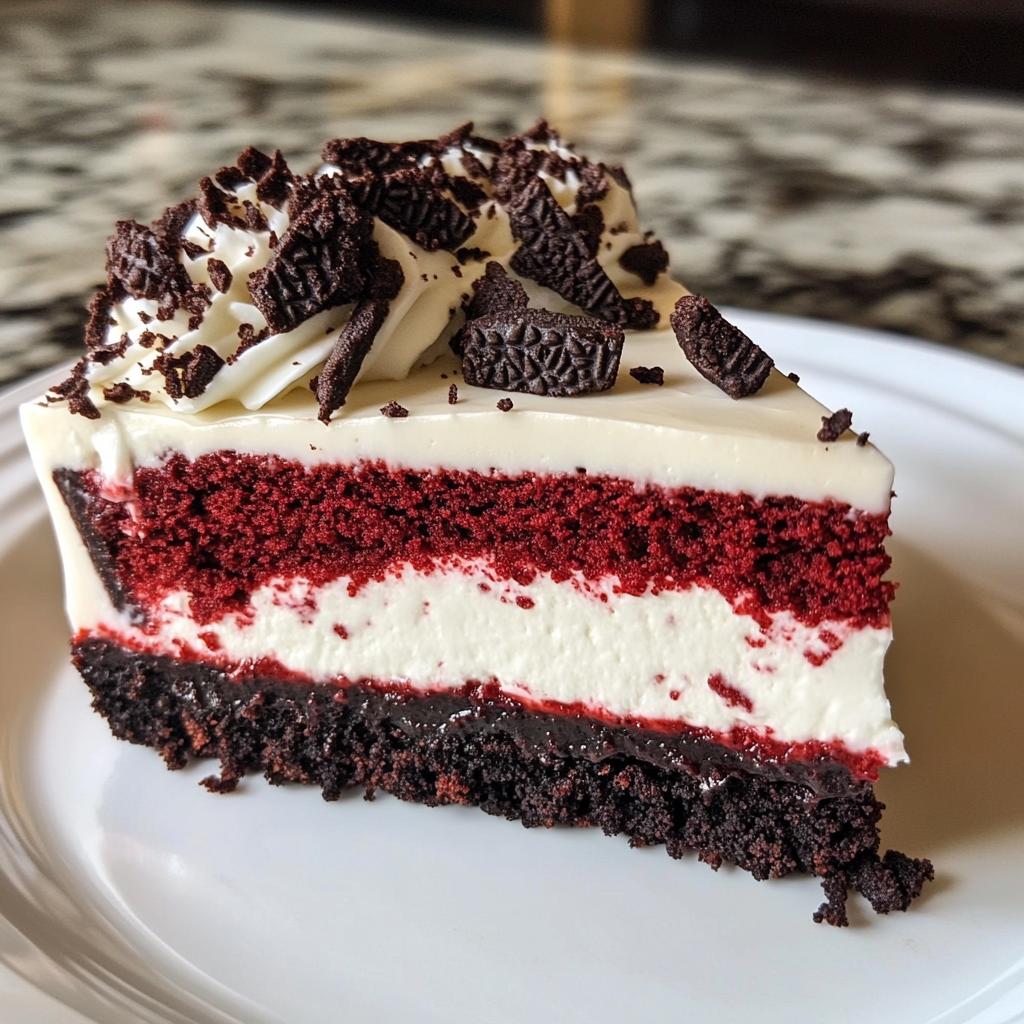
A decadent and creamy cheesecake combining the rich flavors of red velvet and Oreo cookies, perfect for any dessert lover.
Ingredients
- 2 cups Oreo cookie crumbs
- 1/4 cup melted butter
- 24 oz cream cheese, softened
- 1 cup granulated sugar
- 1 tsp vanilla extract
- 3 large eggs
- 1/2 cup sour cream
- 1/4 cup cocoa powder
- 1 tbsp red food coloring
- 1/2 cup chopped Oreo cookies
Instructions
- Preheat your oven to 325°F (163°C).
- Mix Oreo crumbs and melted butter, then press into the bottom of a 9-inch springform pan.
- Beat cream cheese and sugar until smooth. Add vanilla, eggs, and sour cream, mixing well.
- Divide the batter in half. Add cocoa powder and red food coloring to one half.
- Alternate spoonfuls of red and plain batter over the crust. Swirl gently with a knife.
- Sprinkle chopped Oreos on top.
- Bake for 45-50 minutes. Let cool, then refrigerate for at least 4 hours.
Notes
- Use room temperature ingredients for a smoother batter.
- Chill cheesecake thoroughly before serving for best texture.
- Store leftovers in the refrigerator for up to 5 days.
- Prep Time: 20 minutes
- Cook Time: 50 minutes
- Category: Dessert
- Method: Baking
- Cuisine: American
Nutrition
- Serving Size: 1 slice
- Calories: 450
- Sugar: 30g
- Sodium: 350mg
- Fat: 30g
- Saturated Fat: 15g
- Unsaturated Fat: 10g
- Trans Fat: 0g
- Carbohydrates: 40g
- Fiber: 2g
- Protein: 8g
- Cholesterol: 120mg
Keywords: Red Velvet Oreo Cheesecake, Oreo Cheesecake Recipe, Red Velvet Dessert