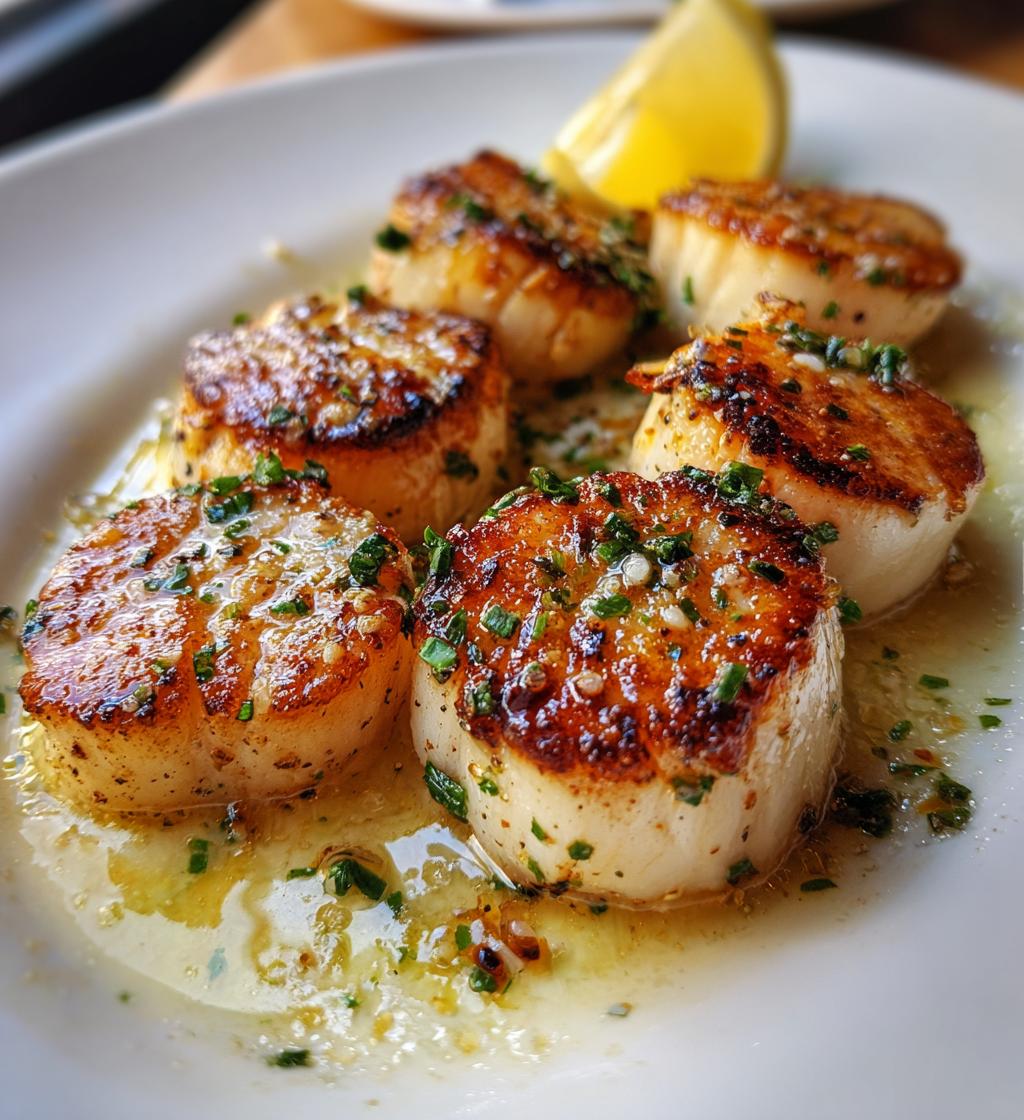
If you’re looking for a show-stopping dish that’s as simple as it is delicious, let me introduce you to my favorite seared scallops recipe. Seriously, these beauties cook up in just 16 minutes, making them perfect for a quick weeknight dinner or an elegant weekend feast. The key to this recipe lies in the technique—patting the scallops dry and achieving that golden-brown crust that locks in all their natural sweetness. Trust me, once you try searing scallops in a hot pan with a splash of olive oil and a pat of butter, you’ll wonder how something so simple can taste so divine!
The fresh lemon juice adds a bright zing that perfectly complements the rich scallops, elevating every bite. And the best part? This dish is gluten-free, making it suitable for various diets. So, let’s dive in and get cooking—you’re going to love this!
Ingredients List
- 1 pound large scallops
- 2 tablespoons extra virgin olive oil
- 2 tablespoons unsalted butter
- Salt to taste
- Pepper to taste
- Juice of 1 medium lemon
How to Prepare Instructions
Now, let’s get into the nitty-gritty of making these incredible seared scallops! Don’t worry, it’s super straightforward, and I promise you’ll feel like a culinary rockstar by the end of it.
Preparing the Scallops
First things first, you want to pat those scallops dry with a paper towel. This step is crucial! Removing excess moisture helps achieve that beautiful golden-brown crust when you sear them. Trust me, it makes a world of difference. Once they’re nice and dry, season them generously with salt and pepper. This simple seasoning elevates their natural flavor and prepares them for that glorious sear.
Searing the Scallops
Next up, it’s time to get cooking! Heat your olive oil in a skillet over medium-high heat. You want it hot enough to sizzle when the scallops hit the pan, but not so hot that it smokes. Once the oil is shimmering, carefully add the scallops to the pan, making sure not to overcrowd them—this ensures they sear properly instead of steaming. Sear them for about 2-3 minutes on one side until they turn a lovely golden brown. Then, flip them over and do the same on the other side. Oh, the smell will be heavenly!
Finishing Touches
When the scallops are perfectly seared, it’s time for the finishing touches! Add in your butter and squeeze that lemon juice over the top. This step is key for flavor enhancement—the butter adds richness, while the lemon brightens everything up beautifully. Let it all cook together for another minute, allowing the scallops to soak up those delicious flavors. Then, remove them from the heat and get ready to serve! You’re just moments away from enjoying this delightful dish.
Why You’ll Love This Recipe
- Quick Preparation: With just 10 minutes of prep and a total cooking time of only 6 minutes, you can whip up a stunning meal in under 30 minutes!
- Easy Cooking Process: The steps are straightforward, making it perfect for both beginner cooks and seasoned chefs. Just pat, season, sear, and enjoy!
- Flavorful Outcome: The combination of perfectly seared scallops, rich butter, and zesty lemon creates a mouthwatering flavor that’s sure to impress.
- Healthy Attributes: Low in carbs and high in protein, this dish is not only delicious but also nutritious, fitting well into a balanced diet.
Tips for Success
Getting those seared scallops just right can feel like a culinary dance, but with a few pro tips, you’ll be twirling around the kitchen like a star!
Use Fresh Scallops
First and foremost, always opt for fresh scallops if you can! They have a sweet, delicate flavor that frozen ones just can’t match. Look for scallops that are firm to the touch and have a slight sheen. If they smell too fishy, keep looking! Fresh scallops should smell like the ocean—clean and briny.
Don’t Overcrowd the Pan
Another crucial tip is to avoid overcrowding the pan. When you pile too many scallops in there, they’ll steam instead of sear, and you definitely want that lovely caramelization! Depending on the size of your pan, it’s best to work in batches if you’re making a larger quantity. Give each scallop room to breathe and develop that gorgeous crust.
Achieving the Right Sear
And let’s not forget about that perfect sear! Make sure your pan is hot enough; you should hear a sizzle when the scallops hit the oil. If they stick to the pan, they’re not ready to flip. Patience is key here—give them those 2-3 minutes to develop that golden-brown crust before turning them. You’ll be rewarded with a beautifully seared scallop that’s tender and juicy inside!
With these tips in your back pocket, you’re all set to make the most out of your seared scallops recipe. Enjoy every bite!
Nutritional Information Section
Now, let’s chat about the nutritional goodness packed into this delightful seared scallops recipe! Keep in mind that these values are estimates, but they give you a good idea of what you’re enjoying when you savor these tender morsels.
- Calories: 200
- Fat: 14g
- Saturated Fat: 6g
- Unsaturated Fat: 8g
- Trans Fat: 0g
- Cholesterol: 40mg
- Sodium: 400mg
- Carbohydrates: 1g
- Fiber: 0g
- Sugar: 0g
- Protein: 18g
This dish is not only incredibly tasty but also a healthy choice, filled with protein and low in carbs. Enjoy the rich flavors without any guilt! Now you can feel even better about indulging in this seafood delight!
FAQ Section
Got questions about my seared scallops recipe? No worries! I’ve gathered some of the most common queries I get, along with my personal tips to help you nail this dish every time.
What are the best side dishes to serve with seared scallops?
Ooh, the possibilities are endless! I love serving these scallops alongside a fresh arugula salad drizzled with lemon vinaigrette—it complements the scallops beautifully. You can also pair them with creamy risotto or a bed of sautéed spinach for a lovely contrast. And don’t forget about roasted vegetables; they add a nice crunch and vibrant color to your plate!
Can I use frozen scallops for this recipe?
While fresh scallops are always my go-to, frozen scallops can work in a pinch! Just make sure you thaw them completely in the fridge overnight before cooking. And remember to pat them dry well—this step is crucial for a good sear!
What variations can I try with this recipe?
If you’re feeling adventurous, why not jazz it up a bit? You could add a splash of white wine while cooking for an extra depth of flavor or toss in some minced garlic for a fragrant twist. Fresh herbs like parsley or chives sprinkled on top right before serving can also brighten things up. Feel free to get creative!
How do I know when the scallops are done cooking?
Great question! The perfect scallop should be opaque in the center and have a lovely golden crust on the outside. If you’re unsure, just cut one open—it should be slightly firm to the touch but still tender. Remember, overcooking can make them tough, so keep an eye on the time!
Can I make this recipe ahead of time?
Seared scallops are best enjoyed fresh off the pan, but if you want to prep ahead, you can season them in advance. Just hold off on the cooking until you’re ready to serve. Trust me, the texture is simply unmatched when you cook them fresh!
I hope these FAQs help you feel more confident about making your seared scallops recipe! If you have more questions, don’t hesitate to reach out. Happy cooking!
Storage & Reheating Instructions
So, you’ve made these delightful seared scallops and have some leftovers? No worries, I’ve got you covered on how to store and reheat them while keeping that amazing texture and flavor intact!
First things first, let the scallops cool down to room temperature. Once they’re cooled, transfer them to an airtight container. If you’ve got a few leftover lemon slices, toss those in too—they add a bit of extra zing when you reheat! Make sure to store them in the fridge, where they’ll be good for about 1-2 days. Just remember, scallops are best enjoyed fresh, so try to eat them up quickly!
Now, when it comes to reheating, you’ll want to be gentle to avoid overcooking. The best method is to use a skillet. Heat a bit of olive oil or butter over medium heat. Once hot, add the scallops back into the pan, cooking for just a minute on each side until warmed through. You could also sprinkle a little fresh lemon juice on top to revive that bright flavor. Avoid using the microwave if you can—it can make those lovely scallops rubbery, and we don’t want that!
There you have it! With these simple tips, you can enjoy your seared scallops even after the initial feast. Happy eating!
Print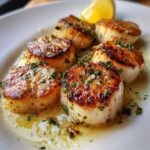
seared scallops recipe: 16-Minute Culinary Delight
- Total Time: 16 minutes
- Yield: 4 servings 1x
- Diet: Gluten Free
Description
A simple and delicious seared scallops recipe.
Ingredients
- 1 pound scallops
- 2 tablespoons olive oil
- 2 tablespoons butter
- Salt to taste
- Pepper to taste
- 1 lemon, juiced
Instructions
- Pat the scallops dry with a paper towel.
- Season with salt and pepper.
- Heat olive oil in a pan over medium-high heat.
- Add scallops and sear for 2-3 minutes on each side until golden brown.
- Add butter and lemon juice. Cook for an additional minute.
- Remove from heat and serve immediately.
Notes
- Use fresh scallops for best flavor.
- Do not overcrowd the pan while cooking.
- Prep Time: 10 minutes
- Cook Time: 6 minutes
- Category: Main Course
- Method: Searing
- Cuisine: Seafood
Nutrition
- Serving Size: 4 scallops
- Calories: 200
- Sugar: 0g
- Sodium: 400mg
- Fat: 14g
- Saturated Fat: 6g
- Unsaturated Fat: 8g
- Trans Fat: 0g
- Carbohydrates: 1g
- Fiber: 0g
- Protein: 18g
- Cholesterol: 40mg
Keywords: seared scallops recipe