There’s something truly magical about St. Patrick’s Day, isn’t there? The joy of gathering with friends and family, the vibrant greens everywhere, and of course, the delicious treats that come with the celebration! That’s where my *st patricks cookies* come into play. These delightful cookies are not just a sweet treat; they’re a festive way to spread cheer and embrace the spirit of the holiday.
Baking these cookies fills my kitchen with the warm, buttery aroma that makes your heart sing. The best part? You don’t need to be a master baker to create them! With simple ingredients and a splash of green food coloring, you’ll have the perfect cookies that look as festive as they taste. Whether you’re hosting a St. Patrick’s Day party, looking for a fun activity with kids, or simply wanting to indulge in something sweet, these *st patricks cookies* are your go-to recipe. Trust me, the smiles on everyone’s faces when they see and taste these cookies are worth every second spent in the kitchen!
Ingredients List
To whip up a batch of my delightful *st patricks cookies*, you’ll need the following ingredients. Let’s make sure you have everything ready before diving into the mixing!
- 2 cups all-purpose flour – This is the base of your cookies, giving them that perfect structure.
- 1 cup unsalted butter, softened – Make sure it’s at room temperature for easy creaming!
- 1 cup granulated sugar – This adds sweetness and helps with that lovely golden color.
- 1 large egg – It binds everything together and adds richness.
- 1 teaspoon vanilla extract – A splash of vanilla makes everything better, trust me!
- 1/2 teaspoon baking powder – This helps the cookies rise just right.
- 1/2 teaspoon salt – A pinch of salt enhances all the flavors.
- Green food coloring – This is what gives our cookies that festive St. Patrick’s Day vibe!
- 1 cup powdered sugar (for icing) – This sweet icing will top off your cookies beautifully.
- 2 tablespoons milk (for icing) – Just enough to make the icing creamy and spreadable.
- Green sprinkles – Because what’s a festive cookie without some sparkle?
Gather all these goodies, and let’s get ready to bake some joy into your kitchen!
How to Prepare Instructions
Let’s dive into the fun part – making those fabulous *st patricks cookies*! Follow these steps, and you’ll be on your way to cookie bliss in no time!
Preparing the Dough
First things first, you’ll want to cream together your softened butter and granulated sugar in a large mixing bowl. Grab a sturdy wooden spoon or an electric mixer and beat them together until the mixture is light and fluffy. This usually takes about 3-4 minutes. Next, add in your egg and vanilla extract, mixing well until everything is beautifully combined. Now, in a separate bowl, whisk together the all-purpose flour, baking powder, and salt. This is your dry mixture, and it’s essential for that perfect cookie structure.
Coloring and Shaping
Now for the fun part – the green! Gradually add the dry ingredients to your butter mixture, stirring gently until just combined. Then, it’s time to add the green food coloring! Start with a few drops and mix it in until you achieve that vibrant green color. You can always add more if you want a deeper hue. Once the color is to your liking, scoop out the dough and roll it into balls, about 1 inch in diameter. Place them on a baking sheet lined with parchment paper, making sure to leave some space between each ball for spreading.
Baking the Cookies
Preheat your oven to 350°F (175°C) while you get those cookie balls ready. Once the oven is hot, pop the baking sheet in and bake for 10-12 minutes. You’ll know they’re done when the edges are lightly golden, and the centers look just set. Don’t worry if they seem a little soft; they’ll firm up as they cool on the baking sheet for a few minutes before transferring them to a wire rack to cool completely.
Icing and Decorating
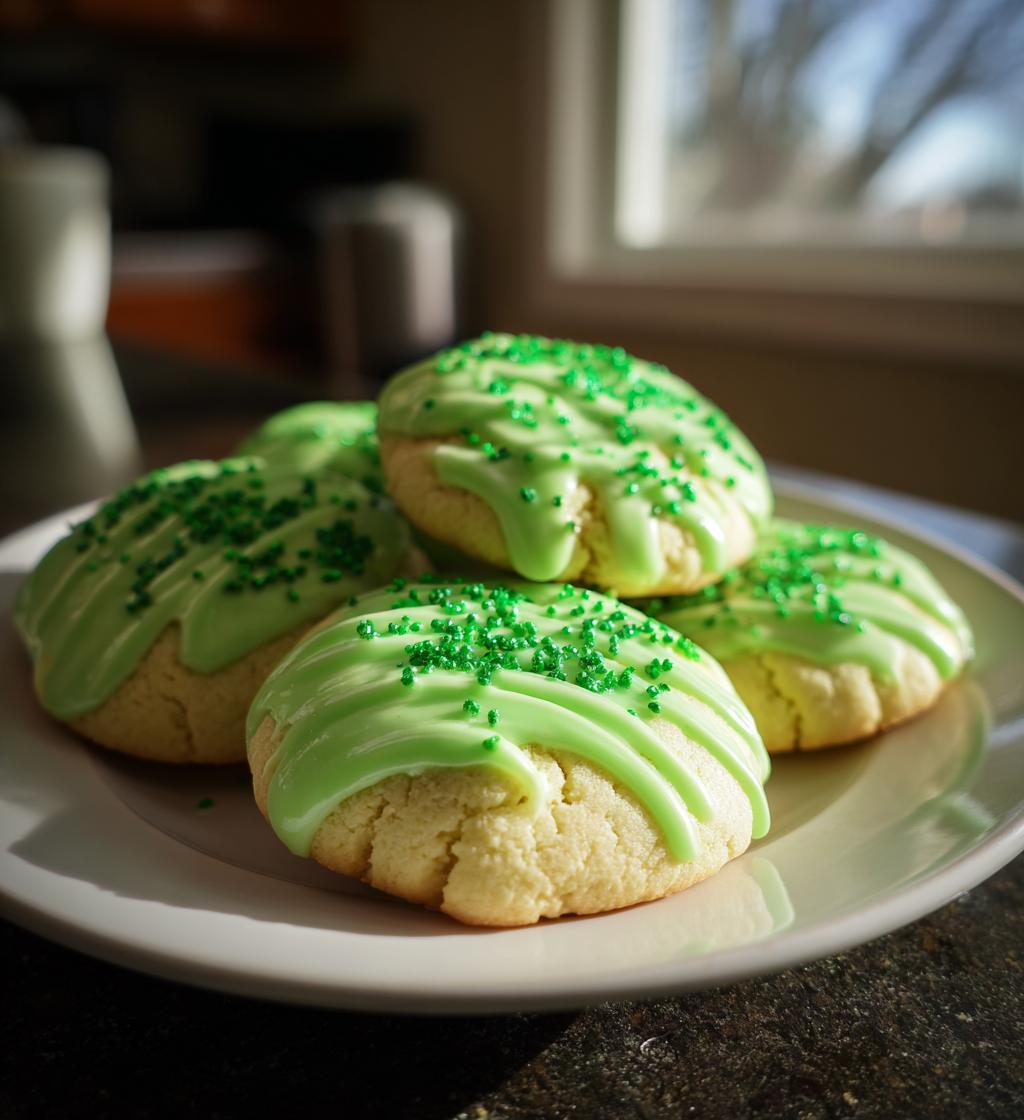
While your cookies are cooling, let’s whip up that sweet icing! In a small bowl, mix together the powdered sugar and milk until smooth – you want it to be thick but spreadable. Once your cookies are cool, generously spread the icing on top of each cookie and, of course, sprinkle on those fun green sprinkles for that festive touch. And voila! You’ve just made the most delightful *st patricks cookies* that are sure to bring smiles all around!
Nutritional Information
When you’re baking treats like my *st patricks cookies*, it’s always good to know what you’re indulging in! Here’s a typical nutritional breakdown for one cookie, but remember, these values are just estimates and can vary based on your specific ingredients and portion sizes:
- Calories: 150
- Fat: 7g
- Saturated Fat: 4g
- Unsaturated Fat: 2g
- Trans Fat: 0g
- Cholesterol: 20mg
- Sodium: 50mg
- Carbohydrates: 20g
- Fiber: 0g
- Sugar: 10g
- Protein: 1g
So, while these cookies are a delightful treat, they’re also a great way to celebrate the holiday without going too overboard! Enjoy them in moderation, and don’t forget to share the joy with friends and family!
Tips for Success
Now that you’re ready to bake those scrumptious *st patricks cookies*, here are some tried-and-true tips I’ve gathered over the years to ensure your cookies turn out perfect every time!
First up, consider chilling the dough for about 30 minutes. This might seem like an extra step, but it makes a world of difference! Chilling the dough helps it firm up, making it easier to roll into balls without sticking to your hands. Plus, it helps the cookies maintain their shape while baking, so you won’t end up with flat cookies.
Next, don’t be afraid to experiment with colors. While green is the star of the show for St. Patrick’s Day, you can mix in other colors to create fun designs. Think rainbow swirls or even pastel shades for a different twist. Just remember to start with a small amount of food coloring and gradually add more until you achieve your desired hue. It’s all about having fun!
Also, pay attention to your baking time. Ovens can vary, so keep an eye on your cookies as they bake. If you notice the edges turning golden but the centers still look a bit soft, that’s okay! They’ll firm up as they cool, and you’ll be left with a perfectly chewy interior.
Finally, if you want to enhance the flavor, consider adding a splash of almond extract along with the vanilla. It gives the cookies a lovely depth that pairs beautifully with the sweetness. Just a little goes a long way!
With these tips in mind, you’ll be well on your way to creating the best *st patricks cookies* that will delight your family and friends. Happy baking!
Variations
Now that you’ve mastered the basics of my *st patricks cookies*, let’s get creative with some fun variations! There are endless ways to put your unique spin on these cookies while still keeping the festive spirit alive.
First off, change up the colors! While green is the classic choice for St. Patrick’s Day, why not mix in some vibrant rainbow hues? You can create a swirl effect by dividing the dough into sections and adding different colors of food coloring to each. When you roll the dough into balls, do a little twist to combine the colors for a beautiful marbled look!
If you want to step up the flavor game, consider adding extracts. A splash of almond extract or peppermint extract can add a delightful twist to the traditional cookie flavor. Just remember, a little goes a long way, so start with a teaspoon and adjust to taste. These flavor additions can really elevate your cookies and make them stand out!
Another fun idea is to incorporate chocolate chips or nuts into the dough. Semi-sweet chocolate chips paired with the buttery cookie base create a delicious contrast. If you’re feeling adventurous, try adding crushed pistachios or walnuts for a bit of crunch – they’ll add both texture and a unique flavor to your cookies!
And don’t forget about the decorations! Instead of just green sprinkles, mix in some edible glitter for a magical touch. You could also use royal icing to pipe fun shapes or designs on top of the cookies. Think shamrocks, rainbows, or even little pots of gold! The sky’s the limit when it comes to how you can make these cookies your own.
With these variations, your *st patricks cookies* will be sure to impress, making each batch a new and exciting adventure in baking. So gather your ingredients, channel your inner artist, and let the creativity flow!
Storage & Reheating Instructions
Once you’ve baked and decorated your delightful *st patricks cookies*, you’ll want to make sure they stay fresh for as long as possible. To do this, simply store your cookies in an airtight container. This helps keep them soft and prevents them from drying out. A cookie jar with a tight seal works wonderfully, or you can use a plastic storage container lined with parchment paper to keep them safe.
If you’ve sprinkled on some icing, just make sure the icing is completely set before stacking them in the container. This way, you won’t end up with any messy icing smudges. I usually recommend layering them with strips of parchment paper in between to keep them from sticking together.
Now, if you find yourself with leftover cookies (which can be hard to believe, but it happens!), you can keep them at room temperature for up to a week. If you want to save them for longer, consider freezing them! Just place the cookies in a single layer on a baking sheet and freeze until solid. Then, transfer them to a freezer-safe container or a resealable plastic bag, separating layers with parchment paper.
When you’re ready to enjoy a cookie (or two!), you can simply take them out of the freezer and let them thaw at room temperature for about 15-20 minutes. If you prefer them warm, you can pop them in the microwave for about 10-15 seconds. Just be careful not to overdo it! You want them warm and gooey, not hot and crumbly.
With these simple storage and reheating tips, you’ll be able to savor your *st patricks cookies* long after the holiday has passed. Enjoy every delightful bite!
FAQ Section
Got questions about my *st patricks cookies*? No worries! I’ve got you covered with answers to some common queries that pop up when baking these festive treats. Let’s dive in!
Can I substitute ingredients in this recipe?
Absolutely! If you’re out of unsalted butter, you can use salted butter, but just remember to reduce the added salt in the recipe. For a dairy-free option, try using a plant-based butter or shortening. If you need to skip the egg, you can use a flax egg (1 tablespoon of ground flaxseed mixed with 2.5 tablespoons of water) or even unsweetened applesauce – about 1/4 cup should do the trick!
How do I store the cookies properly?
Storing your cookies in an airtight container is key to keeping them fresh. They’ll stay soft and delicious for about a week at room temperature. If you want to keep them for longer, freezing is a great option! Just ensure they’re in a single layer on a baking sheet until frozen solid, then transfer them to a freezer-safe bag or container.
What if my dough is too sticky?
Don’t panic! If the dough feels too sticky to handle, you can chill it in the fridge for about 30 minutes. This will firm it up and make it easier to roll into balls. If you still find it sticky after chilling, sprinkle a little extra flour on your hands while rolling.
Can I use a different color for the cookies?
Of course! While green is the traditional choice for St. Patrick’s Day, feel free to experiment with any color you like! You can mix in a rainbow of colors for a fun twist or even use pastel shades for a springtime feel. Just remember to add the food coloring gradually until you reach your desired shade!
How can I make the icing less sweet?
If you find the icing a bit too sweet for your taste, you can add a tiny pinch of salt to balance the sweetness. Another option is to mix in a bit of cream cheese with the powdered sugar and milk for a tangy flavor that cuts through the sweetness. Just make sure to adjust the sugar accordingly to maintain the right consistency!
With these answers, I hope you feel more confident about baking my *st patricks cookies*! If you have any more questions, don’t hesitate to reach out. Happy baking, and may your cookies bring joy to all who taste them!
Print
St Patricks Cookies: 7 Joyful Tips for Festive Baking
- Total Time: 27 minutes
- Yield: 24 cookies 1x
- Diet: Vegetarian
Description
Delicious cookies decorated for St. Patrick’s Day.
Ingredients
- 2 cups all-purpose flour
- 1 cup unsalted butter, softened
- 1 cup granulated sugar
- 1 large egg
- 1 teaspoon vanilla extract
- 1/2 teaspoon baking powder
- 1/2 teaspoon salt
- Green food coloring
- 1 cup powdered sugar (for icing)
- 2 tablespoons milk (for icing)
- Green sprinkles
Instructions
- Preheat your oven to 350°F (175°C).
- In a bowl, cream together butter and sugar.
- Add in egg and vanilla extract, mix well.
- In another bowl, whisk together flour, baking powder, and salt.
- Gradually add dry ingredients to wet ingredients.
- Mix in green food coloring until desired color is achieved.
- Roll dough into balls and place them on a baking sheet.
- Bake for 10-12 minutes or until edges are golden.
- Let cookies cool on a wire rack.
- Mix powdered sugar and milk to create icing and decorate cookies.
- Add green sprinkles on top of icing.
Notes
- Store cookies in an airtight container.
- You can use different colors for decoration.
- Chill dough for 30 minutes for easier handling.
- Prep Time: 15 minutes
- Cook Time: 12 minutes
- Category: Dessert
- Method: Baking
- Cuisine: Irish
Nutrition
- Serving Size: 1 cookie
- Calories: 150
- Sugar: 10g
- Sodium: 50mg
- Fat: 7g
- Saturated Fat: 4g
- Unsaturated Fat: 2g
- Trans Fat: 0g
- Carbohydrates: 20g
- Fiber: 0g
- Protein: 1g
- Cholesterol: 20mg
Keywords: st patricks cookies, holiday cookies, festive cookies