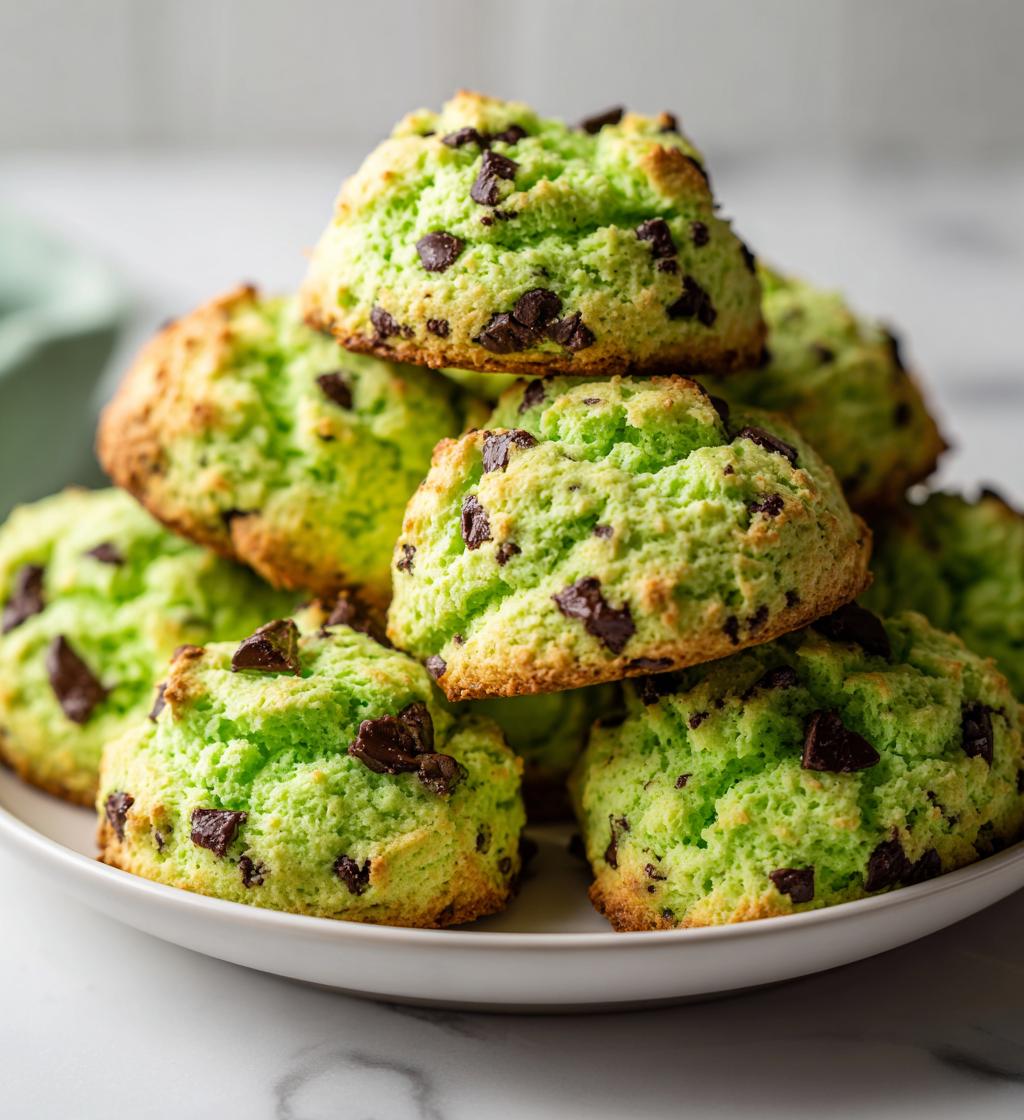
St. Patrick’s Day is one of those magical times of the year when everyone gets to wear a little green and celebrate with joy and laughter. I can’t help but get excited thinking about all the festivities — parades, music, and, of course, the delicious food! And let me tell you, these *St. Patrick’s Day treats* are a must-have for your celebrations. They’re not just any dessert; they’re a delightful burst of color and flavor that adds an extra sprinkle of fun to the day.
Every year, I whip up a batch of these treats to share with my family and friends. There’s something so satisfying about seeing their eyes light up when they take a bite of those vibrant green goodies. It’s like a little bite of happiness! I remember one St. Patrick’s Day when my niece helped me bake them, and we both ended up with more green food coloring on our hands than in the batter! Those moments are what make this recipe special — they’re not just treats, they’re memories waiting to happen. So, grab your mixing bowl, and let’s get baking to bring a taste of the Emerald Isle to your home!
Ingredients List
To whip up these festive *St. Patrick’s Day treats*, you’ll need the following ingredients. Trust me, having everything prepped and ready makes the baking process so much smoother!
- 2 cups all-purpose flour
- 1 cup sugar
- 1/2 cup unsalted butter, softened
- 2 large eggs
- 1 cup milk
- 1 tablespoon baking powder
- 1 teaspoon vanilla extract
- 1/2 teaspoon salt
- Green food coloring (adjust to your desired shade)
- 1 cup chocolate chips (or substitute with nuts if you prefer)
Make sure to measure everything accurately! It really helps in getting that perfect texture and flavor. Happy baking!
How to Prepare *St Patricks Day Treats*
Alright, let’s dive into the fun part — making these scrumptious *St. Patrick’s Day treats*! Follow these simple steps, and you’ll have a vibrant batch ready in no time. Trust me, it’s easier than you might think!
Preheat and Prepare
First things first, preheat your oven to 350°F (175°C). This is super important because it ensures your treats bake evenly. While that’s heating up, grab your baking pan and grease it well. I like to use a bit of butter or cooking spray to make sure those delicious goodies don’t stick. Nothing worse than a stuck treat — yikes!
Mixing Dry Ingredients
In a separate bowl, it’s time to mix your dry ingredients. Combine the flour, baking powder, and salt together. I usually whisk them together until they’re nicely blended. This step helps to ensure that the baking powder is evenly distributed, which means your treats will rise perfectly!
Creaming Butter and Sugar
Now for the fun part! In another bowl, cream together the softened butter and sugar until it’s light and fluffy. You want to beat it for about 2-3 minutes. It should look pale and creamy, almost like whipped honey! This process creates air pockets that will give your treats that lovely texture. Don’t rush this step; it’s key to the final result!
Combining Ingredients
Once your butter and sugar are ready, it’s time to add the eggs and vanilla extract. Mix them in until everything is well combined. Then, gradually incorporate your dry ingredients into this wet mixture. I like to add it in three parts, alternating with the milk, to keep it smooth. Just be gentle — overmixing can lead to dense treats, and we want them fluffy!
Adding Color and Chocolate
Now comes the fun part: adding the color! Stir in the milk and a few drops of green food coloring until you reach your desired shade of green. I usually start with one drop and go from there; you can always add more! Then, fold in those chocolate chips (or nuts, if that’s your jam) until they’re evenly distributed throughout the batter. It’s starting to look festive already!
Baking the Treats
Pour your batter into the greased baking pan and spread it out evenly. Pop it in the preheated oven and bake for 25-30 minutes. To check for doneness, stick a toothpick in the center; if it comes out clean or with just a few crumbs, you’re good to go! Let them cool in the pan for a few minutes, then transfer them to a wire rack to cool completely. The anticipation is half the fun!
Why You’ll Love These *St Patricks Day Treats*
These *St. Patrick’s Day treats* are not just a delightful addition to your celebration; they’re practically bursting with joy and flavor! Here’s why you’ll love them:
- Festive Fun: Their vibrant green color makes them the star of any St. Patrick’s Day gathering, instantly lifting everyone’s spirits!
- Easy to Make: With simple ingredients and straightforward steps, even beginner bakers can whip these up without a hitch.
- Deliciously Decadent: The combination of buttery goodness and rich chocolate chips creates a treat that’s hard to resist.
- Perfect for Sharing: With a yield of 12 servings, they’re ideal for parties or family get-togethers — everyone can enjoy a piece!
- Customizable: Feel free to play around with flavors and colors, making each batch uniquely yours!
Tips for Success
Want to make sure your *St. Patrick’s Day treats* turn out perfectly? Here are some tried-and-true tips that I swear by, plus a little encouragement to get creative!
- Room Temperature Ingredients: Make sure your butter and eggs are at room temperature before you start. This helps them blend together smoothly and creates a better texture in your treats.
- Don’t Skimp on the Creaming: Remember to cream your butter and sugar until it’s light and fluffy! This step is crucial for achieving that delightful texture.
- Adjusting the Color: When it comes to the green food coloring, don’t be afraid to experiment! Start with a few drops and keep adding until you get that perfect shade of green. Your treats can be as vibrant or subtle as you like!
- Mix It Up: Feel free to swap out chocolate chips for other mix-ins like white chocolate, butterscotch, or even dried fruit. Each variation adds a unique twist that keeps things fun!
- Check for Doneness: Ovens can vary, so keep an eye on your treats as they bake. If they look golden on top and a toothpick comes out clean, it’s time to take them out!
With these tips, you’ll be well on your way to baking up some amazing *St. Patrick’s Day treats*. So roll up your sleeves, have fun, and don’t forget to enjoy the process! Happy baking!
Variations on *St Patricks Day Treats*
One of the best things about these *St. Patrick’s Day treats* is how easily you can mix things up to make them your own! Here are some fun variations to consider, so you can keep the festivities fresh and exciting every year:
- Chocolate Chip Swaps: Instead of regular chocolate chips, try using white chocolate chips for a sweet contrast against the green batter. Or go for dark chocolate chips for a richer flavor — both are delicious!
- Nuts for Crunch: If you love a little crunch, add chopped walnuts or pecans to the batter. They add a lovely texture and a nutty flavor that pairs beautifully with the sweetness.
- Minty Freshness: For a refreshing twist, mix in some peppermint extract along with the vanilla. You could also sprinkle crushed mint candies on top for a delightful finishing touch.
- Fruit Frenzy: Consider adding some chopped dried fruits like cranberries or apricots for a burst of flavor. They not only enhance the taste but also add a pop of color!
- Frosted Goodness: If you’re in the mood for something extra, top your treats with a light cream cheese frosting or a simple glaze. A sprinkle of green sprinkles on top makes them even more festive!
These variations not only make your *St. Patrick’s Day treats* unique, but they also let you play around with flavors and textures. Feel free to experiment and find your favorite combo — the possibilities are endless and so much fun!
Nutritional Information
Here’s a quick breakdown of the estimated nutritional values for each piece of these delightful *St. Patrick’s Day treats*. Keep in mind, these are just estimates, but they give you a good idea of what you’re enjoying!
- Calories: 200
- Fat: 8g
- Saturated Fat: 5g
- Unsaturated Fat: 2g
- Trans Fat: 0g
- Cholesterol: 40mg
- Sodium: 150mg
- Carbohydrates: 30g
- Fiber: 1g
- Protein: 3g
- Sugar: 15g
This gives you a nice balance of flavors and treats, making them perfect for celebrating without too much guilt. Enjoy every bite, and remember that sharing with friends makes it even sweeter!
FAQ Section
Got questions about these delightful *St. Patrick’s Day treats*? Don’t worry, I’ve got you covered! Here are some common queries that might pop up, along with helpful answers to ensure your baking adventure goes smoothly.
Q: How should I store my *St. Patrick’s Day treats*?
A: To keep your treats fresh, store them in an airtight container at room temperature. They’ll stay delicious for about 3-4 days. If you want to keep them longer, you can freeze them! Just wrap them tightly in plastic wrap and place them in a freezer-safe bag. They should last for up to 3 months. When you’re ready to enjoy, simply let them thaw at room temperature!
Q: Can I substitute any of the ingredients?
A: Absolutely! If you’re looking to make these treats a bit healthier, you can substitute half of the all-purpose flour with whole wheat flour. You can also swap the sugar for a natural sweetener like honey or maple syrup, but keep in mind that it may alter the texture slightly. For a dairy-free option, use coconut oil instead of butter and almond milk in place of regular milk.
Q: What can I do if my batter seems too thick or too runny?
A: If your batter is too thick, you can add a splash more milk to loosen it up. Just do it gradually; you want the batter to be pourable but still hold its shape. On the flip side, if it’s too runny, try adding a bit more flour, a tablespoon at a time, until you reach the right consistency. Remember, a little patience goes a long way!
Q: How can I enhance the flavor of my *St. Patrick’s Day treats*?
A: For an extra flavor boost, consider adding a pinch of cinnamon or nutmeg to the dry ingredients. A splash of almond extract can also add a lovely depth of flavor. If you’re feeling adventurous, try mixing in some citrus zest — lemon or lime zest can brighten everything up and complement the sweetness beautifully!
Q: Can I make these ahead of time?
A: Yes, you can! If you want to get a head start, you can prepare the batter a day in advance and store it in the fridge. Just give it a stir before pouring it into the baking pan. Or, you can bake the treats ahead of time and store them as mentioned earlier. Just remember to add any frosting or toppings right before serving for the best presentation!
Hopefully, these FAQs help you feel more confident in making your *St. Patrick’s Day treats*! If you have any other questions, feel free to reach out. Happy baking!
Print
St Patrick’s Day Treats: 5 Fun Recipes to Celebrate Joy
- Total Time: 45 minutes
- Yield: 12 servings 1x
- Diet: Vegetarian
Description
Delicious treats for St. Patrick’s Day.
Ingredients
- 2 cups all-purpose flour
- 1 cup sugar
- 1/2 cup unsalted butter
- 2 large eggs
- 1 cup milk
- 1 tablespoon baking powder
- 1 teaspoon vanilla extract
- 1/2 teaspoon salt
- Green food coloring
- 1 cup chocolate chips
Instructions
- Preheat your oven to 350°F (175°C).
- In a bowl, mix flour, baking powder, and salt.
- In another bowl, cream butter and sugar until light.
- Add eggs and vanilla, mix well.
- Gradually add flour mixture to the wet ingredients.
- Stir in milk and green food coloring until desired color is reached.
- Add chocolate chips and mix.
- Pour batter into greased baking pan.
- Bake for 25-30 minutes or until a toothpick comes out clean.
- Let cool before serving.
Notes
- Can substitute chocolate chips with nuts.
- Adjust food coloring for a deeper green.
- For added flair, top with green sprinkles.
- Prep Time: 15 minutes
- Cook Time: 30 minutes
- Category: Dessert
- Method: Baking
- Cuisine: Irish
Nutrition
- Serving Size: 1 piece
- Calories: 200
- Sugar: 15g
- Sodium: 150mg
- Fat: 8g
- Saturated Fat: 5g
- Unsaturated Fat: 2g
- Trans Fat: 0g
- Carbohydrates: 30g
- Fiber: 1g
- Protein: 3g
- Cholesterol: 40mg
Keywords: St. Patrick's Day treats, festive desserts, green treats