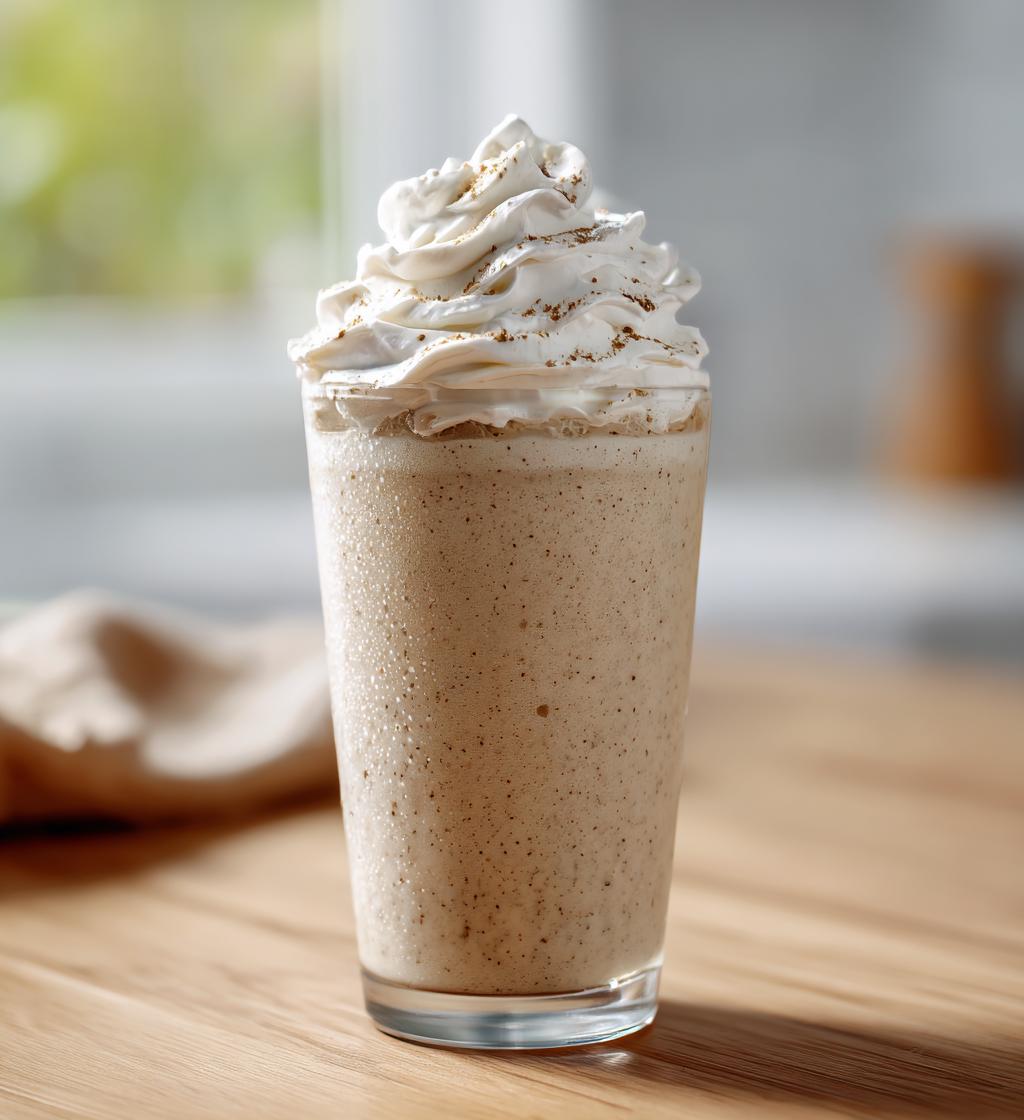
There’s something magical about whipping up your own drinks at home, isn’t there? The aroma fills the air, and suddenly, your kitchen transforms into your favorite café. One of my absolute go-to drinks is the *Starbucks Vanilla Bean Frappuccino DIY*. I can’t tell you how many hot summer days this delightful treat has saved me from the heat! It’s creamy, refreshing, and bursting with that classic vanilla flavor that just makes your taste buds dance with joy.
Every time I make this frappuccino, I’m reminded of cozy afternoons spent with friends, chatting over iced drinks. The best part? You can easily customize it to suit your taste. Want it a little sweeter? Go for it! Prefer it a bit thicker? Just toss in some more ice. This recipe is not just about quenching your thirst; it’s about creating a moment of joy in your day. Trust me, once you try making this at home, you’ll wonder why you ever bought it from the store! Let’s dive into the ingredients and get started on this delicious journey together!
Ingredients List
Here’s what you’ll need to create your own delightful homemade *Starbucks Vanilla Bean Frappuccino DIY*. I like to gather everything first, so I’m ready to blend away!
- 2 cups ice: Fresh ice cubes work best for that perfect slushy texture. Don’t skimp on this – it’s key!
- 1 cup milk: You can use any type of milk you prefer. I usually go for whole milk, but almond or oat milk can make this drink dairy-free, too!
- 1/2 cup heavy cream: This adds that rich, creamy goodness we all love. The more, the merrier, right?
- 1/4 cup vanilla bean ice cream: Make sure it’s real vanilla bean ice cream for the best flavor. It’s like the cherry on top!
- 1 tablespoon vanilla extract: This is where the magic happens! A splash of quality vanilla extract takes the flavor up a notch.
- 2 tablespoons sugar: Sweeten to your liking! You can adjust this based on your personal preference – it’s all about what you love.
With these simple yet rich ingredients, you’re all set to blend up a deliciously refreshing drink that’ll leave you craving more. Gather them up, and let’s get blending!
How to Prepare Starbucks Vanilla Bean Frappuccino DIY
Now, let’s get to the fun part – making your own *Starbucks Vanilla Bean Frappuccino DIY*! This process is super straightforward, and I promise you’ll be sipping on your homemade delight in no time. Just follow these simple steps, and you’ll be well on your way to enjoying a café-quality drink right at home.
Step 1: Blend the Base
First things first, let’s create that luscious base for our frappuccino! Grab your blender and toss in the 2 cups of ice, 1 cup of milk, and 1/2 cup of heavy cream. I usually start with the ice to ensure it blends smoothly. Blend everything together on high speed for about 30 seconds or until the mixture is nice and smooth. You’re looking for a slushy consistency, where the ice is fully crushed and incorporated. If it looks too chunky or thick, don’t hesitate to give it another quick blend. You want it to flow easily but still have that thick frappuccino vibe!
Step 2: Add Flavorings
Once you’ve got that smooth base, it’s time to bring in the flavor! Add in 1/4 cup of vanilla bean ice cream, 1 tablespoon of vanilla extract, and 2 tablespoons of sugar to the blender. This is where the magic truly happens! Blend everything together again for another 20-30 seconds. You want to make sure the ice cream is fully mixed in and the sugar dissolves nicely. Give it a quick taste – if you want it sweeter, feel free to add a bit more sugar. Blend again as needed until everything is perfectly combined. You’ll love the way the sweet vanilla aroma fills your kitchen!
Step 3: Serve
Now comes the best part – serving your creation! Grab a tall glass and pour your frappuccino mixture in, filling it to your desired level. If you’re feeling extra indulgent, top it off with some whipped cream for that classic café touch. It adds a rich creaminess that complements the vanilla flavor so well. You can even sprinkle a little extra sugar or drizzle some caramel sauce on top for a fancy twist. I love serving mine with a cute straw and a smile! Enjoy your homemade Starbucks Vanilla Bean Frappuccino DIY while it’s cold, and take a moment to savor your hard work. You deserve it!
Nutritional Information
Here’s the scoop on the nutritional values for one serving of your delightful *Starbucks Vanilla Bean Frappuccino DIY*. Keep in mind that these values are estimates and can vary based on specific ingredients and portion sizes you choose.
- Calories: 300
- Sugar: 30g
- Sodium: 150mg
- Fat: 15g
- Saturated Fat: 10g
- Unsaturated Fat: 5g
- Trans Fat: 0g
- Carbohydrates: 35g
- Fiber: 0g
- Protein: 6g
- Cholesterol: 45mg
This creamy treat is definitely a splurge, but hey, it’s homemade! You can always adjust ingredients like the sugar or cream to suit your dietary needs and preferences. Enjoy your frappuccino while keeping these numbers in mind, and remember – it’s all about balance!
Why You’ll Love This Recipe
This *Starbucks Vanilla Bean Frappuccino DIY* recipe is a true gem for anyone who loves a refreshing treat at home. Here’s why you’ll adore making this drink:
- Quick Preparation: With just 10 minutes of prep time, you can whip up this delicious frappuccino and enjoy it in no time!
- Delicious Flavor: The rich vanilla flavor combined with creamy textures is simply irresistible. It’s like a summer hug in a glass!
- Customizable Ingredients: You can easily adjust the sweetness, thickness, or even substitute ingredients to match your dietary preferences. Feeling adventurous? Try adding a splash of espresso for a coffee kick!
- Homemade Happiness: There’s something special about creating your own drinks. It’s not just about the taste; it’s about the joy of making something delicious from scratch!
Trust me, once you start making this, you’ll find yourself craving it again and again!
Tips for Success
To make sure your *Starbucks Vanilla Bean Frappuccino DIY* turns out absolutely perfect, here are some pro tips that I swear by:
- Perfect Ice: Use fresh ice cubes for the best texture. If your ice has been sitting in the freezer for a while, it can absorb odors and affect the flavor. Fresh is best!
- Chill Your Glass: For an extra frosty experience, pop your serving glass in the freezer for a few minutes before pouring in the frappuccino. It keeps your drink colder for longer!
- Blend in Batches: If you’re making a larger batch, blend in smaller portions. This ensures everything gets mixed evenly and keeps the texture just right.
- Quality Ingredients: Invest in high-quality vanilla bean ice cream and vanilla extract. It makes a noticeable difference in flavor that you won’t regret!
- Taste as You Go: Don’t hesitate to taste your mixture before serving. Adjust the sweetness or creaminess to your liking for a personalized touch!
With these tips in hand, you’ll be on your way to crafting a frappuccino that rivals your favorite coffee shop! Enjoy the process and have fun experimenting!
Variations
If you’re feeling adventurous or just want to switch things up a bit, here are some fun variations on the *Starbucks Vanilla Bean Frappuccino DIY* that you can easily try out. Each twist can give your frappuccino a new personality and keep things exciting!
- Chocolate Vanilla Bean Frappuccino: Add 2 tablespoons of chocolate syrup to the blender for a delicious chocolatey twist. You can even mix in some chocolate chips for added texture!
- Strawberry Vanilla Bean Frappuccino: Toss in a handful of fresh or frozen strawberries along with the other ingredients. This fruity addition gives a refreshing berry flavor that’s perfect for summer!
- Matcha Vanilla Bean Frappuccino: For a unique and earthy flavor, blend in 1-2 teaspoons of matcha powder. It’s a delightful way to enjoy the benefits of green tea while keeping that creamy vanilla base.
- Coconut Vanilla Bean Frappuccino: Substitute coconut milk for the regular milk and add 1/4 cup of shredded coconut. This variation gives your frappuccino a tropical flair that’s simply irresistible!
- Espresso Vanilla Bean Frappuccino: For a coffee kick, add 1 shot of espresso or strong brewed coffee to the mix. This will give you that perfect caffeinated boost while still tasting like a smooth vanilla dream!
Feel free to mix and match these ideas or come up with your own unique combinations. The beauty of this recipe is that it’s totally adaptable to your taste buds, so get creative and enjoy every sip!
Storage & Reheating Instructions
If you happen to have any leftovers from your *Starbucks Vanilla Bean Frappuccino DIY*, don’t worry! Storing it is super easy. Just pour any remaining frappuccino into an airtight container and pop it in the fridge. It’ll keep well for about 1-2 days, but trust me, it’s best enjoyed fresh!
When you’re ready to indulge again, give it a good shake or stir to recombine the ingredients since it may separate a bit in the fridge. If you find it’s too thick after chilling, feel free to add a splash of milk and blend it again until it reaches your desired consistency. Enjoying your homemade frappuccino at its best is just a quick blend away!
FAQ Section
Q1. Can I make a dairy-free version of the Starbucks Vanilla Bean Frappuccino DIY?
Absolutely! To make this frappuccino dairy-free, simply substitute the regular milk and heavy cream with almond milk, coconut milk, or any plant-based milk you prefer. Just ensure your vanilla bean ice cream is also dairy-free for the best results!
Q2. How can I adjust the sweetness of my frappuccino?
If you find it’s not sweet enough for your taste, you can easily add more sugar during the blending process. Start with an extra teaspoon and blend again, tasting until it’s just right for you. Remember, you can always add more, but it’s tough to take it out!
Q3. What if I don’t have vanilla bean ice cream?
No worries! If you can’t find vanilla bean ice cream, regular vanilla ice cream will work just fine. You’ll still get that creamy, dreamy vanilla flavor. You might even consider adding a touch of vanilla bean paste for an extra kick!
Q4. Can I make this frappuccino ahead of time?
You can prepare the frappuccino mixture ahead of time and store it in the fridge for up to 1-2 days. Just remember to give it a good stir or blend again before serving, as it may separate while sitting. Fresh ice added right before serving can also help bring back that frosty texture!
Q5. How can I make this frappuccino thicker?
If you like your frappuccino extra thick, just add more ice to the blender! You can also reduce the amount of milk or cream a bit to achieve that perfect creamy consistency. Just blend until it reaches your desired thickness!
Starbucks Vanilla Bean Frappuccino DIY: 5 Steps to Bliss
- Total Time: 10 minutes
- Yield: 2 servings 1x
- Diet: Vegetarian
Description
Homemade Starbucks Vanilla Bean Frappuccino.
Ingredients
- 2 cups ice
- 1 cup milk
- 1/2 cup heavy cream
- 1/4 cup vanilla bean ice cream
- 1 tablespoon vanilla extract
- 2 tablespoons sugar
Instructions
- Blend ice, milk, and heavy cream until smooth.
- Add vanilla bean ice cream, vanilla extract, and sugar.
- Blend again until fully combined.
- Pour into a glass and top with whipped cream if desired.
Notes
- Use more or less sugar to taste.
- Substitute almond milk for a dairy-free version.
- Adjust ice quantity for desired thickness.
- Prep Time: 10 minutes
- Cook Time: 0 minutes
- Category: Beverage
- Method: Blending
- Cuisine: American
Nutrition
- Serving Size: 1 serving
- Calories: 300
- Sugar: 30g
- Sodium: 150mg
- Fat: 15g
- Saturated Fat: 10g
- Unsaturated Fat: 5g
- Trans Fat: 0g
- Carbohydrates: 35g
- Fiber: 0g
- Protein: 6g
- Cholesterol: 45mg
Keywords: starbucks vanilla bean frappuccino diy