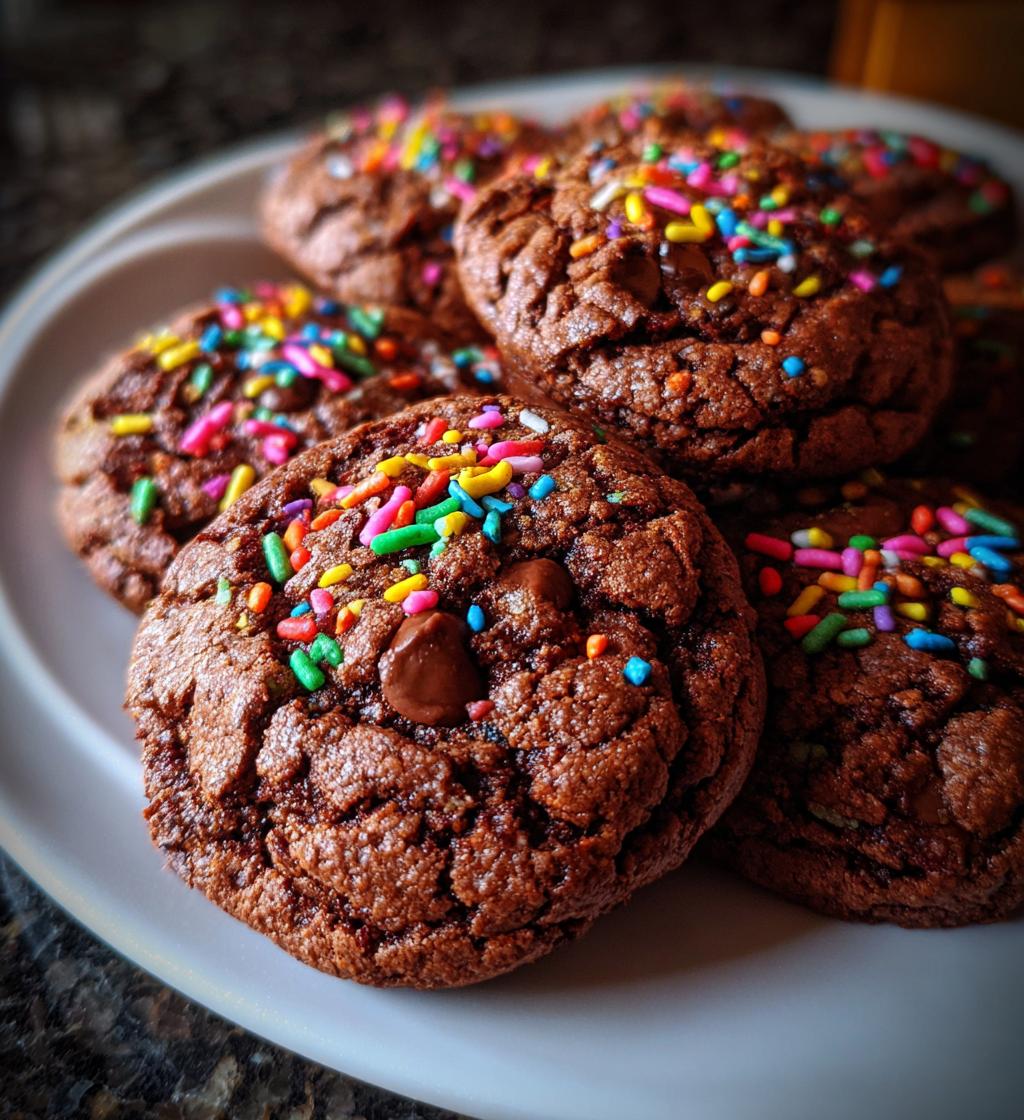
There’s something extra special about whipping up treats for Valentine’s Day, isn’t there? These cookies are not just delicious; they’re a canvas for creativity and love! I remember baking these with my kids, their tiny hands covered in flour and sprinkles flying everywhere. It’s a fun mess that turns into sweet, heart-shaped goodies! The best part? You can decorate them however you like – with colorful sprinkles, chocolate drizzles, or even cute little messages. Each bite is a delightful burst of chocolatey goodness that brings smiles all around. Trust me, whether you’re sharing them with friends, family, or that special someone, these Valentine’s Day treats will make your heart feel as warm as they taste!
Ingredients for Valentine’s Day Treats
Here’s what you’ll need to whip up these delightful Valentine’s Day treats. Gather these ingredients, and let’s get baking!
- 1 cup sugar
- 1/2 cup butter, softened to room temperature
- 2 cups all-purpose flour
- 1/2 cup cocoa powder
- 1 teaspoon baking powder
- 1/2 teaspoon salt
- 2 large eggs
- 1 teaspoon vanilla extract
- 1 cup chocolate chips
- Sprinkles for decoration
How to Prepare Valentine’s Day Treats
Now, let’s dive into the fun part—making these delightful Valentine’s Day treats! Follow these steps, and you’ll be on your way to baking up a storm in no time.
Step 1: Preheat the Oven
First things first, you’ll want to preheat your oven to 350°F (175°C). This step is super important because a properly heated oven ensures your cookies bake evenly and rise just right. Don’t skip it! While the oven warms up, you can gather your ingredients and get everything ready to go.
Step 2: Cream Sugar and Butter
Next, let’s cream together the sugar and butter until it’s light and fluffy. I usually start with softened butter—think room temperature, not melted. It should be soft enough to leave a finger mark when you poke it but still hold its shape. Using a sturdy mixing bowl, beat the butter for about 2-3 minutes, adding the sugar gradually. You’re looking for a texture that’s airy and pale, almost like whipped honey. This is what gives your cookies that lovely, tender crumb!
Step 3: Add Eggs and Vanilla
Once your butter and sugar are fluffy, it’s time to mix in the eggs and vanilla extract. I crack my eggs into a small bowl first to avoid any shell mishaps—trust me, it happens! Add the eggs one at a time, mixing well after each addition. This helps incorporate them fully into the batter. Finally, pour in that lovely vanilla extract; it adds that warm, inviting flavor that makes these cookies irresistible!
Step 4: Combine Dry Ingredients
Now, grab another bowl and mix the dry ingredients together: the flour, cocoa powder, baking powder, and salt. Whisk them gently until they’re combined. This step is key to evenly distributing the baking powder and salt, which helps your cookies rise beautifully. You want to avoid any pockets of flour or cocoa hanging out in your batter!
Step 5: Mix Wet and Dry Ingredients
It’s time to bring it all together! Gradually add the dry mixture to the wet ingredients. I like to do this in three parts, mixing gently after each addition. This helps create a smooth batter without overmixing, which can make your cookies tough. You want to stop mixing as soon as you see the last bit of flour disappear—lumps are totally okay!
Step 6: Stir in Chocolate Chips
Now for my favorite part—stirring in the chocolate chips! Fold them into the batter gently, ensuring they’re evenly distributed throughout. I always use a mix of semi-sweet and milk chocolate chips for that perfect balance of sweetness and richness. Just imagine those melty chocolate pockets in every bite!
Step 7: Prepare Baking Sheet
Time to prepare your baking sheet! Line it with parchment paper or a silicone mat for easy cleanup. Using a spoon or a cookie scoop, drop spoonfuls of dough onto the sheet, giving them a bit of space to spread out while they bake. I usually leave about 2 inches between each dollop to avoid any cookie collisions!
Step 8: Baking Time
Pop those cookies in the oven and bake for 10-12 minutes. You’ll know they’re ready when the edges are set but the centers still look slightly soft—don’t worry, they’ll firm up as they cool. I usually set a timer for 10 minutes and then start checking for doneness. A light golden color is your cue!
Step 9: Cooling and Decorating
Once baked, remove the cookies from the oven and let them rest on the baking sheet for about 5 minutes. This helps them hold their shape before transferring them to a wire rack to cool completely. Once they’re cool, it’s time for the fun part—decorating! Grab your sprinkles and get creative. A little sprinkle action makes them look like true Valentine’s Day treats!
Nutritional Information Disclaimer
As you whip up these delightful Valentine’s Day treats, you might be curious about their nutritional content. Here’s a quick look at the estimated values for each cookie:
- Calories: 150
- Fat: 7g
- Protein: 2g
- Carbohydrates: 20g
- Sugar: 10g
- Sodium: 50mg
Keep in mind that these figures are just estimates and can vary based on the specific ingredients you use. For instance, swapping in different brands of chocolate chips or using margarine instead of butter can change the numbers a bit. So, while it’s fun to know what’s in your treats, don’t stress too much about the details—just enjoy every delicious bite!
Why You’ll Love This Recipe
There are so many reasons to adore these Valentine’s Day treats! Not only do they taste amazing, but they also bring joy and creativity into your kitchen. Here’s why you’ll want to make these delightful cookies:
- Quick and Easy: You’ll whip these up in no time! From mixing to baking, you can have fresh cookies in under 30 minutes.
- Fun to Decorate: Let your imagination run wild! Whether you’re using heart-shaped sprinkles or drizzling chocolate, decorating these cookies is a blast.
- Perfect for Sharing: Whether it’s a school event, a family gathering, or a cozy night in, these cookies are great for sharing the love.
- Customizable: Feel free to switch up the chocolate chips, add nuts, or even throw in some dried fruit—make them your own!
- Deliciously Chocolatey: With rich cocoa and melty chocolate chips, each bite is a heavenly chocolate experience that’s hard to resist!
Trust me, these cookies aren’t just treats; they’re a sweet way to spread love and happiness this Valentine’s Day!
Tips for Success
Want to ensure your Valentine’s Day treats turn out perfectly every time? Here are some expert tips to help you bake cookies that are not just good, but truly amazing!
- Don’t Overmix: Once you combine the wet and dry ingredients, mix just until everything is incorporated. Overmixing can lead to tough cookies—yikes! You want that tender texture that melts in your mouth.
- Check Your Oven Temperature: Ovens can vary, so it’s a great idea to use an oven thermometer if you have one. Baking at the right temperature ensures even cooking and helps your cookies rise beautifully.
- Chill the Dough: If you have time, consider chilling your dough for about 30 minutes before baking. This will help the cookies hold their shape and prevent them from spreading too much. Plus, it intensifies the flavors!
- Use Quality Ingredients: The better the ingredients, the better your cookies will taste. Try to use high-quality chocolate chips and real vanilla extract for that extra oomph!
- Give Them Space: When dropping cookie dough onto the baking sheet, make sure to leave enough space between each cookie. They’ll spread out while baking, and you don’t want them to merge into one giant cookie!
- Cool Completely: Allow your cookies to cool on the baking sheet for a few minutes before transferring them to a wire rack. This helps them set properly so they won’t fall apart.
With these tips in your back pocket, you’ll be well on your way to baking the most scrumptious Valentine’s Day treats! Happy baking!
Variations on Valentine’s Day Treats
If you’re feeling adventurous and want to switch things up a bit, there are plenty of fun variations to explore with these Valentine’s Day treats! Here are some ideas that’ll keep the creativity flowing and the love spreading:
- Different Chocolate Chips: Try using white chocolate chips, dark chocolate chips, or even peanut butter chips for a twist! Mixing different kinds can create a delightful flavor explosion in every bite.
- Nuts for Crunch: Add some chopped walnuts, pecans, or almonds to the dough for an extra crunch. They not only enhance the texture but also add a rich, nutty flavor that pairs beautifully with chocolate.
- Flavored Extracts: Swap out the vanilla extract for almond or hazelnut extract. Just a teaspoon can give your cookies a unique flavor profile that’s sure to surprise your taste buds!
- Dried Fruits: Toss in some dried cranberries or cherries for a touch of tartness. They add a lovely pop of color and a chewy texture that contrasts nicely with the chocolate.
- Heart-Shaped Cookies: Use a cookie cutter to shape the dough into hearts before baking. This adds a cute, festive touch perfect for Valentine’s Day celebrations!
- Sandwich Cookies: Make these cookies a bit more indulgent by sandwiching a layer of frosting or whipped cream cheese between two cookies. Add sprinkles on the outside for a truly festive treat!
These variations are not just about changing the flavor; they’re about making the baking experience more exciting and personal! So feel free to experiment and let your imagination run wild in the kitchen. Happy baking!
Storage Instructions
Once you’ve baked up a batch of these scrumptious Valentine’s Day treats, you’ll want to make sure they stay fresh and delicious for as long as possible! Here’s how to store your cookies properly:
First, let the cookies cool completely on a wire rack. This step is essential because if you store them while they’re still warm, you’ll end up with a soggy mess—yikes! Once they’re cool, transfer them to an airtight container. I love using a container that seals tightly to keep air out and moisture in, ensuring they stay soft and chewy for days.
If you’re planning to keep the cookies for more than a few days, consider layering them with parchment paper to prevent sticking. This way, they won’t end up as one big cookie blob! They’ll stay fresh at room temperature for about a week, but trust me, they probably won’t last that long!
If you find yourself with leftover cookies that you want to enjoy later, you can also freeze them. Just place them in a freezer-safe container or a resealable plastic bag, separating layers with parchment paper. When you’re ready to indulge, simply take out the desired amount and let them thaw at room temperature for a few hours, or pop them in the microwave for about 10-15 seconds for a warm treat. Enjoy your delicious Valentine’s Day cookies whenever the craving strikes!
Print
Valentine’s Day Treats: 7 Irresistible Ideas to Spread Love
- Total Time: 32 minutes
- Yield: 24 cookies 1x
- Diet: Vegetarian
Description
Delicious and fun treats for Valentine’s Day.
Ingredients
- 1 cup sugar
- 1/2 cup butter
- 2 cups all-purpose flour
- 1/2 cup cocoa powder
- 1 teaspoon baking powder
- 1/2 teaspoon salt
- 2 eggs
- 1 teaspoon vanilla extract
- 1 cup chocolate chips
- Sprinkles for decoration
Instructions
- Preheat your oven to 350°F (175°C).
- Cream together sugar and butter until fluffy.
- Beat in eggs and vanilla.
- In a separate bowl, mix flour, cocoa, baking powder, and salt.
- Gradually add dry ingredients to the wet mixture.
- Stir in chocolate chips.
- Drop spoonfuls of dough onto a baking sheet.
- Bake for 10-12 minutes.
- Let cool and decorate with sprinkles.
Notes
- Store in an airtight container.
- Can substitute butter with margarine.
- Add nuts for extra crunch.
- Prep Time: 20 minutes
- Cook Time: 12 minutes
- Category: Dessert
- Method: Baking
- Cuisine: American
Nutrition
- Serving Size: 1 cookie
- Calories: 150
- Sugar: 10g
- Sodium: 50mg
- Fat: 7g
- Saturated Fat: 4g
- Unsaturated Fat: 2g
- Trans Fat: 0g
- Carbohydrates: 20g
- Fiber: 1g
- Protein: 2g
- Cholesterol: 20mg
Keywords: Valentine’s day treats, cookies, dessert