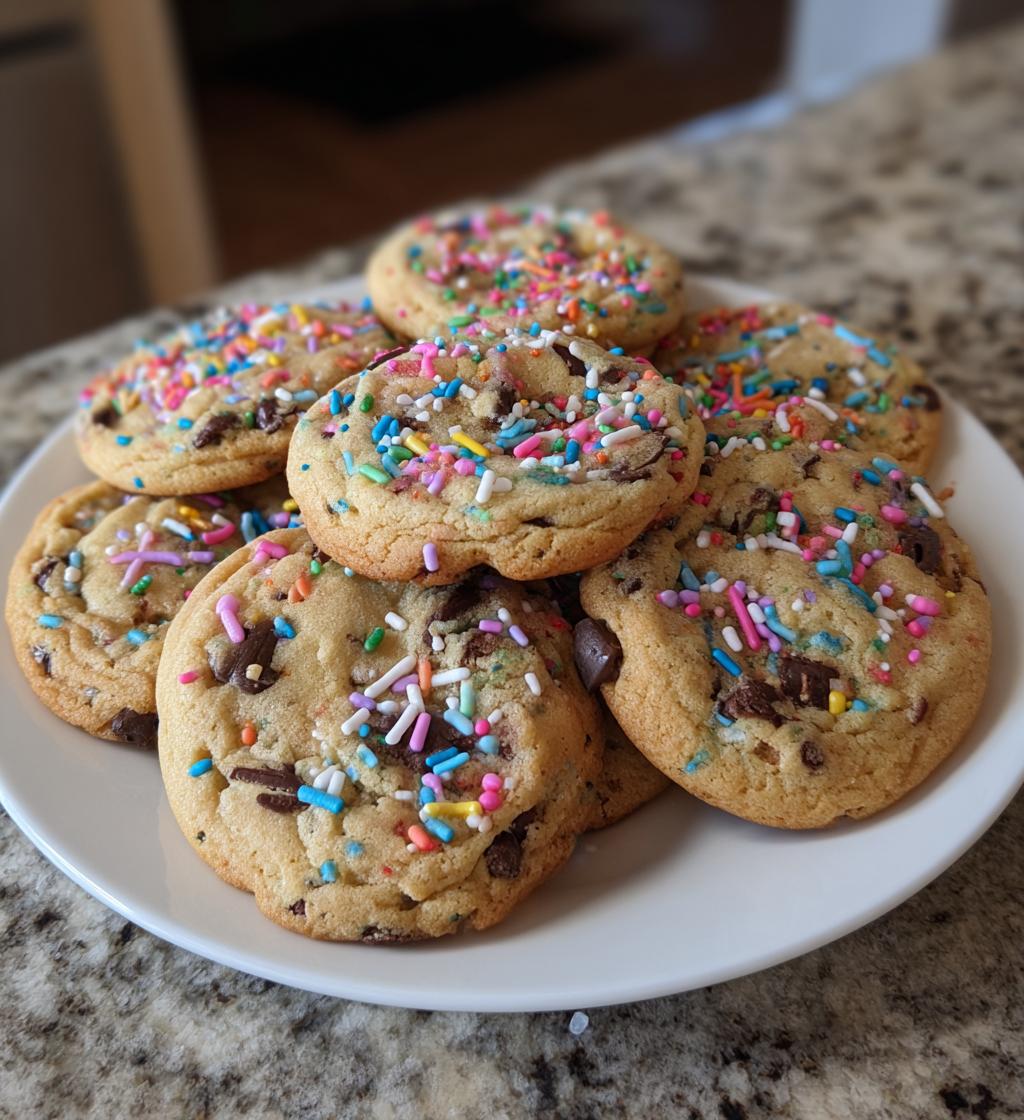
There’s something truly magical about making sweets for Valentine’s Day. The air fills with warmth and love as you whip up delicious treats that are sure to bring smiles to those you adore. My favorite part of this journey is how simple and quick this recipe is—it transforms basic ingredients into delightful cookies that taste as wonderful as they look! These valentines sweets treats are not just any ordinary cookies; they’re packed with rich flavors from semi-sweet chocolate chips and colorful sprinkles that make them irresistibly festive. Trust me, the joy of sharing these homemade goodies with your loved ones is unmatched! Whether you’re baking for a special someone, hosting a gathering, or just indulging yourself, these cookies will surely be a hit. So, roll up your sleeves and let’s create some sweet memories together!
Ingredients List
To whip up these delightful valentines sweets treats, you’ll need a few simple ingredients that come together beautifully. Here’s what you’ll need:
- 1 cup of granulated sugar
- 1/2 cup of unsalted butter, softened
- 2 cups of all-purpose flour
- 1 tsp of pure vanilla extract
- 2 large eggs
- 1/2 cup of semi-sweet chocolate chips
- 1/4 cup of colorful sprinkles
Gather these ingredients, and you’ll be well on your way to creating sweet treats that are perfect for sharing with loved ones!
How to Prepare Instructions
Getting ready to make these valentines sweets treats is as easy as pie! Just follow these simple steps, and you’ll have cookies that are sure to impress. Let’s dive right in!
Preheat the Oven
First things first, preheat your oven to 350°F (175°C). This step is super important because it helps your cookies bake evenly and achieve that perfect golden color. While the oven warms up, you can get all your ingredients ready!
Cream Together Sugar and Butter
Next, grab a mixing bowl and cream together the granulated sugar and unsalted butter. This means you want to mix them until the mixture is light and fluffy, which usually takes about 2-3 minutes. The right texture here is key, as it creates air pockets that make your cookies light and tender. Trust me, you’ll know it’s ready when it looks like fluffy clouds!
Add Eggs and Vanilla Extract
Now it’s time to add in those large eggs and pure vanilla extract. Mix everything together until it’s well combined. This step is essential because the eggs help bind your ingredients together, while the vanilla adds that irresistible flavor we all love. You want to stir just until everything is blended—don’t overdo it!
Gradually Add Flour
Here comes the flour! Gradually add the all-purpose flour into the mixture. I like to do this in about three parts. Mixing gently with a spatula or wooden spoon helps avoid overmixing, which can make your cookies tough. Just combine until you see no more flour streaks—it’s okay if the dough looks a little lumpy!
Fold in Chocolate Chips and Sprinkles
Now for the fun part! Gently fold in the semi-sweet chocolate chips and colorful sprinkles. Use a spatula to carefully combine them into the dough without smashing the chips. This way, every bite will be filled with delicious chocolatey goodness and festive crunch!
Drop Dough onto Baking Sheet
Using a spoon or a cookie scoop, drop spoonfuls of dough onto a baking sheet lined with parchment paper. Make sure to leave some space between each cookie—about 2 inches—so they have room to spread while baking. You want them to be nice and fluffy, not stuck together!
Bake and Cool
Pop those cookies into the oven and bake for about 10-12 minutes, or until they’re lightly golden around the edges. To check for doneness, give the pan a gentle shake; the cookies should look set but still soft in the center. Once they’re done, take them out and let them cool on the baking sheet for a few minutes before transferring them to a wire rack. This cooling time is crucial because it helps them firm up just right—plus, it gives you a moment to enjoy that amazing cookie smell wafting through your kitchen!
Why You’ll Love This Recipe
- Quick to Make: With just 15 minutes of prep time, you’ll have delicious cookies ready in no time!
- Simple Ingredients: You probably already have most of these ingredients in your pantry, making it super convenient.
- Flavorful: The combination of semi-sweet chocolate chips and colorful sprinkles creates a delightful taste that’s hard to resist.
- Perfect for Sharing: These cookies are ideal for parties, gatherings, or just to brighten someone’s day—everyone loves a homemade treat!
- Great for Gifting: Package them up in a cute box or tin, and you’ve got the perfect heartfelt gift for friends or loved ones this Valentine’s Day.
Tips for Success
To ensure your valentines sweets treats turn out perfectly, I’ve gathered some pro tips that will make your baking experience a breeze. Trust me, these little nuggets of wisdom can truly elevate your cookies!
Use Room Temperature Ingredients
Make sure your unsalted butter and eggs are at room temperature before you start. This helps them mix together more easily, creating that lovely fluffy texture in your cookie dough. If you forget to pull them out ahead of time, you can warm the eggs in a bowl of warm water for a few minutes and soften the butter in the microwave for a few seconds (just be careful not to melt it!).
Don’t Skip the Parchment Paper
Using parchment paper on your baking sheet is a game-changer! It prevents the cookies from sticking and makes cleanup a breeze. Plus, it helps them bake evenly—no more burnt bottoms! If you run out of parchment, just grease the pan with a little butter or non-stick spray.
Chill the Dough for Extra Softness
If you have a little extra time, consider chilling the cookie dough for about 30 minutes before baking. This helps the flavors meld and results in thicker, chewier cookies. Just pop it in the fridge while your oven preheats, and you’ll be good to go!
Keep an Eye on Baking Time
Ovens can vary, so keep an eye on your cookies as they bake. Start checking them at the 10-minute mark. You want them to be slightly golden around the edges but still soft in the center. They’ll continue to cook a bit after you take them out, so don’t worry if they look a little underdone!
Experiment with Mix-Ins
While chocolate chips and sprinkles are fantastic, don’t be afraid to get creative! You can swap in white chocolate chips, peanut butter chips, or even add chopped nuts for a delightful crunch. Just remember to keep the proportions consistent so the dough maintains its structure.
Store Properly for Freshness
Once your cookies are baked and cooled, store them in an airtight container at room temperature. This helps them stay soft and fresh for up to a week. If you want to keep them even longer, you can freeze the dough in balls and bake them fresh whenever the craving strikes!
With these tips in your back pocket, you’re all set to create the most delightful valentines sweets treats ever! Happy baking!
Variations
If you’re feeling a bit adventurous, there are so many fun ways to switch up these valentines sweets treats! Here are some delightful variations to consider that will keep the cookie magic alive:
Different Types of Chocolate
Why stick to just semi-sweet chocolate chips? You can mix it up by using white chocolate chips for a sweeter twist, or even dark chocolate chips if you prefer a richer flavor. If you’re really feeling bold, try a combination of all three—talk about a chocolate lover’s dream!
Flavor Extracts
While vanilla extract is a classic, don’t hesitate to explore other flavors! A splash of almond extract can add a lovely nutty depth, or try coconut extract for a tropical vibe. Just be careful with the amounts; a little goes a long way!
Add Some Nuts
If you love a little crunch, consider folding in some chopped nuts like walnuts or pecans. They add a great texture and a nutty flavor that pairs wonderfully with the sweetness of the cookies. Just remember to chop them roughly so you still get those delightful surprises in every bite!
Fruit Zest
For a fresh twist, add some zest from a lemon or orange. Just a teaspoon or two mixed into the dough will brighten up the flavors and give a lovely citrusy aroma. It’s a fantastic way to celebrate the season!
Make It Festive with Seasonal Sprinkles
While colorful sprinkles are already a fun addition, you can change them up for different occasions. Think red and pink sprinkles for Valentine’s Day, or even pastel colors for springtime. You could even use themed sprinkles to match the holidays—how fun is that?
With these variations at your disposal, you can personalize your valentines sweets treats to fit any taste or occasion! Let your creativity flow and enjoy the process of making these cookies uniquely yours!
Storage & Reheating Instructions
Once you’ve baked these delightful valentines sweets treats, you’ll want to make sure they stay fresh and scrumptious for as long as possible. The good news is that storing them is super easy!
To keep your cookies at their best, place them in an airtight container at room temperature. This will help retain their moisture and keep them soft for up to a week. If you’re like me and can’t resist cookies, they probably won’t last that long anyway!
If you find yourself with leftovers (lucky you!), you can also freeze the cookies. Just make sure they’re completely cool, then layer them in a freezer-safe bag or container, separating layers with parchment paper to prevent sticking. They can be frozen for up to three months. When you’re ready to enjoy them, simply let them thaw at room temperature for a bit, and they’ll taste just as fresh as the day you baked them!
Now, if you crave a warm cookie, reheating is a breeze! Preheat your oven to 350°F (175°C) and place the cookies on a baking sheet. Warm them up for about 5-7 minutes, or until they’re heated through. You can also pop them in the microwave for about 10-15 seconds, but be careful not to overdo it—nobody likes a rubbery cookie!
With these simple storage and reheating tips, you can enjoy your valentines sweets treats anytime you want, whether freshly baked or warmed up! Happy snacking!
Nutritional Information Section
When it comes to enjoying these valentines sweets treats, it’s always good to know what you’re indulging in! Here’s the estimated nutritional breakdown for one cookie:
- Calories: 120
- Total Fat: 5g
- Saturated Fat: 3g
- Unsaturated Fat: 1g
- Trans Fat: 0g
- Cholesterol: 20mg
- Sodium: 50mg
- Total Carbohydrates: 18g
- Fiber: 1g
- Sugar: 10g
- Protein: 2g
Keep in mind that these values are estimates and can vary based on the specific brands of ingredients you use. But don’t let the numbers stop you from enjoying these delightful cookies—after all, they’re made with love!
FAQ Section
Got questions about these delightful valentines sweets treats? Don’t worry, I’ve got you covered! Here are some common queries and their answers that might help you along the way:
Can I use different kinds of chocolate?
Absolutely! You can swap out the semi-sweet chocolate chips for white chocolate, dark chocolate, or even a mix of all three. Each type will bring its own unique flavor to the cookies, so feel free to experiment and find your favorite!
How do I make these gluten-free?
If you want to make these cookies gluten-free, you can substitute the all-purpose flour with a good gluten-free flour blend. Just make sure it contains xanthan gum, which helps with the texture. You might need to adjust the baking time slightly, so keep an eye on them as they bake!
What can I use instead of butter?
If you’re looking for a dairy-free option, you can replace the unsalted butter with coconut oil or a plant-based butter substitute. Just make sure it’s softened for the best mixing results. Your cookies will still turn out delicious!
How long do these treats last?
Once baked, these cookies can stay fresh in an airtight container at room temperature for up to a week. If you want to keep them for a longer period, consider freezing them. They can last up to three months in the freezer, so you’ll always have a sweet treat on hand!
If you have any other questions, feel free to reach out! Happy baking and enjoy those sweet moments!
Print
valentines sweets treats: 7 Magical Ways to Spread Love
- Total Time: 27 minutes
- Yield: 24 cookies 1x
- Diet: Vegetarian
Description
Delicious sweets for Valentine’s Day.
Ingredients
- 1 cup of sugar
- 1/2 cup of butter
- 2 cups of flour
- 1 tsp of vanilla extract
- 2 eggs
- 1/2 cup of chocolate chips
- 1/4 cup of sprinkles
Instructions
- Preheat the oven to 350°F (175°C).
- Cream together the sugar and butter.
- Add eggs and vanilla extract, mix well.
- Gradually add flour and combine.
- Fold in chocolate chips and sprinkles.
- Drop spoonfuls of dough onto a baking sheet.
- Bake for 10-12 minutes until golden.
- Let cool before serving.
Notes
- Store in an airtight container.
- Can substitute chocolate chips with nuts.
- Prep Time: 15 minutes
- Cook Time: 12 minutes
- Category: Dessert
- Method: Baking
- Cuisine: American
Nutrition
- Serving Size: 1 cookie
- Calories: 120
- Sugar: 10g
- Sodium: 50mg
- Fat: 5g
- Saturated Fat: 3g
- Unsaturated Fat: 1g
- Trans Fat: 0g
- Carbohydrates: 18g
- Fiber: 1g
- Protein: 2g
- Cholesterol: 20mg
Keywords: valentines sweets treats