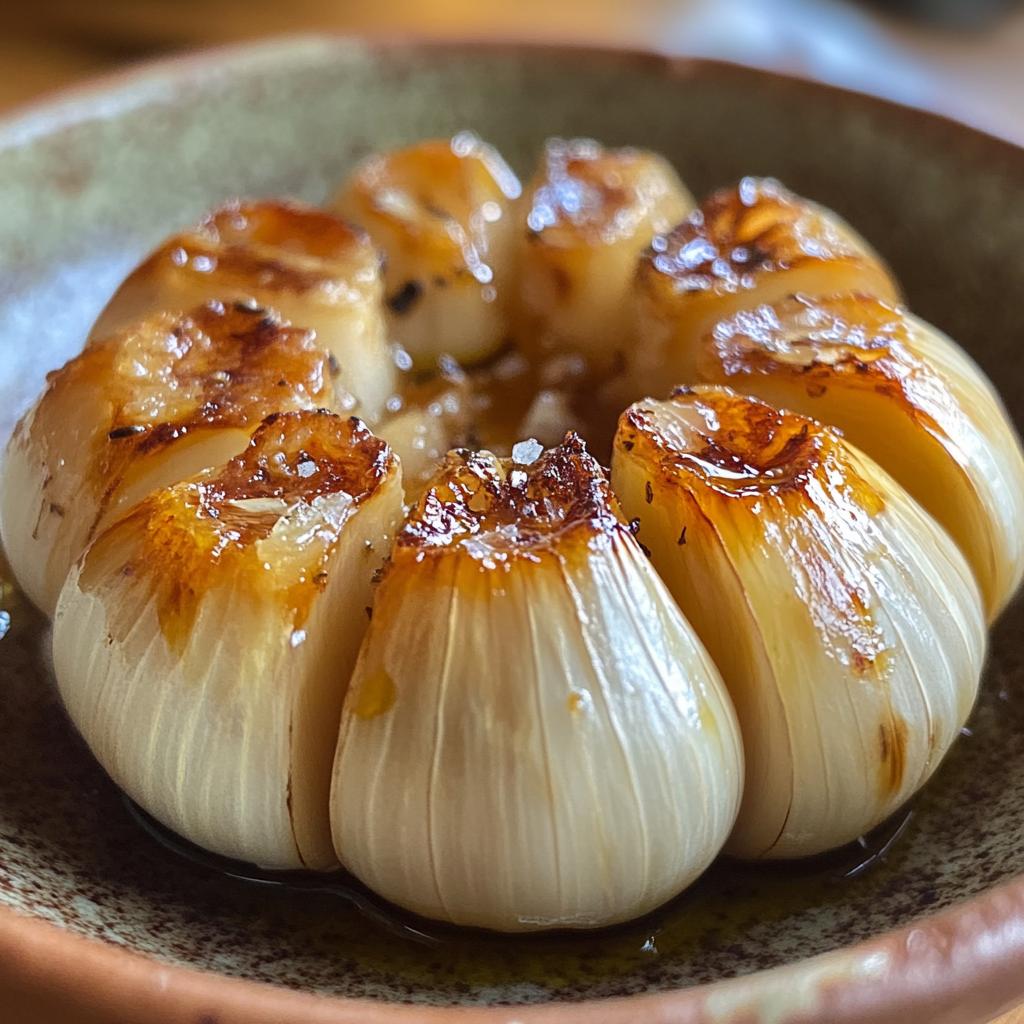
Oh, let me tell you about the magic of roasted garlic! If you’ve ever wondered how to roast garlic in the oven, you’re in for a treat. Roasting garlic transforms those pungent little cloves into something truly special. The heat mellows out their sharpness, turning them into creamy, caramelized nuggets of flavor that can elevate any dish. Imagine spreading this luscious goodness on warm bread or mixing it into your favorite pasta sauce—yum!
Not only does roasted garlic add depth and richness to your meals, but it’s also packed with health benefits. It’s loaded with antioxidants and can support your immune system. Plus, it’s incredibly easy to make, requiring just a head of garlic, some olive oil, and a sprinkle of salt. You’ll be amazed at how such simple ingredients can create a flavor explosion! So, let’s dive into the wonderful world of roasting garlic and unlock that incredible taste that will leave your taste buds dancing.
Ingredients List
To create the most delicious roasted garlic, you’ll need just a few simple ingredients. Here’s what you’ll gather:
- 1 head of garlic: Choose a firm, unblemished bulb. The fresher, the better! Each head contains multiple cloves that will transform into sweet, spreadable goodness.
- 1 tablespoon olive oil: This adds a rich flavor and helps in the roasting process. Extra virgin olive oil is my go-to for its robust taste, but any good quality olive oil will work well.
- Salt to taste: A sprinkle of salt enhances the natural flavors of the garlic. You can use sea salt or kosher salt—whatever you have on hand works perfectly!
That’s all you need to embark on this flavorful journey! Trust me, once you have these ingredients prepped, you’re well on your way to making something magical.
How to Roast Garlic in the Oven
Roasting garlic is a simple yet transformative process that brings out the best in this humble ingredient. Here’s a step-by-step guide to help you navigate through the roasting adventure, ensuring you achieve that sweet, mellow flavor we all love. Let’s get started!
Preheat the Oven
First things first, you’ll want to preheat your oven to 400°F (200°C). This step is crucial because a hot oven ensures even cooking and caramelization of the garlic. Trust me, you don’t want to skip this part! Preheating also helps to lock in those delicious flavors, making sure your garlic turns out perfectly roasted.
Prepare the Garlic
Now, let’s get our garlic ready! Start by removing the outer layers of the garlic bulb. You just want to peel away the papery skin, but don’t separate the cloves yet. Once that’s done, grab a sharp knife and slice the top off the garlic head, about a quarter of an inch down. This exposes the cloves, which will become sweet and spreadable when roasted. Make sure to use a steady hand; you want to keep the bulb intact. That’s where all the magic happens!
Season the Garlic
Next up, it’s time to season! Drizzle about 1 tablespoon of olive oil over the exposed cloves. This not only adds flavor but also helps the garlic roast evenly. Don’t be shy with the oil! Then, sprinkle a pinch of salt over the top. This little addition enhances the natural sweetness of the garlic and ties everything together. Just a light sprinkle will do; you can always adjust the saltiness later in your dish.
Wrap and Bake
Now, it’s wrapping time! Take a piece of aluminum foil and place the garlic head in the center. Wrap it up tightly, creating a little pouch to keep all those flavorful juices inside. Pop the wrapped garlic into the preheated oven and let it bake for about 30-35 minutes. You’ll know it’s done when the cloves are soft and golden brown. If you’re unsure, give it a gentle squeeze through the foil—if it feels mushy, it’s ready! Just be careful, it’s hot!
Cool and Serve
Once your garlic is out of the oven, let it cool for a few minutes before handling. When it’s cool enough to touch, gently squeeze the bottom of the bulb, and the roasted cloves will pop right out! You can use them immediately in your favorite recipes or spread them on warm bread. The sweet, caramelized flavor will take your dishes to a whole new level!
Tips for Success
To ensure your roasted garlic turns out perfectly every time, here are some of my favorite tips! First, always use fresh garlic. Older bulbs might have dried out cloves that won’t roast well, so it’s worth checking for firmness and tightness before buying. Trust me, the fresher, the better!
When it comes to seasoning, feel free to experiment! Adding herbs like thyme or rosemary along with the olive oil can create a delightful flavor twist. You can also try a splash of balsamic vinegar for a bit of tanginess—yum!
Now, let’s talk storage. If you have leftovers (though I doubt it!), you can store roasted garlic in an airtight container in the fridge for up to a week. Just remember, the flavors can intensify, so a little goes a long way when using it in dishes. You can also freeze roasted cloves! Just pop them in a freezer bag, and they’ll be ready for your next culinary adventure.
Finally, get creative with how you use your roasted garlic! Mix it into mashed potatoes, swirl it into soups, or use it as a base for dressings and dips. The possibilities are endless, and every bite is a delicious reminder of your roasting triumph!
Why You’ll Love This Recipe
- Health Benefits: Roasted garlic is not just delicious; it’s packed with antioxidants and may boost your immune system. It’s a healthy addition to many dishes!
- Versatile Ingredient: You can easily incorporate roasted garlic into various recipes—think pasta, soups, dips, or even as a flavorful spread on bread. It adds depth to almost anything!
- Easy to Prepare: With just a head of garlic, olive oil, and salt, this recipe is simple to follow. Plus, it takes minimal hands-on time, allowing you to focus on other dishes.
- Flavor Explosion: The sweet, caramelized flavor of roasted garlic elevates your cooking, making ordinary meals extraordinary with just a squeeze!
Once you try this, trust me, you’ll find yourself roasting garlic all the time! It’s a game-changer in the kitchen.
Nutritional Information
When it comes to roasted garlic, you’re looking at a nutritious addition to your meals! Each serving size is about one clove, which contains approximately:
- Calories: 4
- Sugar: 0g
- Sodium: 1mg
- Fat: 0g
- Carbohydrates: 1g
- Fiber: 0g
- Protein: 0g
- Cholesterol: 0mg
Keep in mind that these values are estimates and can vary based on the size of your garlic cloves and how much oil you use. Regardless, roasted garlic is a flavorful, low-calorie way to add depth and health benefits to your dishes!
FAQ Section
Got questions about how to roast garlic in the oven? Don’t worry, I’ve got you covered! Here are some common queries along with my favorite answers:
Can I roast garlic without foil?
Absolutely! While wrapping garlic in foil helps keep the moisture in, you can also place it in a small baking dish and cover it with a lid or another baking sheet. Just keep an eye on it, as it may need a bit more time to achieve that perfect softness.
How long does roasted garlic last?
Roasted garlic can last up to a week in the fridge when stored in an airtight container. If you want to keep it longer, consider freezing the cloves! Just pop them into a freezer bag, and they’ll be ready for your next culinary creation.
What dishes can I use roasted garlic in?
Oh, the possibilities are endless! You can mix roasted garlic into mashed potatoes, spread it on warm bread, or incorporate it into sauces and dressings. It adds a wonderful depth to soups and stews, too. Trust me, it’s a game-changer!
Can I use this method for other types of garlic?
Definitely! You can use the same roasting technique for garlic varieties like elephant garlic, which has a milder flavor. Just keep an eye on the cooking time, as larger bulbs may need a bit longer to soften.
Is roasted garlic healthier than raw garlic?
Both roasted and raw garlic have their health benefits, but roasting does mellow the flavor and makes it easier on the stomach for some people. Plus, the antioxidants in roasted garlic remain intact, so you’re still getting those health perks!
Serving Suggestions
Roasted garlic is such a versatile ingredient, and there are countless ways to incorporate it into your meals! One of my favorite ways to enjoy it is by spreading those sweet, caramelized cloves on warm, crusty bread or toasted baguette slices. It makes for an incredible appetizer that’s sure to impress!
Another fantastic option is to whisk roasted garlic into creamy mashed potatoes for a flavor twist that elevates the classic side dish. You can also mix it into homemade salad dressings or dips, adding a rich depth that your guests will rave about.
If you’re making pasta, try tossing roasted garlic with olive oil, sautéed veggies, and your favorite noodles for a quick, flavorful meal. You can even stir it into soups and stews to enhance their taste. Trust me, once you start using roasted garlic, you’ll find it popping up in all your favorite recipes!
Print
How to Roast Garlic in the Oven: 5 Easy Steps to Perfection
- Total Time: 45 minutes
- Yield: 1 head of roasted garlic 1x
- Diet: Vegetarian
Description
Learn how to roast garlic in the oven for a rich, mellow flavor.
Ingredients
- 1 head of garlic
- 1 tablespoon olive oil
- Salt to taste
Instructions
- Preheat your oven to 400°F (200°C).
- Remove the outer layers of the garlic bulb.
- Slice the top off the garlic head to expose the cloves.
- Drizzle olive oil over the exposed cloves.
- Sprinkle with salt.
- Wrap the garlic in aluminum foil.
- Bake for 30-35 minutes or until soft.
- Let it cool before squeezing out the garlic.
Notes
- Store leftover roasted garlic in the fridge.
- Use roasted garlic in pasta, spreads, or dressings.
- Prep Time: 10 minutes
- Cook Time: 35 minutes
- Category: Condiment
- Method: Oven roasting
- Cuisine: Various
Nutrition
- Serving Size: 1 clove
- Calories: 4
- Sugar: 0g
- Sodium: 1mg
- Fat: 0g
- Saturated Fat: 0g
- Unsaturated Fat: 0g
- Trans Fat: 0g
- Carbohydrates: 1g
- Fiber: 0g
- Protein: 0g
- Cholesterol: 0mg
Keywords: how to roast garlic in the oven